How to Deploy Into Nexcess Using DeployBot in 4 Easy Steps
As a developer, there's nothing more frustrating than deployments gone wrong. You've poured your heart and soul into coding the perfect new features or updates, only to have the deployment process become a nightmare of missed steps, failed transfers, and configuration conflicts.
Manually deploying code changes is like playing a high-stakes game of Operation - one wrong move and everything could come crashing down. Database syncs fail, critical files are overwritten, and your whole application is on life support before you even know it.
This stress and mishaps are enough to make you never want to push to production again. But powering through manual deployments is just asking for premature gray hairs and a very stressful office environment.
The good news? There is a much saner way to handle deployments, starting with Nexcess hosting and DeployBot automation. This dynamic duo takes the pain and guesswork out of the deployment process from start to finish.
With Nexcess as your rock-solid hosting foundation and DeployBot to automate all the fiddly deployment tasks, you can wave goodbye to tedious file transfers, database headaches, and late nights at the office, untangling deployment snafus. Simply point, click, and let DeployBot seamlessly deliver your code to its Nexcess home.
Unfortunately, people aren't aware of this time-saving tool and its use cases due to a lack of knowledge.
Hence, in this guide today, I'll uncover for you the full integration of deploying into Nexcess using DeployBot and explore the strengths of using DeployBot as a code deployment platform…
Why Choose DeployBot?
DeployBot is an advanced tool that reinforces code deployment by facilitating with following features:
- One-click deployment: This solution ensures the quickest code shipment with a single click.
- Manual and automatic deployment: Both deployments are possible with this tool so that you can use Whichever deployment system is convenient for you.
- Effortless server configuration: DeployBot makes server connection super friendly for its users.
- Code shipment to multiple environments: DeployBot lets you bring code deployment to multiple servers at once.
- Safe deployment: DeployBot prioritizes error free code deployment by safeguarding with quick rollback from faulty releases.
- Release update: You can keep your team updated with release notes regarding code deployment.
- Monitor deployment: It allows you to monitor every deployment in real time and get you always notified via different communication channels.
- Zero downtime: You can enjoy zero downtime code shipment through Atomic deployment.
- Performance tracking: DeployBot lets you track deployment performance and application stability using third-party tools such as Bugsnag and New Relic.
- Manage access: This code deployment software can manage permissions for your team members.
- Manual tracking: DeployBot eliminates the need to manually track changes and uploading files.
Deploying Into Nexcess Using DeployBot in Minutes
After learning about the benefits of using DeployBot as a code deployment solution, it’s time to find out the easy integration process of Nexcess with DeployBot.
So, follow the below quick 4-step tutorial if you're a beginner. Or else, just follow step 4, if you already have a repo and an environment setup on DeployBot.
Let's have a look at the steps below and find easy ways to deploy code using Nexcess:
Step 1: Signup DeployBot.
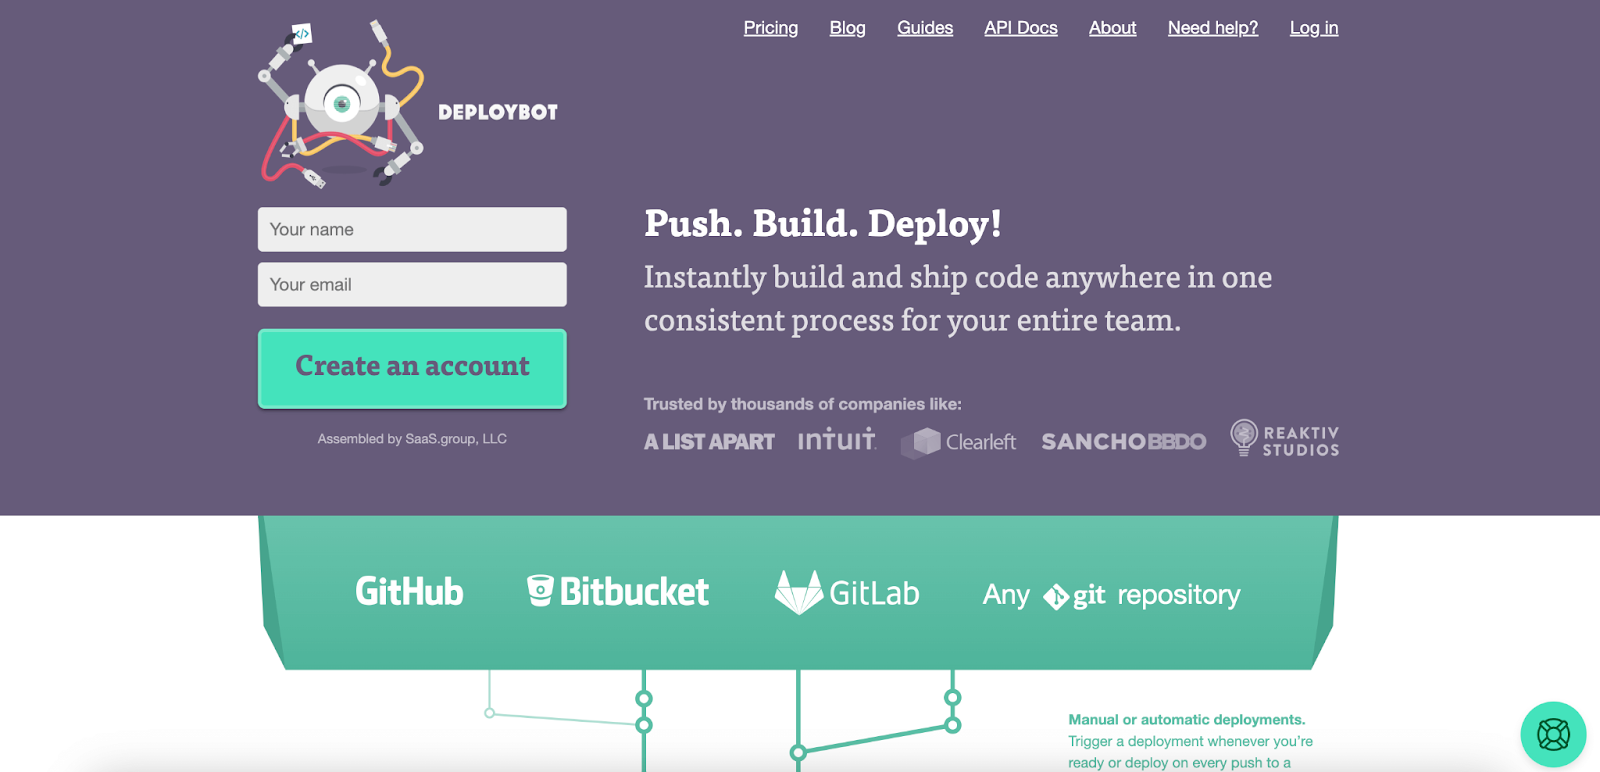
To establish a seamless deployment system, you must first adopt a code deployment tool. As mentioned, I'll use DeployBot as a code deployment platform for this guide to integrate it with Nexcess hosting server. And to get started with this tool, you need to sign up for DeployBot which allows you to connect three repositories and servers in the free version.
So, register DeployBot by filling out the “Your name” & “Your email” fields and hitting the “Create an account” button.
Step 2: Setup repository connection.
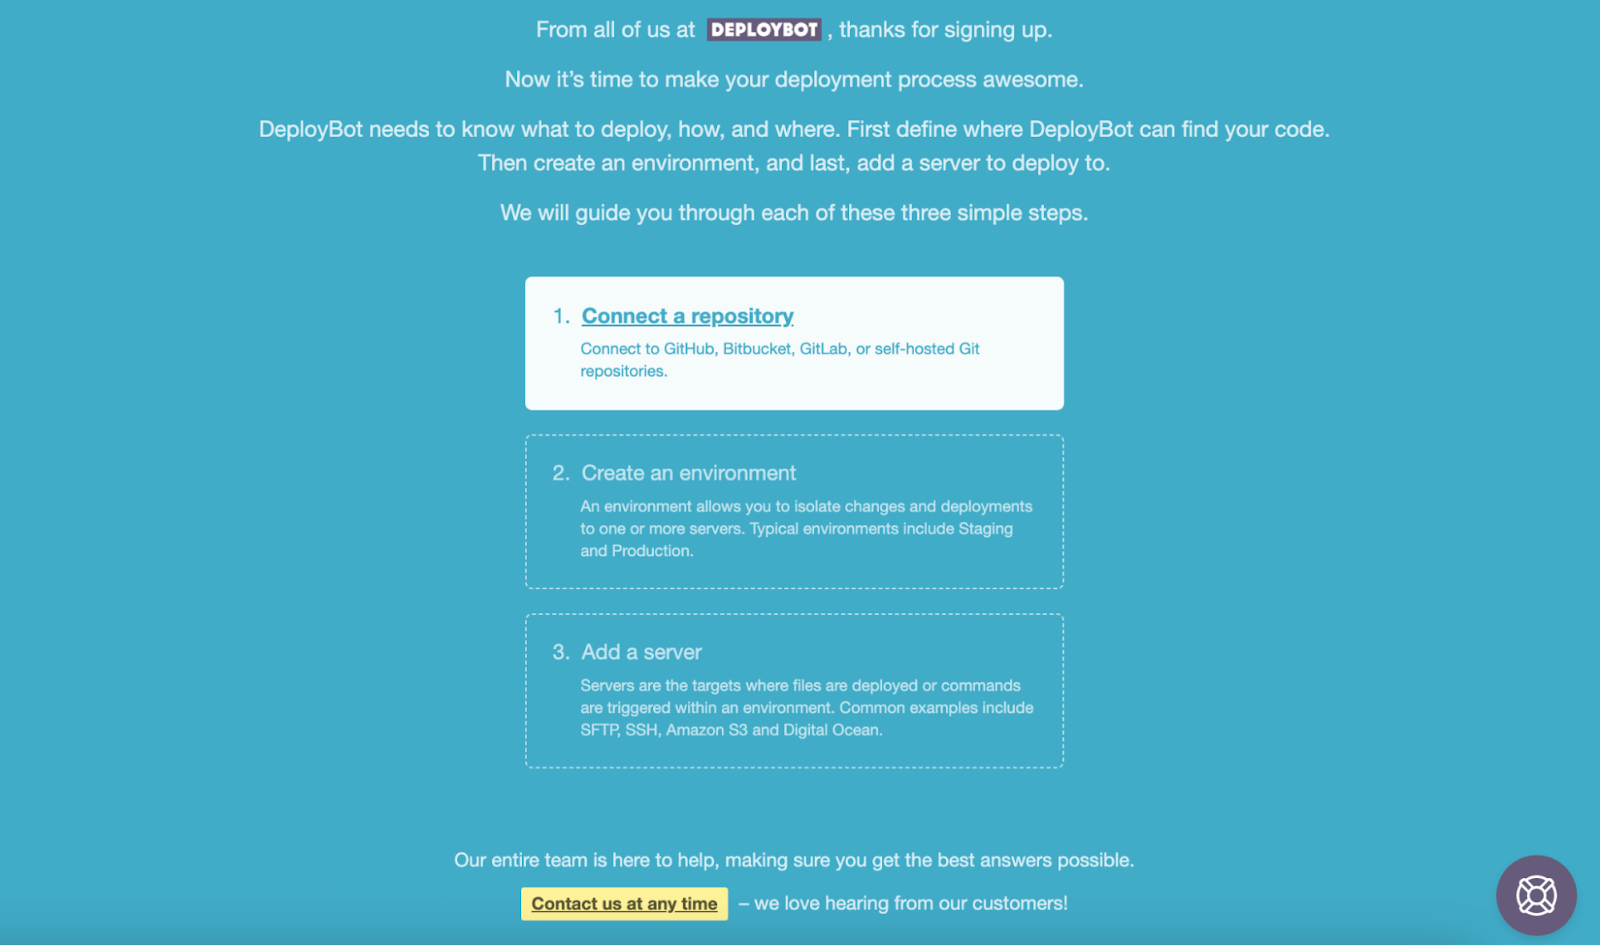
After signing up, you will be required to connect your desired repo with DeployBot by clicking the first option.
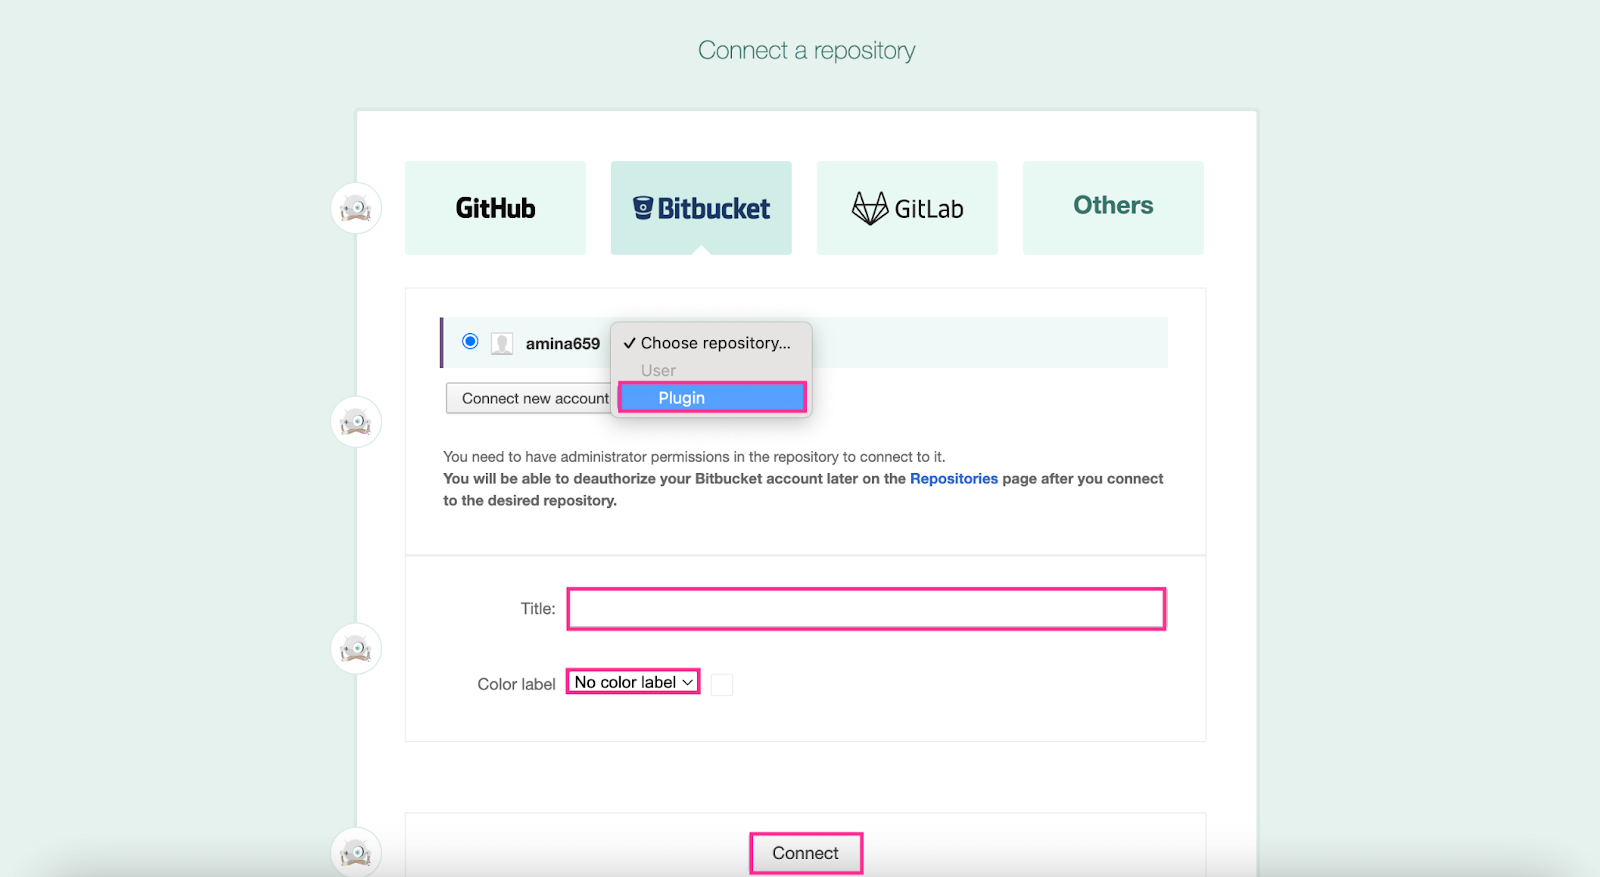
Here, we'll be connecting the “Bitbucket” repository with DeployBot. You can connect any other repo according to your preferences. The process will be the same for all repos.
So, click “Bitbucket” and hit the “Connect” button.

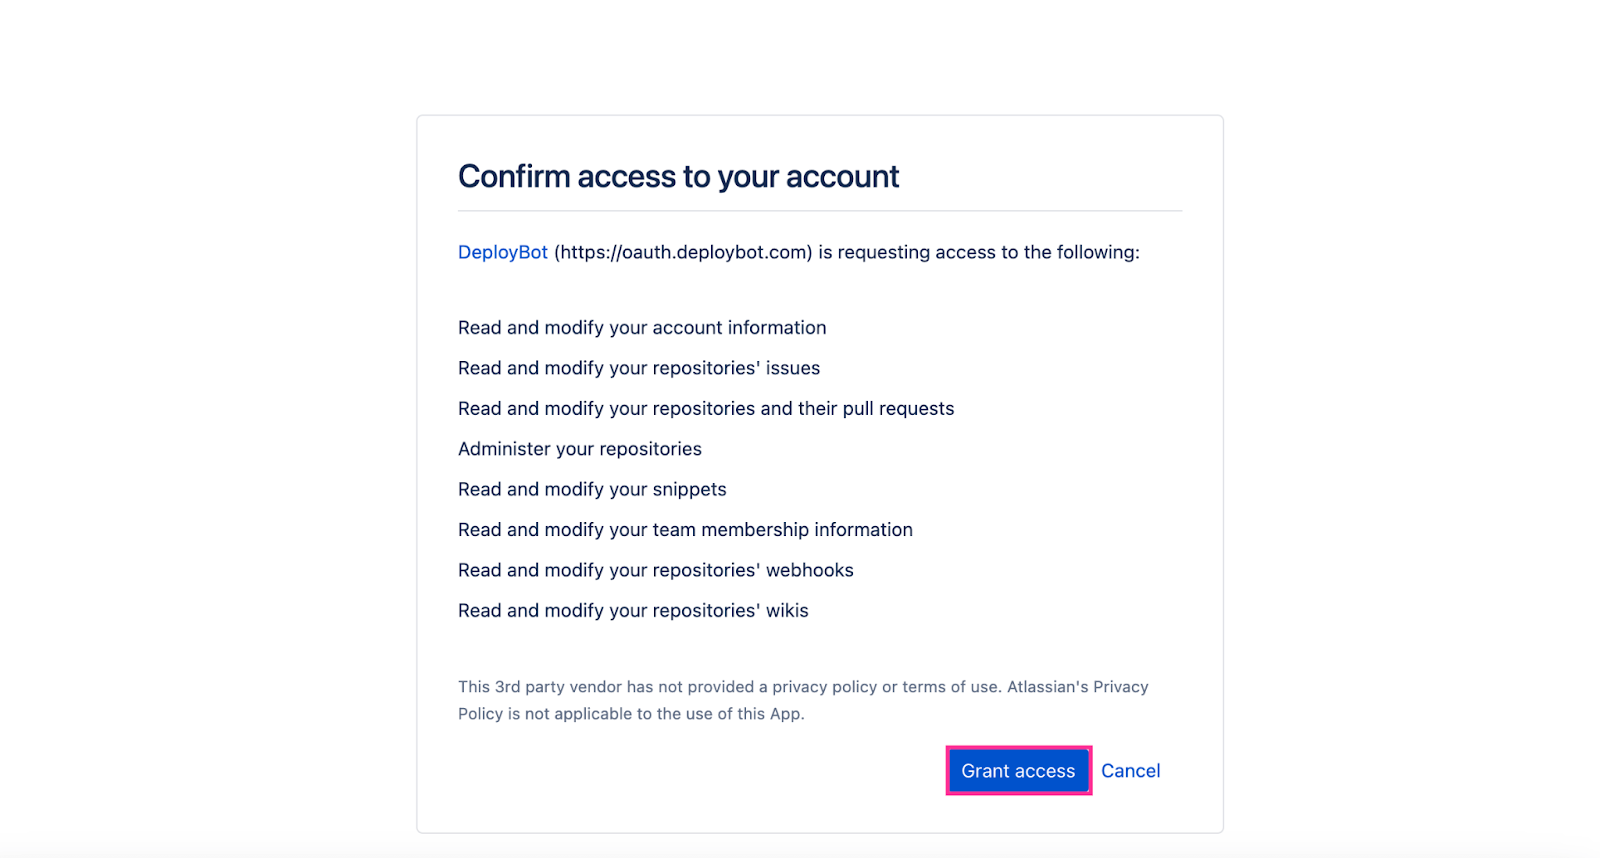
Now, you have to give access to DeployBot to connect with Bitbucket. Hit the “Grant access” button for that.
Then, select a repo from the drop-down menu and adjust the Title and Color label fields. After that, press the “Connect” button.
Step 3: Build an environment for deployment.
In the third step, you need to create a suitable environment for deployment. In case of building an environment, click the “Create an environment” option that will redirect you to another tab.
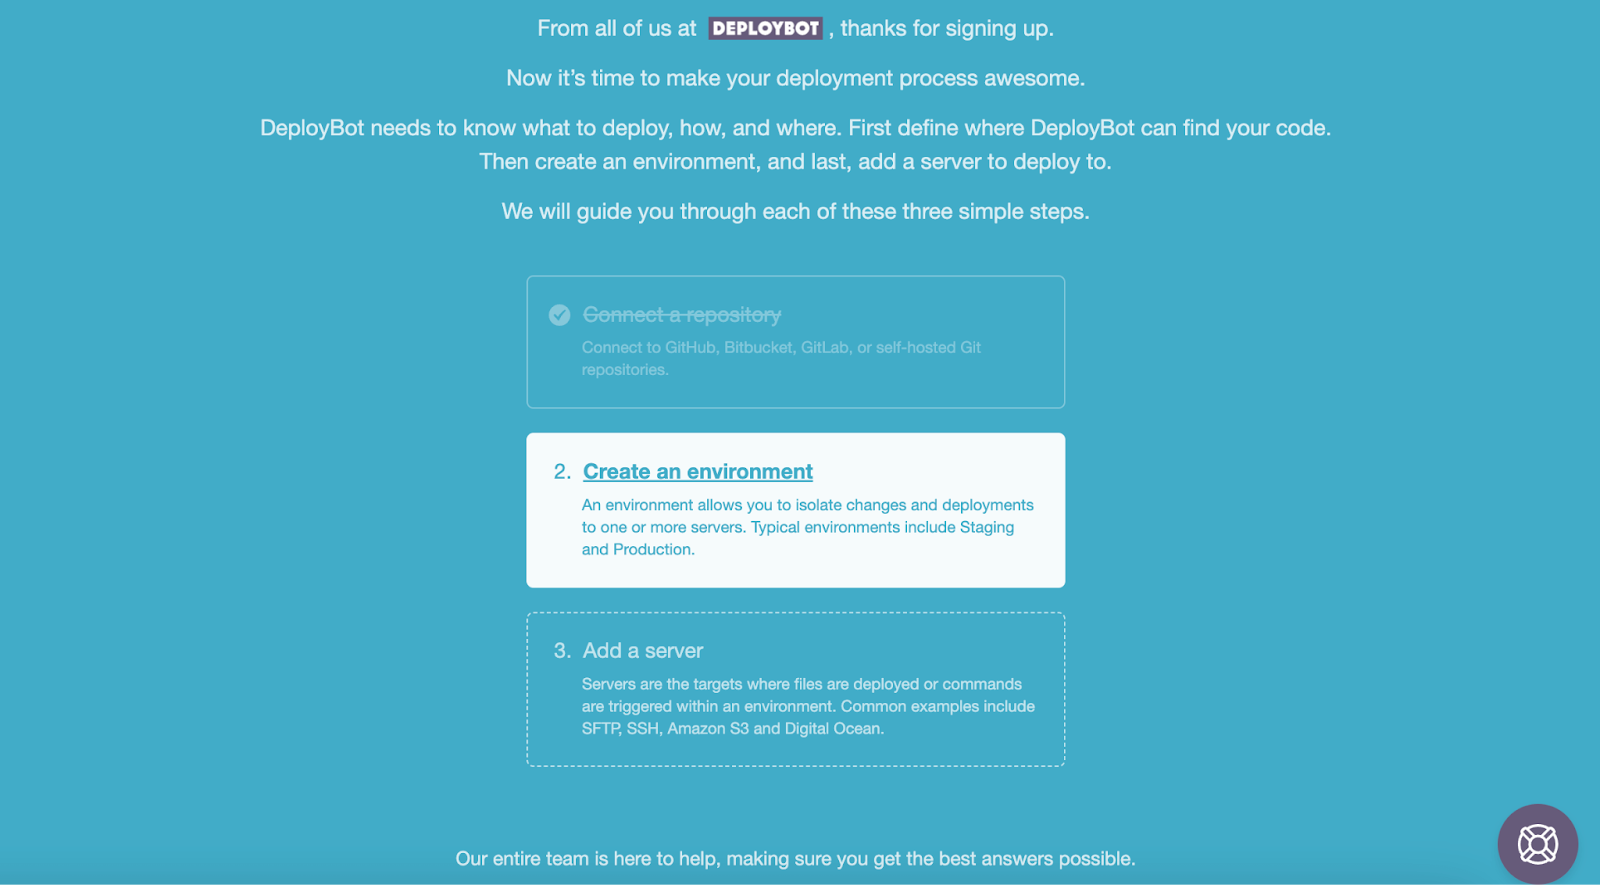
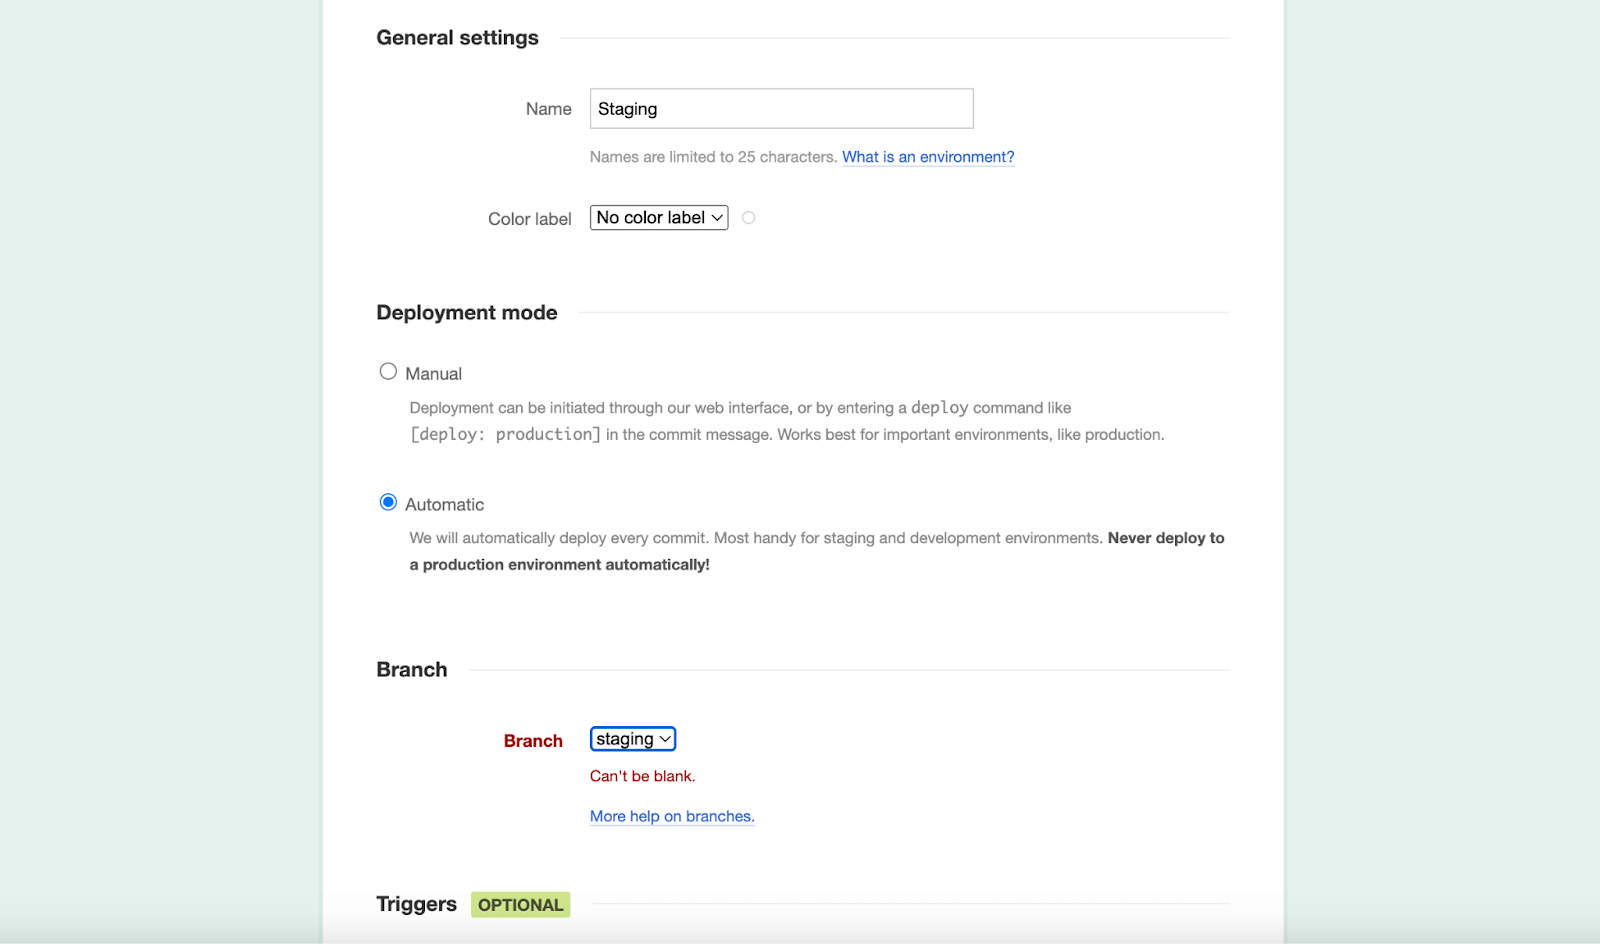
This is a settings tab for environment configuration. To complete General settings, enter the “Name” and select “Color label” for your deployment environment.
In the next stage, you need to select a deployment mode from the following two options:
- Manual Deployment: This is for conducting in-person deployment which is suitable for a production environment.
- Automatic deployment: Automatic deployment should be used where a manual permit for code shipment isn't required, such as in staging and development environments.
After selecting one of these deployment modes, select a Branch. Then, scroll down to press the “Save” button.
Step 4: Add Nexcess to DeployBot.
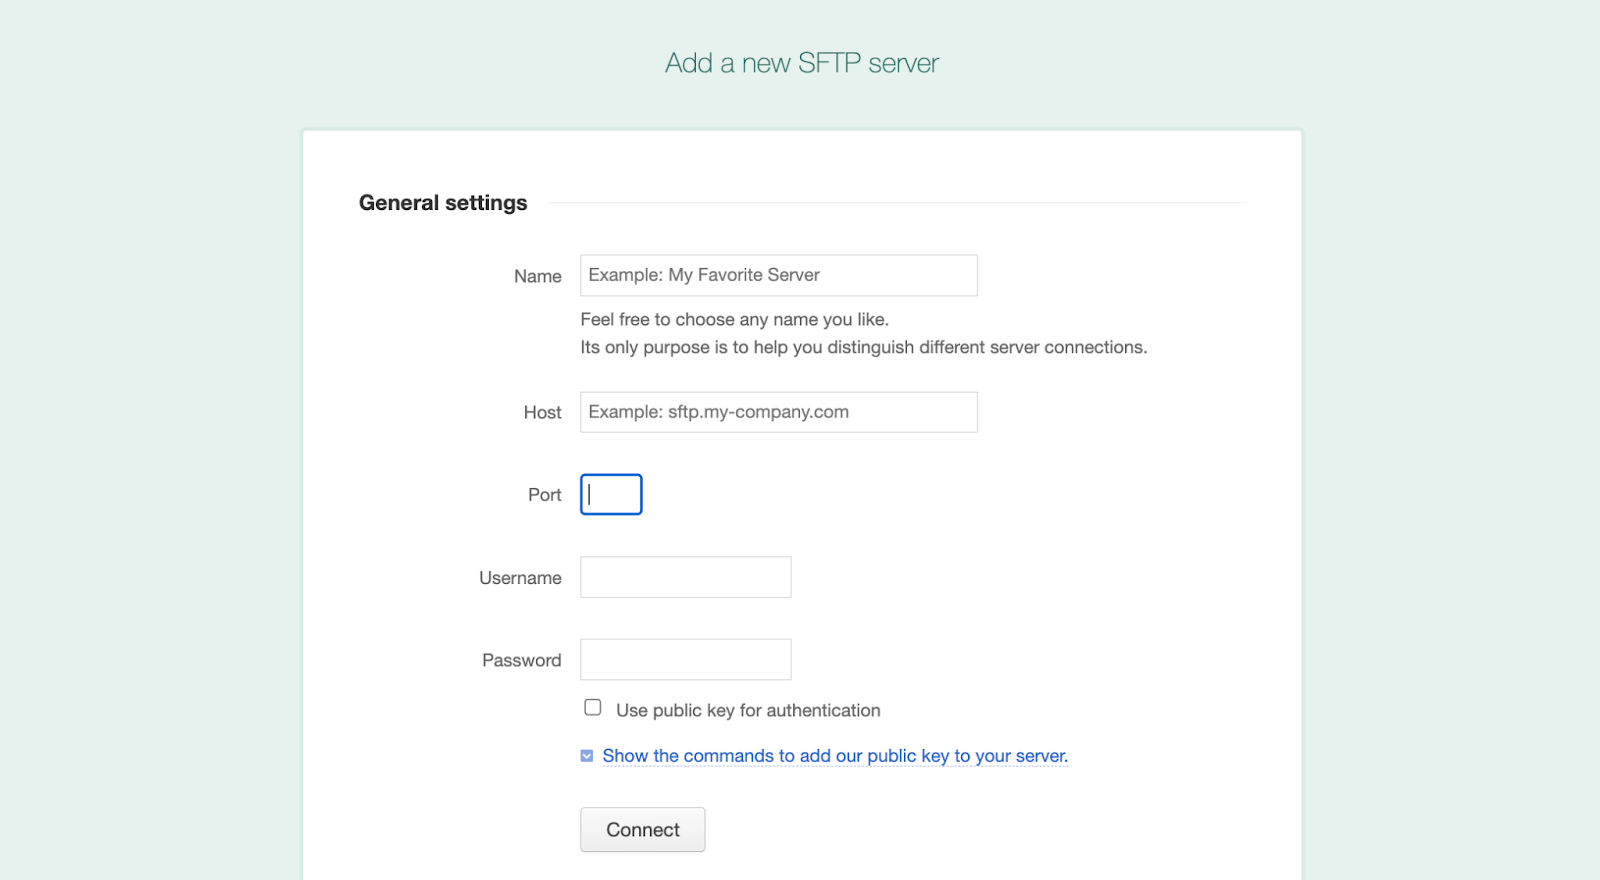
Lastly, you will have to add a server by navigating to Servers & Settings >> Add a server. Then, click SFTP, which will take you to another tab where you need to insert information to complete the server connection.
You will find all the necessary information for server connection, such as Host, Port, Username, and Password, from your Nexcess hosting account by navigating to the Access tab.
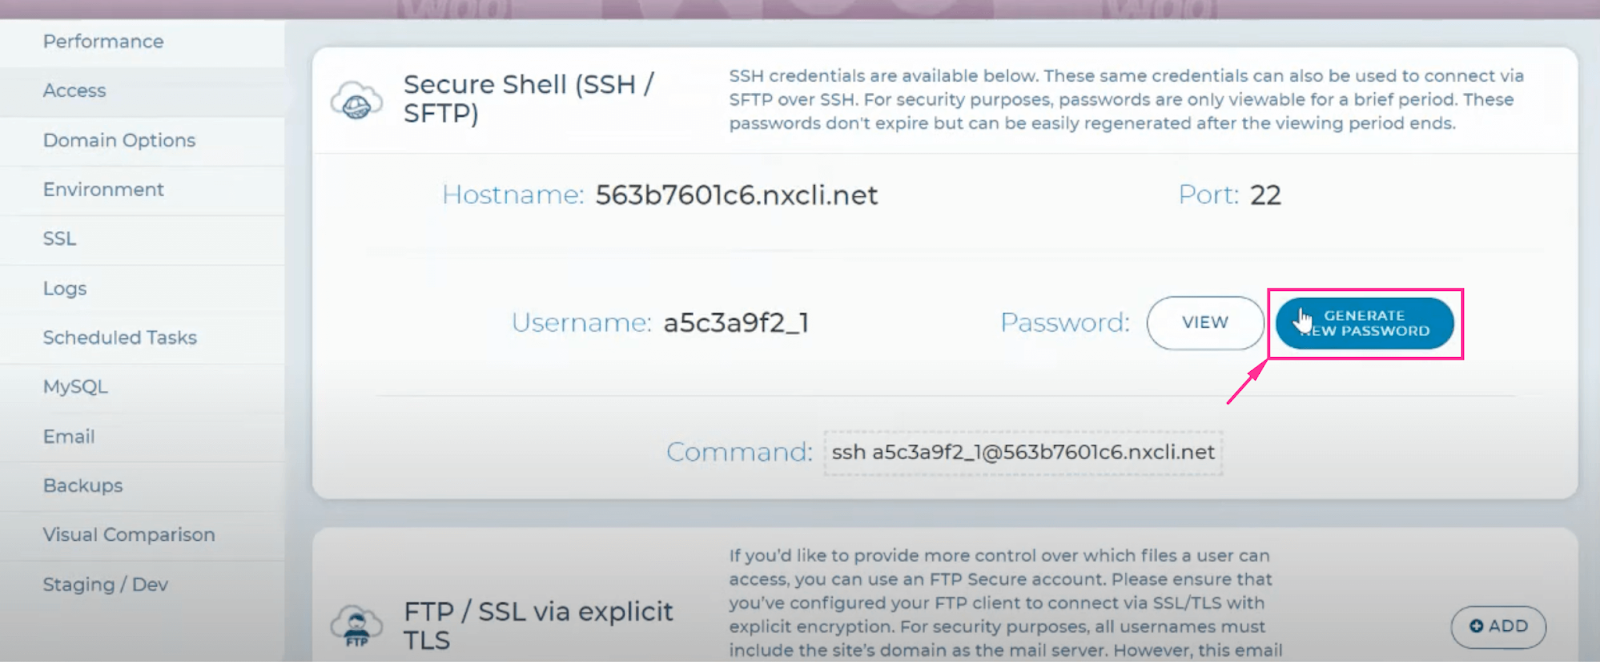
Copy those credentials and paste them on the respective fields of the General settings. Also, fill the name field with Nexcess. After that, hit the “Connect” button.
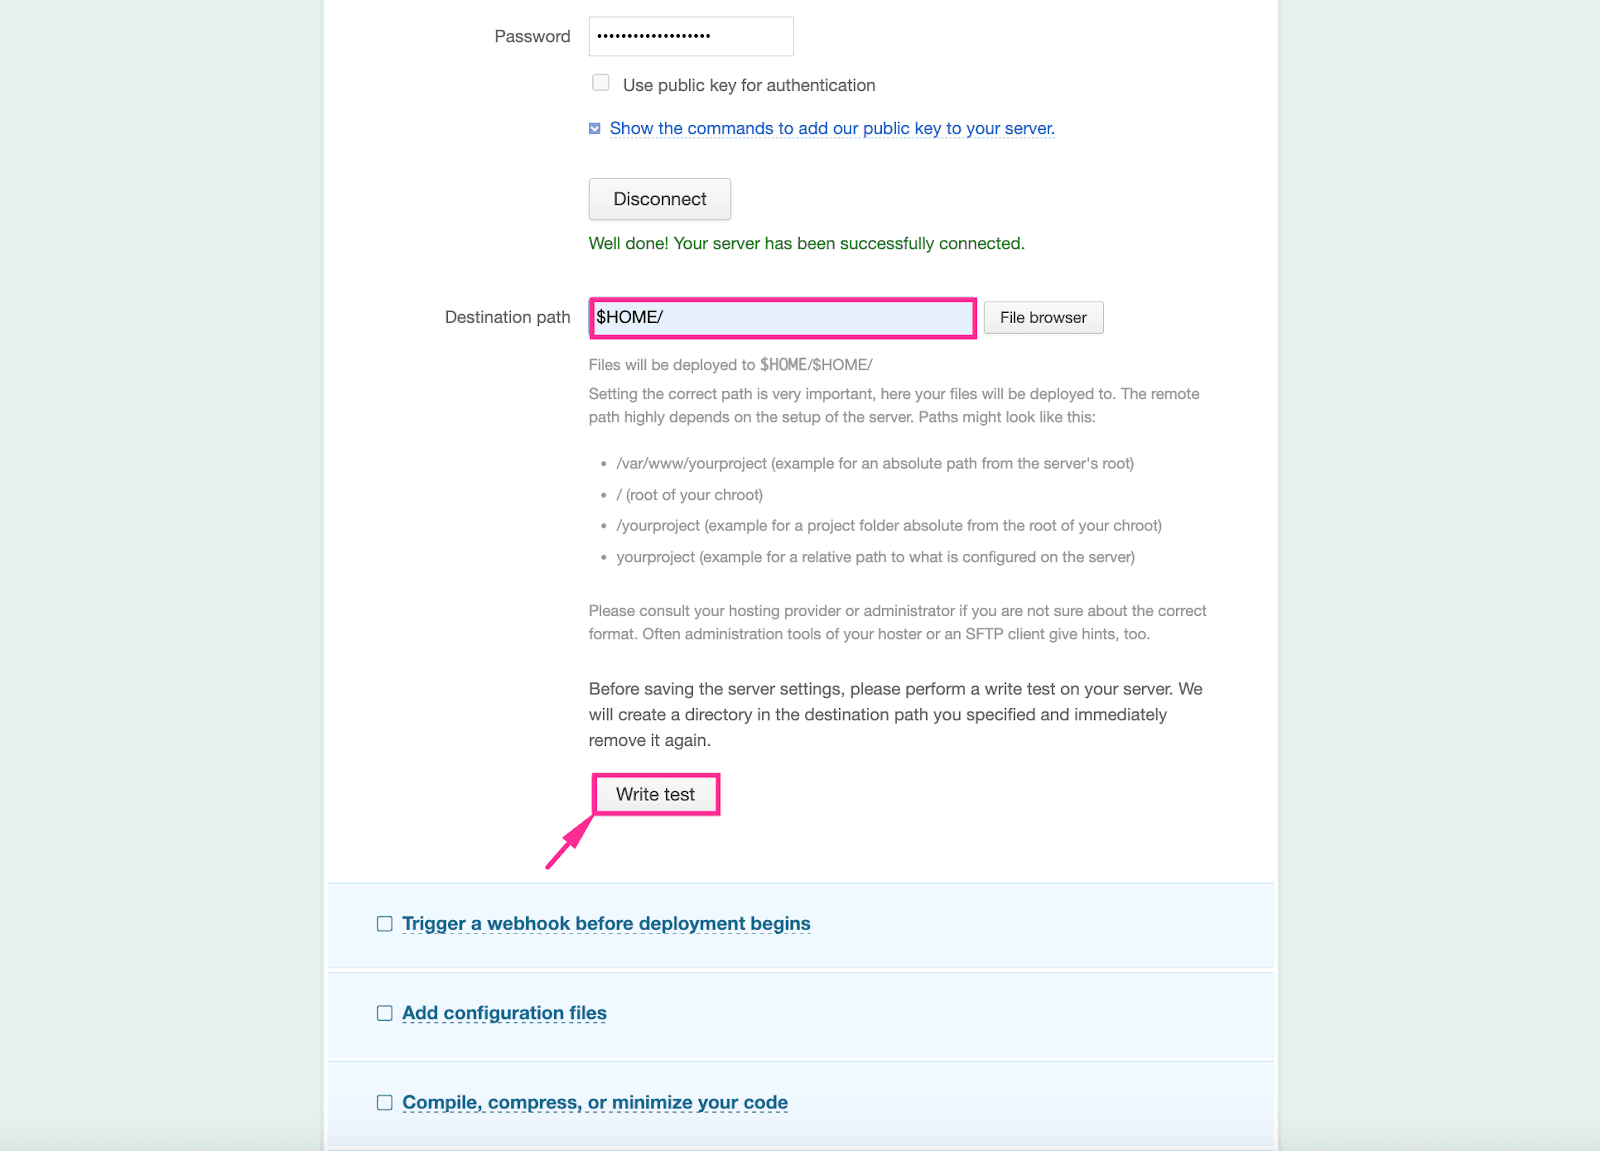
Then, select the Destination path and press the “Write test” button to establish easy code deployment to Nexcess.
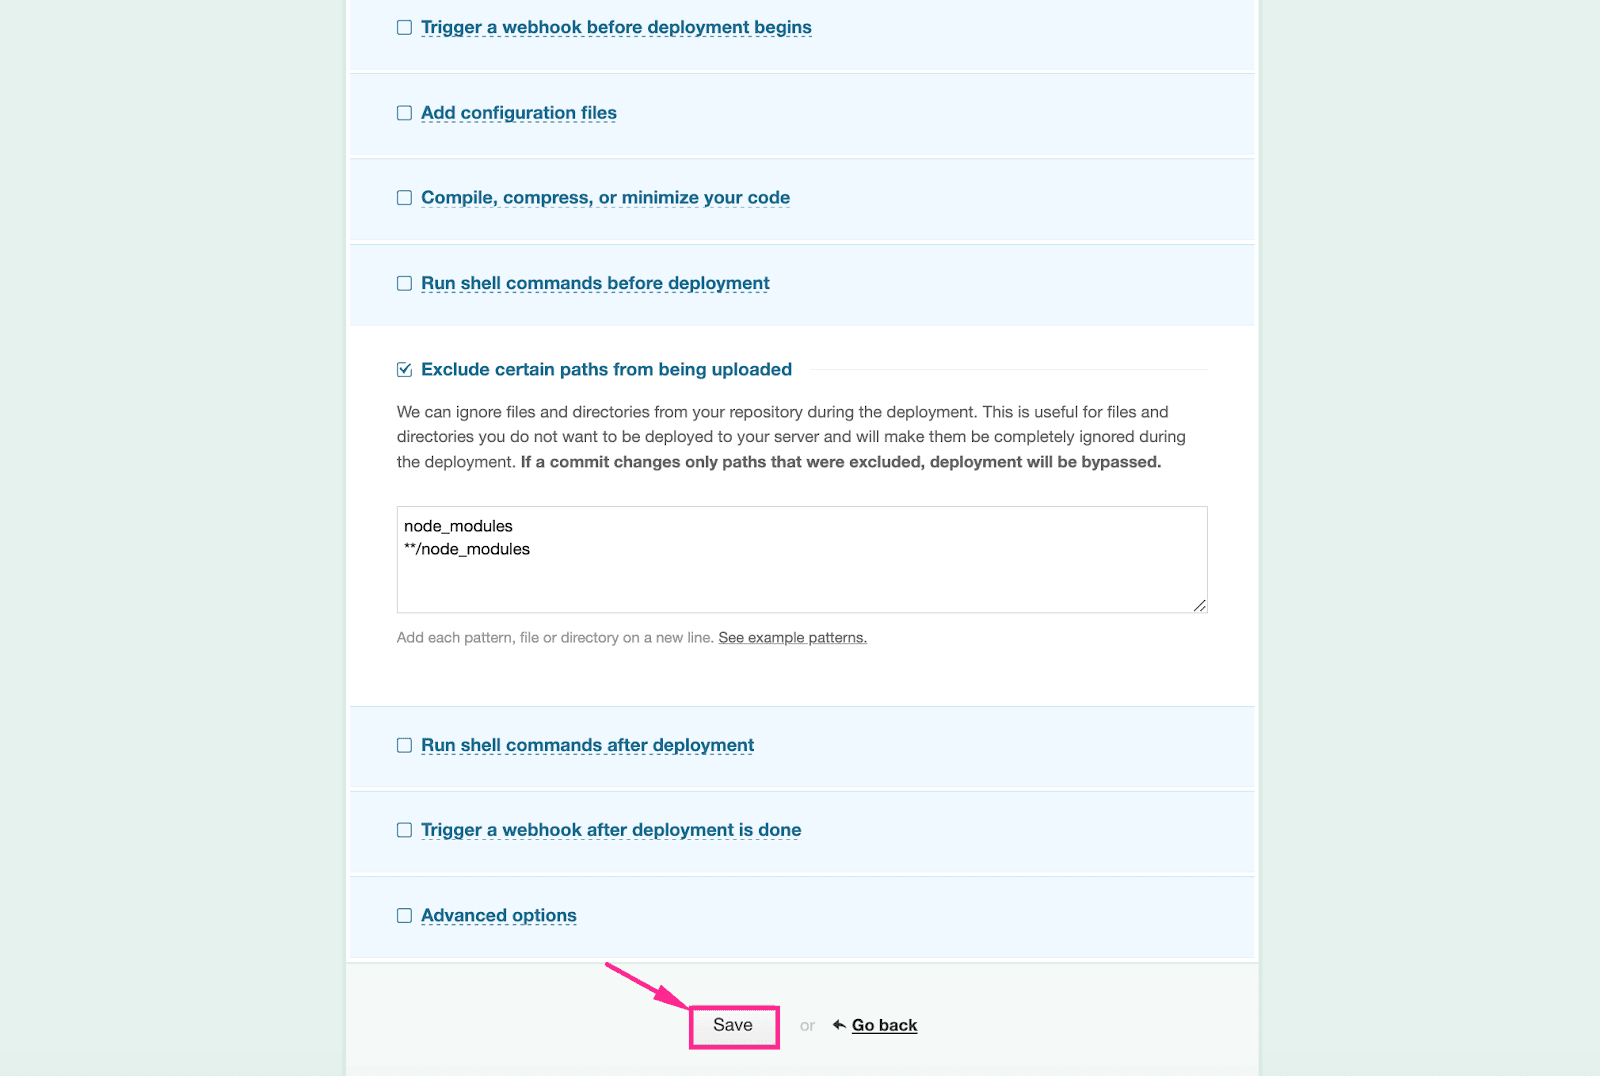
Lastly, scroll down and hit the “Save” button to finish the Nexcess server connection with DeployBot.
Make Your Code Deployment Hassle-Free Integrating Your Favorite Hosting Server With DeployBot
As you can see, integrating DeployBot with Nexcess creates a powerful deployment solution that streamlines your workflow and eliminates the headaches of manual code deployments. By leveraging the robust features of these two platforms, you'll be able to focus on writing amazing code instead of wrestling with complex deployment processes.
Similar to Nexcess, DeployBot allows you to deploy code into any server for quick project development. Not to mention, its friendly, smooth and flexible server configuration makes code deployment super handy for all. Whether you're using EasyWP, Cloudways, WPEngine, WordPress.com, Flywheel, Kinsta, Pagely. or Hostinger, DeployBot ensures straightforward deployments across the board.
Before I conclude, let's quickly recap the key benefits of this integration:
- Automated deployments to any environment hosted on Nexcess with just a few clicks
- Support for team collaboration with secure user permission levels
- Ability to deploy to multiple servers simultaneously for efficient staging/production workflows
- Version control and one-click rollbacks for easy and safe change management
- Detailed deployment logs for valuable insights into issues and better troubleshooting
A comprehensive solution suitable for developers of all levels - from solopreneurs to large teams
Setting up the DeployBot integration on your Nexcess account is straightforward using the steps that I have outlined. Once configured, you'll have a seamless deployment process that minimizes downtime risks and human errors.
However, it's still crucial to proactively monitor your deployments. While DeployBot automates the heavy lifting, diligent oversight allows you to quickly catch and resolve any potential issues before they escalate. Combining the power of automated deployments with strategic monitoring ensures a consistently reliable process.
With Nexcess and DeployBot working in tandem, you have everything needed to elevate your code deployment game to new heights of efficiency and robustness. And so now can actually say goodbye to deployment woes and embrace a workflow optimized for productivity.
Also remember, if you ever need assistance with the integration, configuration, or simply want to unlock the full potential of DeployBot, our world-class support team is just a click away. We're committed to your success every step of the deployment journey.


