Getting Started with DeployBot
DeployBot deploys code from a hosted Git repository to anywhere you need it shipped. It allows a single developer or an entire development team to follow a consistent process for shipping code.
There's no need to manually track changes or log onto a server to upload files any longer. With DeployBot, you can review files set to deploy before you start the process.
Take your deployment process to the next level by using a build server with a pre-defined Docker container or a custom container. During deployment in the container fetch dependencies like NPM or Composer. Compile code, and build and compress files with tools like grunt or gulp.
In this guide we’ll cover the steps for your first deployment:
- Connecting a repository
- Creating an environment
- Adding a server
- Deploying
Connecting a repository
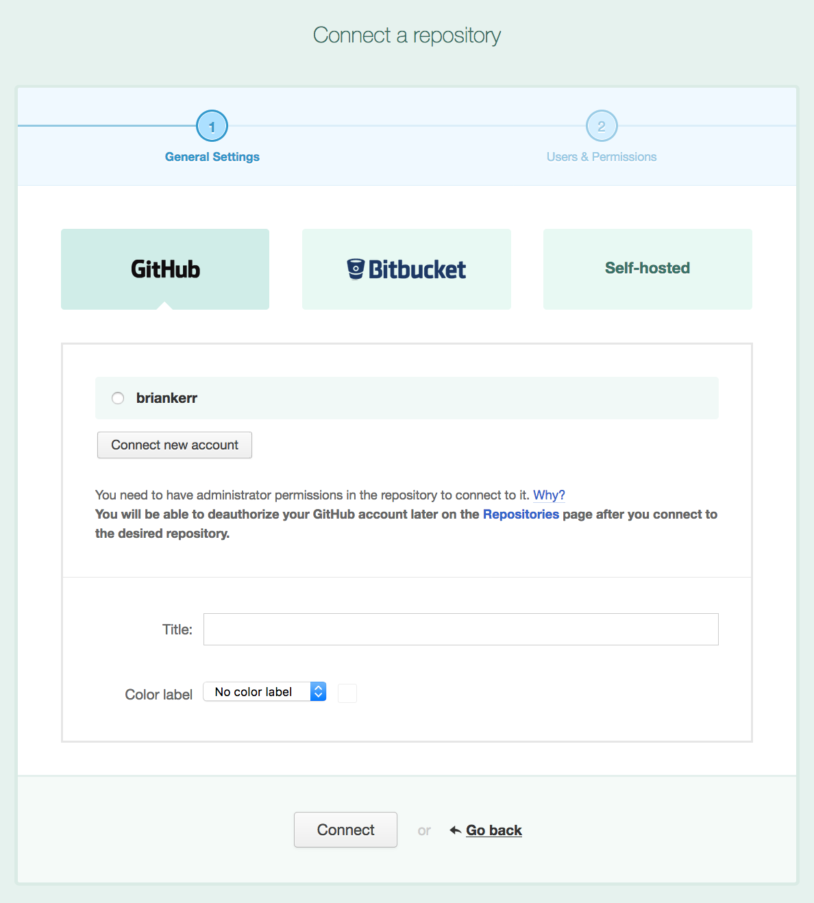
There are two ways to add a repository to your DeployBot account:
- Authorize your GitHub or Bitbucket account and choose the repository to connect.
- Connect a self-hosted Git repository with an HTTPS or SSH URL. This works for any hosted repository, like Beanstalk or GitLab.
When adding a repository, add a name for the repository in DeployBot and apply a color label. When ready to add the repository, click "Connect". If you have users in DeployBot, the next step is to grant them permission to view the repository and run deployments.
Creating an environment
After adding your repository, the next step is adding an environment. This is a place to add servers and manage deployments.
We recommend that you always have Testing or Staging environment, to go with your Production environment. This creates a deployment workflow that’s stable and repeatable without deploying directly to Production. We also believe Production deployments should always be manual. Having a human involved ensures Production deployments don't run at inopportune times. If something does go wrong, the person handling the deployment can rollback the changes.
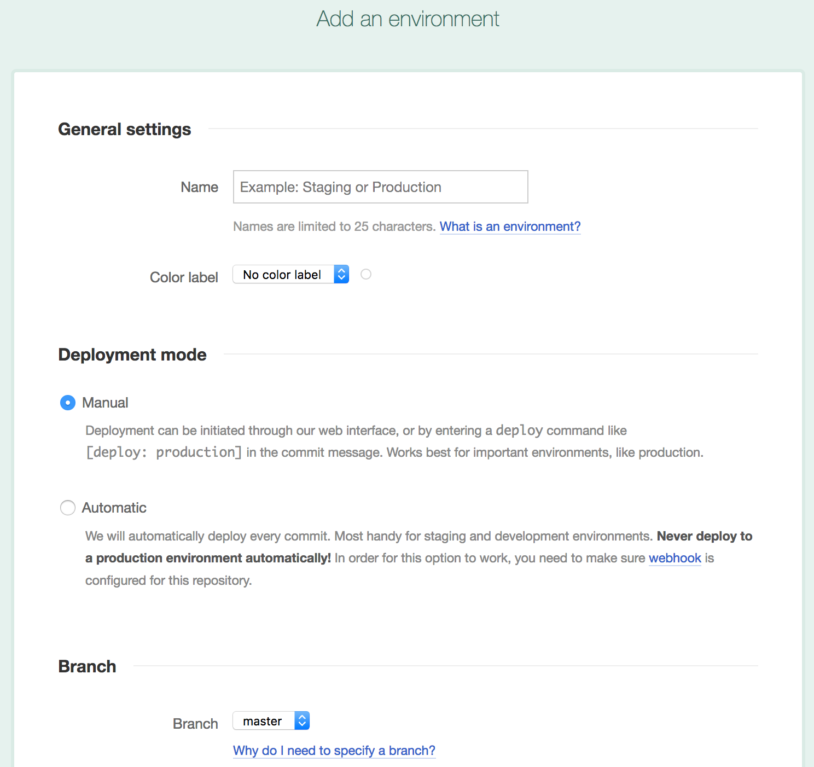
When adding any environment there are some necessary settings:
- Name (i.e., top-secret, staging, production, etc.)
- Deployment mode: Manual or Automatic
- Choose the branch the environment deploys commits from
- Optional: Add a color label
- Optional: Triggers
Change your mind on some settings? Each environment has a settings page to update settings later on.
Adding a server
After adding an environment, the next step is adding a server.
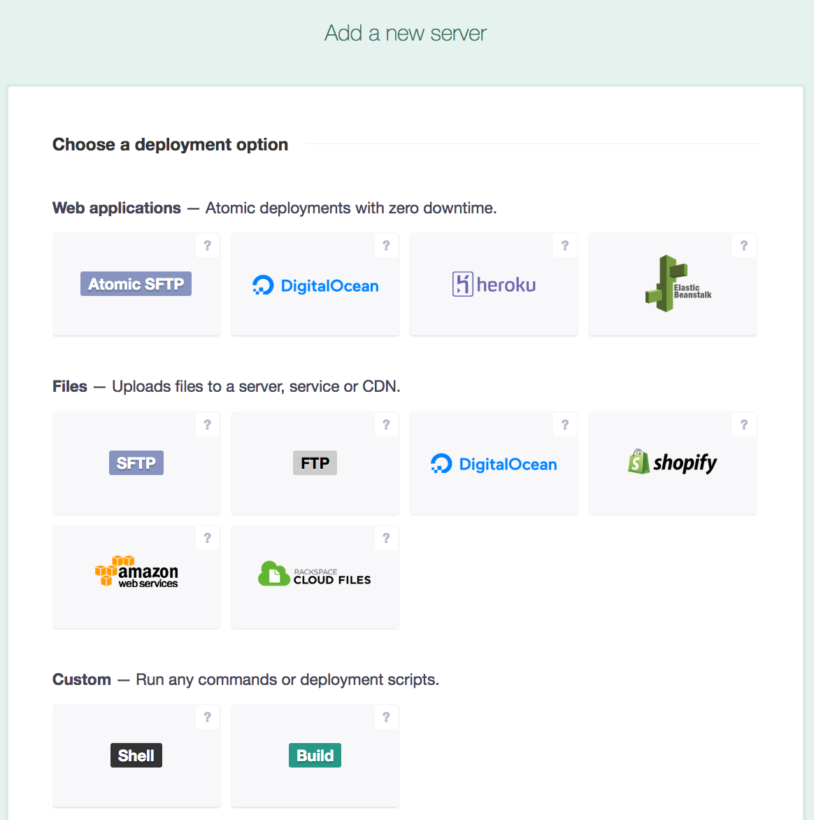
DeployBot supports deployments to DigitalOcean, Shopify, Heroku, AWS Elastic Beanstalk, AWS S3, and Rackspace Cloud Files. Deploy everywhere else with SFTP, FTP, Shell, and Build servers.
While configuring your server, two settings to keep in mind are:
- Source Path: The directory in your repository’s branch DeployBot deploys from.
- Remote/Destination/Application Path: The root deployment location on the server.
Deploying
With a server connected, you’re ready to deploy!
With automatic deployments, deploying is as simple as pushing your code to your remote repository. If a branch that DeployBot is watching receives a new commit, it deploys automatically.
If your deployment is manual, there are two places to trigger it:
- On the Dashboard there is a undeployed commits section.
- Go to the Environment page and select the "Deploy" button.
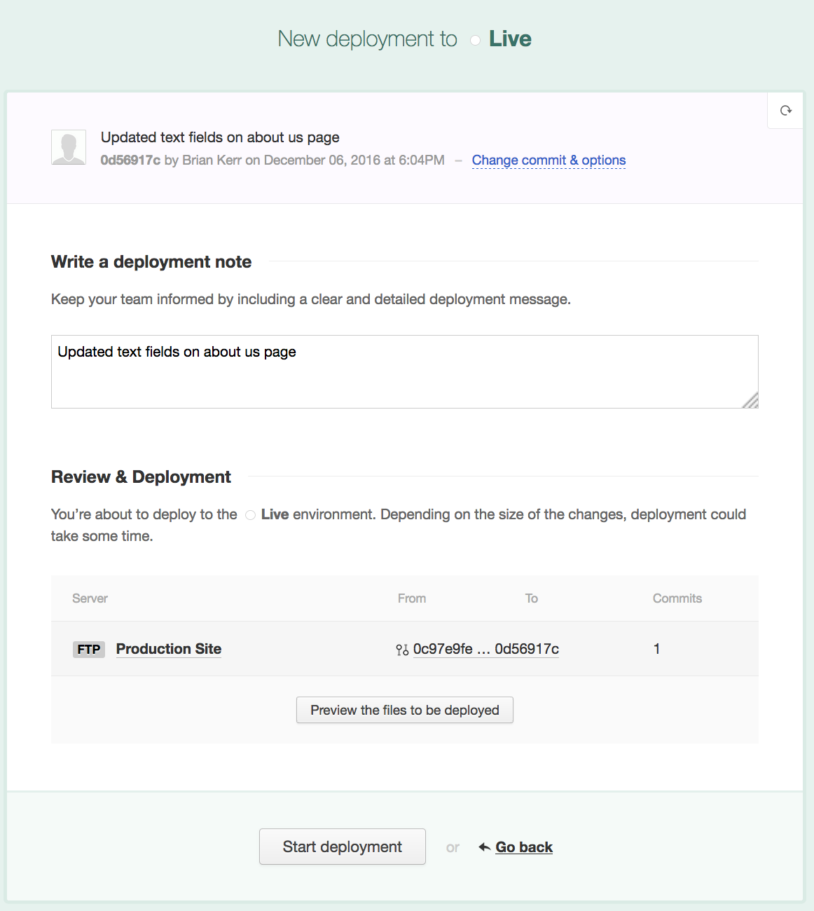
You’ll then be on the new deployment page where you can review changes that will deploy and can edit different deployment options. For instance, customize the deployment message (it defaults to the commit message). When ready to deploy, click on “Start deployment”.
During and after deployment, DeployBot will give a deployment log. The log allows you to see the order commands ran, and be a base for troubleshooting if there are any shell errors.
What’s next
Ready to dive deeper into what you can do with DeployBot? Check out some of our other guides:
- Building assets with Grunt or Gulp during deployment
- Deploy Laravel to DigitalOcean
- ChatOps: DeployBot + Slack
Have any questions while getting running with DeployBot? Give us a shout at support@deploybot.com. Our Success team is always happy to help!
Who makes DeployBot?
DeployBot is assembled with love by SaaS.group. We're developers, so we understand that you need code deployment tools that just work. No mess, no worries, just a reliable service you can count on.
We're focused on building for the long haul, and to us that means making decisions that are win-win: good for our customers and good for us. You can trust your workflow and deployment decisions to us, because we’re not going anywhere. We believe the proof is in our product, which is why we’ll let you try DeployBot for free with one repository forever. Instead of going on and on, we’d like for you to experience it for yourself.

