Using DeployBot to Deploy to WordPress
If you’ve used DeployBot to push commits to a live environment in the past, you know that we build all of our tools to require the least amount of user effort as possible. In the following sections, we will guide you through the process of setting up your DeployBot account for quick and easy WordPress deployment.
What You’ll Need To Get Started
Before launching your project, there are a few things that you will need to get started. Setting up your account for WordPress deployment will require:
- A DeployBot account
- A repository that contains WordPress code
- SSH access for server (via password or RSA key)
- sudo permissions/root access
- Write permissions for the following path: /var/www/wordpress
*Note:* DeployBot’s WordPress Deployment feature currently only supports the Debian 9 (Stretch) Operating System.
1. Connect Your Repository

Like other types of deployment, DeployBot’s WordPress deployment option requires you to first connect your account to the repository where your local code is located. If you already have a repository set up for your account, you will be able to access it through the dropdown menu. Otherwise, a new repository can be easily connected by selecting “Connect New Account”.
2. Create A WordPress Environment

General settings can be configured quickly by providing the system with a name, and selecting a deployment mode and branch.

Once your general settings have been saved, you will be prompted to select your deployment option. The “WordPress” option has been specifically designed to streamline the WordPress setup and deployment processes. With similar configurations as the Atomic SFTP option, the WordPress deployment feature provides zero downtime deployment and automates several setup processes that would have previously required a manual effort.
3) Add a Wordpress Server

Just like you’d expect with other deployment types, WordPress deployment requires users to setup their server by providing a name, host, and login details. Since DeployBot will need to install and configure packages on the system, it is required that the user entered in the Login field have sudo permissions, root level server access and SSH access.
Unlike the Atomic SFTP deployment option, which allows you to select the destination path for the deployment; the WordPress destination path is already hard-coded into the system. All files will automatically be deployed to the following path - /var/www/wordpress. In addition to root-level access, the user that is entered during setup must have writable permissions for this path in order for files to be deployed. If the user does not have these permissions, the deployment request will be rejected.
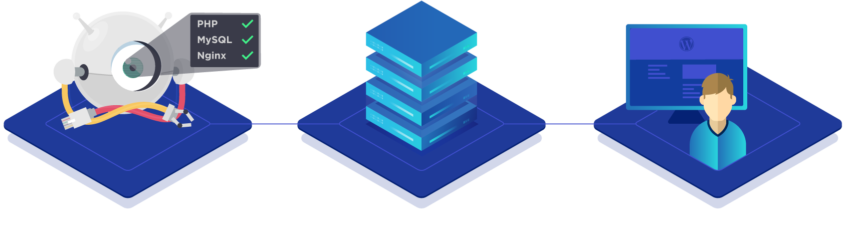
During a typical WP deployment, you would be required to manually install dependencies, enter some settings into the WordPress Installer and others into the WordPress configuration files. With DeployBot’s WP deployment tool however, all of this information can be entered and managed right from the “WordPress Settings” section. All you need to do is add a few admin details and DeployBot will do the rest - configuring the database, the PHP and the web server; and also running WP Installer on your behalf.
DeployBot’s WordPress deployment tool also provides you with access to advanced options and settings such as: triggering hooks, adding configuration files, running build commands, and launching custom scripts.

One important feature includes the ability to specify a particular source path. This way, if your repository contains other non-WordPress code, you can specify exactly where DeployBot should look for your WP files in the repository.
4) Deploy Your Code

If all of your information has been entered correctly, your WordPress project is now ready for deployment. As soon as you click the “Start Deployment” button, DeployBot will begin installing scripts and packages to setup and install Wordpress; and deploying your code into a live environment.

During deployment, you can view a log to see exactly what scripts are being run to install all dependencies and to set up the server. Furthermore, DeployBot has taken several measures to omit any usernames and passwords from the log; ensuring that sensitive information will be hidden from view or the deployment logs stored in DeployBot’s servers.
Once deployment has successfully completed, the project will be live and viewable from the specified domain.
Here’s the great news, we make sure that once your initial setup has been completed, this full process never has to be run again. Future deployments will complete in a fraction of the time since these initial scripts have already run and been configured.
WordPress Deployment - Taking The First Step
If you’re ready to deploy your WordPress project, take the first step and create a DeployBot account today!
Need to deploy your Ruby on Rails App or deploy your Craft CMS to Digital Ocean? No problem, check out our Guides for Using DeployBot to deploy your code across a host of different platforms!


