Deploy Laravel to DigitalOcean | DeployBot Deployment Guide

Laravel is a modern framework for building web applications in PHP. It aims to make the development process a pleasing one for the developer without sacrificing application functionality. DeployBot fits nicely with this philosophy — we believe that your deployment process should scale easily to accommodate for your infrastructure growth.
In this deployment guide, we'll show you how to use DeployBot's tools for bug-free continuous integration to configure zero-downtime deployments for a Laravel app to a DigitalOcean droplet. We’ve taken the Laravel’s official website as an example for this guide. While it’s far from the largest Laravel app in the wild, and your own Laravel setup may differ slightly, this open-source project based on Laravel 5 is quite representative in terms of the setup process. You should be able to apply these instructions to your own projects without a problem.
If you've read this far, maybe Version Control is also an issue for you. However, if you need to update more than one server, automation makes sense. This is exactly what we offer with DeployBot. DeployBot integrates perfectly with the most popular tech. You can find an ever growing collection of beginners’ guides on our website.
Laravel, Digital Ocean, Ruby on Rails, Docker, Craft CMS, Ghost CMS, Google Web Starter Kit, Grunt or Gulp, Slack, Python, Heroku and many more.
Learn how to get started with DeployBot here.
Laravel Deployment to DigitalOcean: Basic Setup
To get started, proceed to DigitalOcean and create a new account, unless you already have one. Their prices start at $5/month for a virtual machine with 512MB RAM and 20GB solid-state drive. Select the appropriate droplet size depending on your needs and budget, then start with a fresh “Ubuntu LEMP on 14.04” image.
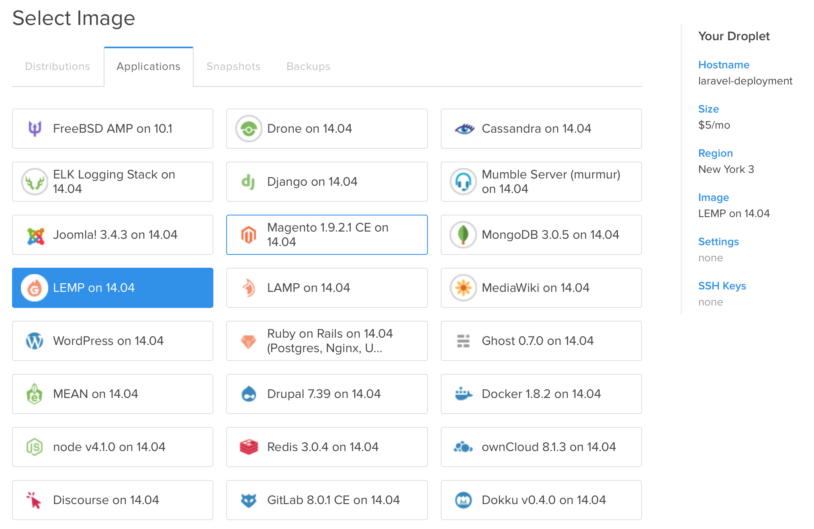
LEMP stands for Linux, Nginx, MySQL and PHP, which combined give you a solid foundation for a modern PHP app deployment. Don’t worry if your application requirements are not standard, you can still use DeployBot. In that case, however, you might have to adjust some paths or commands if you’re not following our instructions precisely.
VM configuration
Open the terminal of your newly created droplet using the DigitalOcean web interface or by connecting via SSH. The VM will greet you with an informational message also containing the pre-set root password for MySQL.
Before we begin, let’s make sure that the system is fully up-to-date, and install packages for Git (required by Composer to install Git dependencies) and the PHP command line interface. To do this, run the following commands one-by-one:
apt-get update
apt-get upgrade
apt-get install php5-cli git
Configuring MySQL
Remember the instructions given by the droplet when you logged in and run the suggested mysql_secure_installation script to properly secure your MySQL server:
mysql_secure_installationFollow the interactive configuration process to set a secure root password (hard to guess, easy to remember), delete all anonymous users, drop the test database and revoke remote root access. When you’re done, create a new database and a dedicated MySQL user for your application:
# Don’t forget to replace placeholders with desired values:
# db_name - database name
# user - MySQL user name
# password - MySQL password
echo "CREATE DATABASE db_name" | mysql -u root -p
echo "GRANT ALL ON db_name.* TO user@'%' IDENTIFIED BY 'password'" | mysql -u root -p
When executing these commands, you will be prompted for the MySQL root user’s password that you’ve just set. Now make sure you’re able to connect to MySQL as a created user:
mysql -u example -p
# Enter password:
# Welcome to the MySQL monitor.  Commands end with ; or \g.
# Your MySQL connection id is 60
# Server version: 5.5.44-0ubuntu0.14.04.1 (Ubuntu)
#
# Type ‘exit’ (Ctrl+D) to quit the MySQL console.
Creating a deployment user
To simplify the initial configuration process, DigitalOcean allows you to log in to your droplet as root. While it is possible to perform application deployments as root, we recommend that you take a slightly longer path and create a separate user with limited write-access to use in DeployBot. This will circumscribe destructive powers of a mistyped command and reduce the risks associated with accidentally exposing your credentials on the web. The following command will create a new user with login “deploybot" and no password set yet. This user will be added to group www-data:
useradd -U -G www-data -m -c "Used by deploybot.com to perform deployments" deploybotThe LEMP droplet is configured in a way that all web services are run by user www-data, a member of www-data group. Generally you’ll want your application files to be writable by your deployment user only, limiting www-data to read access except for when the write permissions are required (logging, file uploads, caching, etc).
Creating the application directory
Now you need to pick up the directory where your web app files are going to be stored (for instance, /var/www/example.com). It has to be readable by the members of www-data group, but only writable by the deployment user.
mkdir -p /var/www/example.com
chown deploybot:www-data /var/www/example.com
chmod 2755 /var/www/example.com
Note the 2755 access mode. It is recommended that you set the GUID bit on the application directory. This way all files created inside it will be automatically owned by group www-data (with read-only access).
Configuring PHP
The LEMP droplet comes with acceptable PHP configuration defaults. However, there is one little piece missing. To run Laravel, you’ll need to enable the mcrypt extension for PHP.
php5enmod mcryptAfter enabling this module, restart the php5-fpm service to pick up the updated config:
service php5-fpm restartNext, install Composer. These two commands should download it and make the executable available globally:
curl -sS https://getcomposer.org/installer | php
mv composer.phar /usr/local/bin/composer
Configuring nginx
Nginx is your web server. It accepts HTTP requests and forwards them to your Laravel app via php5-fpm (where FPM stands for FastCGI process manager). Nginx also takes care of serving your assets (CSS, Javascript, static HTML). First, create a configuration file for your web application using your text editor of choice:
nano /etc/nginx/sites-available/example.comThe following template is a good starting point for most Laravel apps:
server {
  listen 80 default_server;

  root /var/www/example.com/current/public/;
  index index.php index.html index.htm;

  error_log /var/log/nginx/example.com-error.log;
  access_log /var/log/nginx/example.com-access.log;

  location / {
    try_files $uri $uri/ /index.php$is_args$args;
  }

  location ~ \.php$ {
    try_files $uri =404;
    fastcgi_split_path_info ^(.+\.php)(/.+)$;
    fastcgi_pass unix:/var/run/php5-fpm.sock;
    fastcgi_index index.php;
    include fastcgi_params;
    fastcgi_param SCRIPT_FILENAME $realpath_root$fastcgi_script_name;
    fastcgi_param DOCUMENT_ROOT $realpath_root;
  }
}
Please pay extra attention to the root path and the fastcgi_pass value. The latter should match the listen value specified in the pool settings of php5-fpm (/etc/php5/fpm/pool.d/www.conf by default). Note that we’re using $realpath_root nginx variable which will resolve the current release symlink to the actual release path to avoid issues with PHP opcode caching.
Once you’re done editing, make the config visible to the web server by creating a symlink to it in the /etc/nginx/sites-enabled/ directory and restart nginx. To avoid conflicts, remove the default example site first.
rm /etc/nginx/sites-enabled/default
ln -s /etc/nginx/sites-available/example.com /etc/nginx/sites-enabled/
service nginx reload
Configuring DeployBot
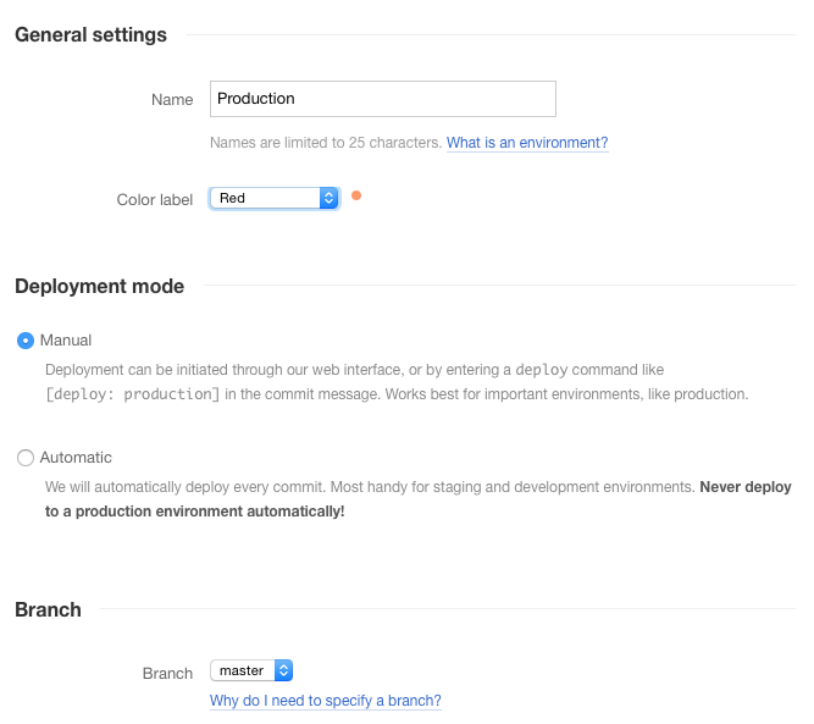
Log in to your DeployBot account and connect a repository with your Laravel project in it. Then create a new environment. If you’re deploying to production, it’s preferable that you keep it in manual mode.
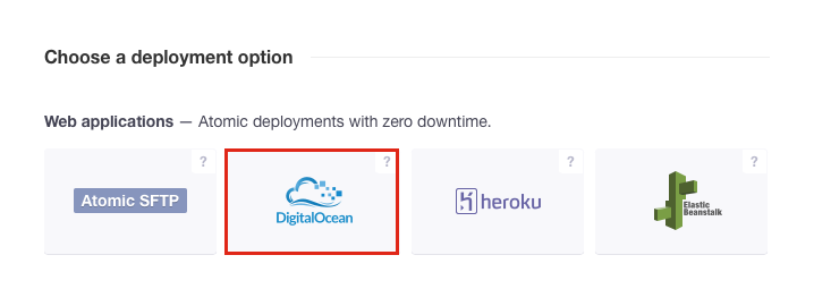
Time to add a target server — choose atomic deployments to DigitalOcean. Atomic deployments are designed so that there’s zero downtime during a deployment. Your deployments either happen completely or not at all, and the previous code keeps running if the deployment goes bad. Atomic deployments use SSH, which is widely trusted and supported.
Follow the instructions presented by the app to connect DeployBot to your DigitalOcean account.
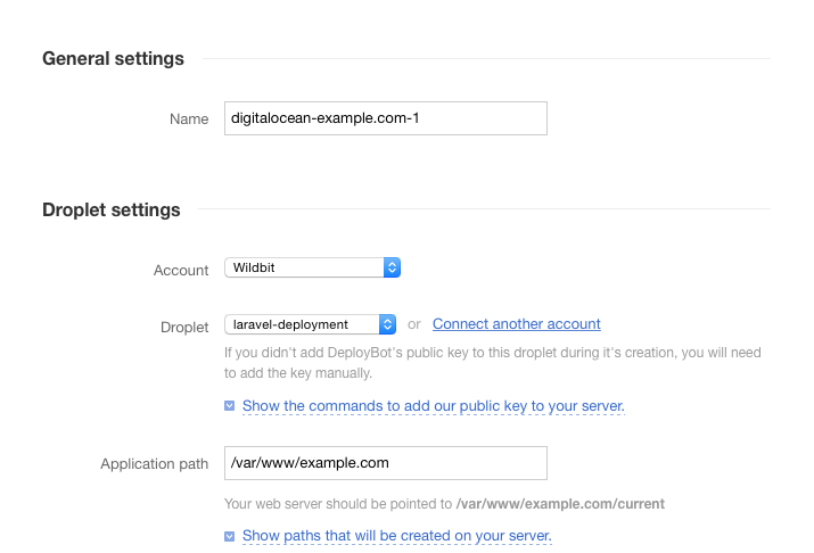
Once you see the configuration page, choose the droplet and make the following changes:
- Name: a distinctive identifier of your server (the droplet name is a good choice).
- Application path:
/var/www/example.com - Advanced → Login: deploybot
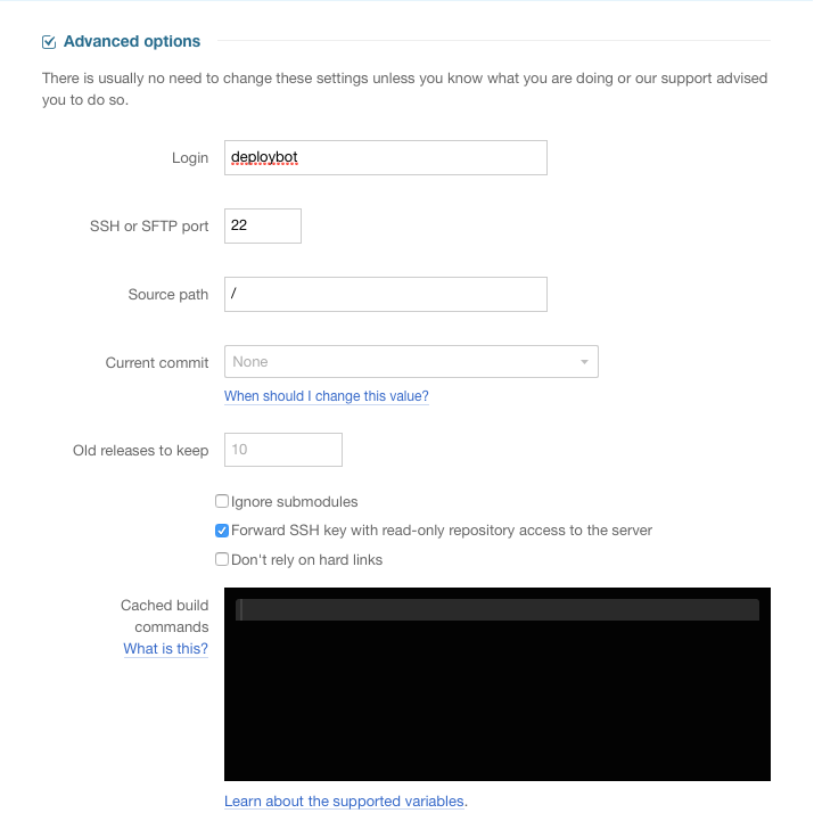
This would be sufficient to deploy the application files, but, since you’re deploying a Laravel app, you’ll need to run some commands after uploading a new version. The following script will create all required shared directories, install application dependencies and run the migrations. Feel free to adjust it to your application’s needs and save it under "Run commands after new version is uploaded".
# Create a shared vendor directory and symlink it to the project root
mkdir -p $SHARED/vendor
ln -s $SHARED/vendor $RELEASE/vendor

# Create a shared storage directory and symlink it to the project root
if [ ! -d "$SHARED/storage" ]; then
  mkdir -p $SHARED/storage
  mv storage/* $SHARED/storage/
  chmod -R 775 $SHARED/storage
fi

rm -rf storage
ln -s $SHARED/storage $RELEASE/storage

# Install application dependencies
composer install

# Run migrations
php artisan migrate --force
The last configuration change you’ll normally want to make is to exclude the vendor directory from deployment. Find the “Exclude certain paths from being uploaded” section and type “vendor” on the first line.
Now, before you click “Save changes”, go back to the droplet terminal. Use your superuser powers to log in as the deploybot user you created earlier, create the directory to store the authorized keys file and then run the command displayed under “Show the commands to add our public key to your server.” to add DeployBot’s public key to your server:

su deploybot
mkdir ~/.ssh
chmod 0700 ~/.ssh
# Now copy & paste the commands you see in your web browser
Finally, click “Save changes”. You should be redirected to the environment deploy history. From here you’re ready to trigger your first deployment. Click “Deploy”, walk through the wizard and deploy the app to your server. If everything is configured correctly, after the deployment is finished, you should be able to access your app via the web browser using the IP address shown in DigitalOcean settings.
Using DeployBot to build assets on deployment
Using Elixir, Gulp, Grunt, or any other task runner to build & minify your application assets? There is no need to pollute your Git history with compiled versions! Instead, you could use DeployBot’s build tools to automatically build everything using our infrastructure on every deployment.
If, like laravel.com, your webapp is using Elixir (Laravel’s own wrapper on top of Gulp) or Gulp, you’ll only need two little changes to start building your assets with DeployBot. First, add the following two lines of code to the “Compile, compress, or minimize your code” section:
npm install
gulp --production
After you do this, update the “Exclude certain paths from being uploaded” section with node_modules directory to avoid uploading installed Node.js dependencies to your server. And that’s all you need to do! Now your assets will be built and uploaded to your server automatically on every deployment. If you’re using a task runner different than Gulp, or have any additional questions on the topic, check out our dedicated guide on building assets.
Deploy Laravel Recap and Advanced Steps
Now that your deployment process is automated, you may relax a bit and trigger a few re-deploys to ensure that everything works as expected. We hope you found this guide useful and were able to successfully deploy Laravel to DigitalOcean with Deploybot.
At this point, if you feel adventurous and want to do some more server administration work, here are some advanced deployment steps for you to consider:
- Remove the default welcome message shown by the LEMP droplet:
rm -rf /etc/motd.tail - Disable root access via SSH
- Take some additional recommended steps for new Ubuntu 14.04 servers.
As you see, DeployBot makes the deployment process seamless and works with almost every tech you wish - like Laravel, Digital Ocean, Ruby on Rails, Docker, Craft CMS, Ghost CMS, Google Web Starter Kit, Grunt or Gulp, Slack, Python or Heroku for which we have an ever growing collection of beginners’ guides.
Learn how to get started with DeployBot here.


