How to Deploy into EasyWP Using DeployBot
Imagine a world where deploying code is not a hassle anymore. Your one push is enough to bring changes to all your WordPress websites. That’s precisely what DeployBot brings to the table for all the coders out there.
DeployBot is not a tool but a magic wand you need for fast and smooth code deployment. It saves you from the struggle of manual deployment and empowers one-click code deployment to all WordPress sites.
Curious how?
In this blog, we’ll enlighten you on the complete step-by-step process of how to deploy into EasyWP using DeployBot.
So, let’s jump right in to turn your code deployment routine into a performance worth applauding!
But before that, let’s start off by highlighting…
If you’ve read this far, you’re probably a DeployBot user and familiar with version control systems, CI/CD, and other related topics. If not, we’ve compiled several beginner’s guides: Laravel, Digital Ocean, Ruby on Rails, Docker, Craft CMS, Ghost CMS, Google Web Starter Kit, Grunt or Gulp, Slack, Python, Heroku and many more.
Why Should You Consider DeployBot for Deployment?
DeployBot is a super convenient system for pushing, building, and deploying code to different servers. It reduces your work by bringing changes to multiple WordPress websites with a single push on one platform. However, you have complete control to allow automatic or manual deployment.
Besides these, DeployBot benefits in many more ways. Here are the potential advantages of using DeployBot:
- It is crucial to get great results from collaborative coding.
- Manual and automatic deployments are available in this tool.
- DeployBot ships code from different branches to multiple servers.
- It ensures zero downtime during atomic deployment.
- This sends notifications for every deployment using, for example, Slack or Campfire.
- It supports automated rollback for problematic releases.
- This deployment software empowers you to deploy without directly accessing the server.
- It has third-party integrations such as New Relic and Sentry for analyzing performance and application stability.
- It offers a real-time overview of deployment progress.
Deploying into EasyWP Using DeployBot
Here, we’ll demonstrate the easiest guide to deploy your GitHub repository into EasyWP through SFTP access. It needs to be mentioned that if you’re a registered DeployBot user and have your repository and environment connection, then only following step 4 is enough.
In this guide, we’re showing the whole process considering new users who don’t have a DeployBot account or perform essential configuration for repository or environment setup. So, start following the steps that suit you:
Step 1: Get Started with a DeployBot Account
If you’re a new user, then to be able to deploy, you will have to create an account first. To create an account, you need to enter “Your Name” and “Your Email” through which you would like to maintain DeployBot communication.

After entering this information, hit the “Create an account” button. This will take you to your DeployBot account, where you can connect the repository, set up the environment, and add EasyWP-like servers to ensure effortless code deployment.
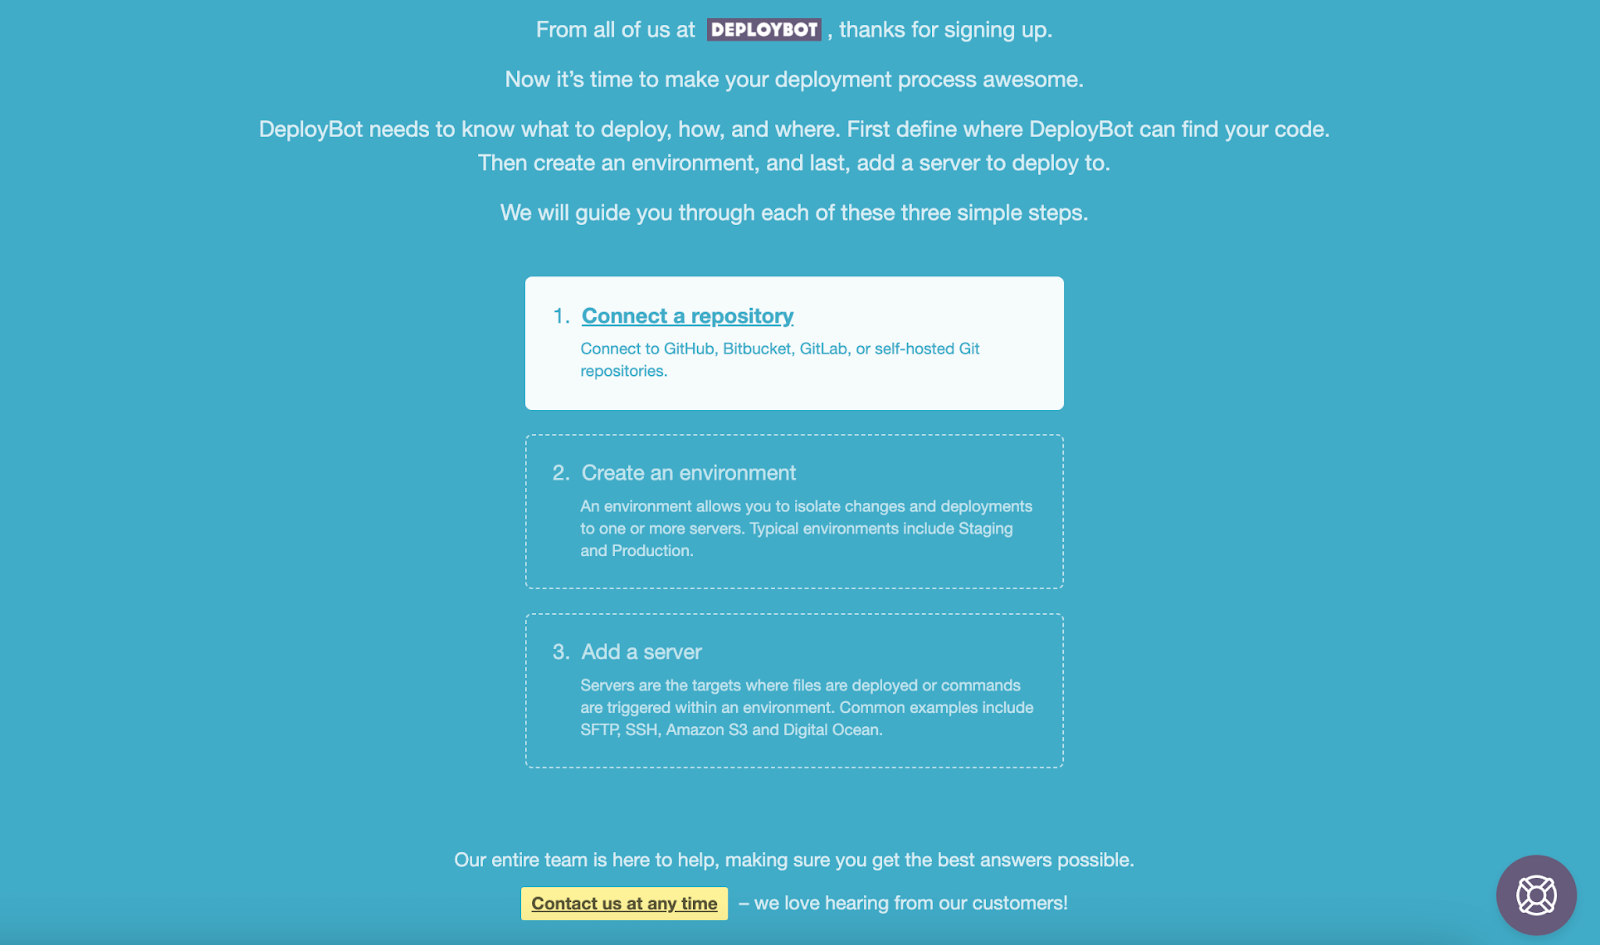
Step 2: Connect a Repository with DeployBot
Here, you will see three steps that you need to configure one by one. First, you need to connect GitHub, BitBucket, GitLab, or other self-hosted repositories with DeployBot by clicking the “Connect a repository” button.
Here, you can connect with any of the Git services. We’re selecting GitHub to transfer the repository to EasyWP. Now, click the “Connect new account” button.

This will send an authorization notification, which you have to allow to create a bridge between DeployBot and GitHub.
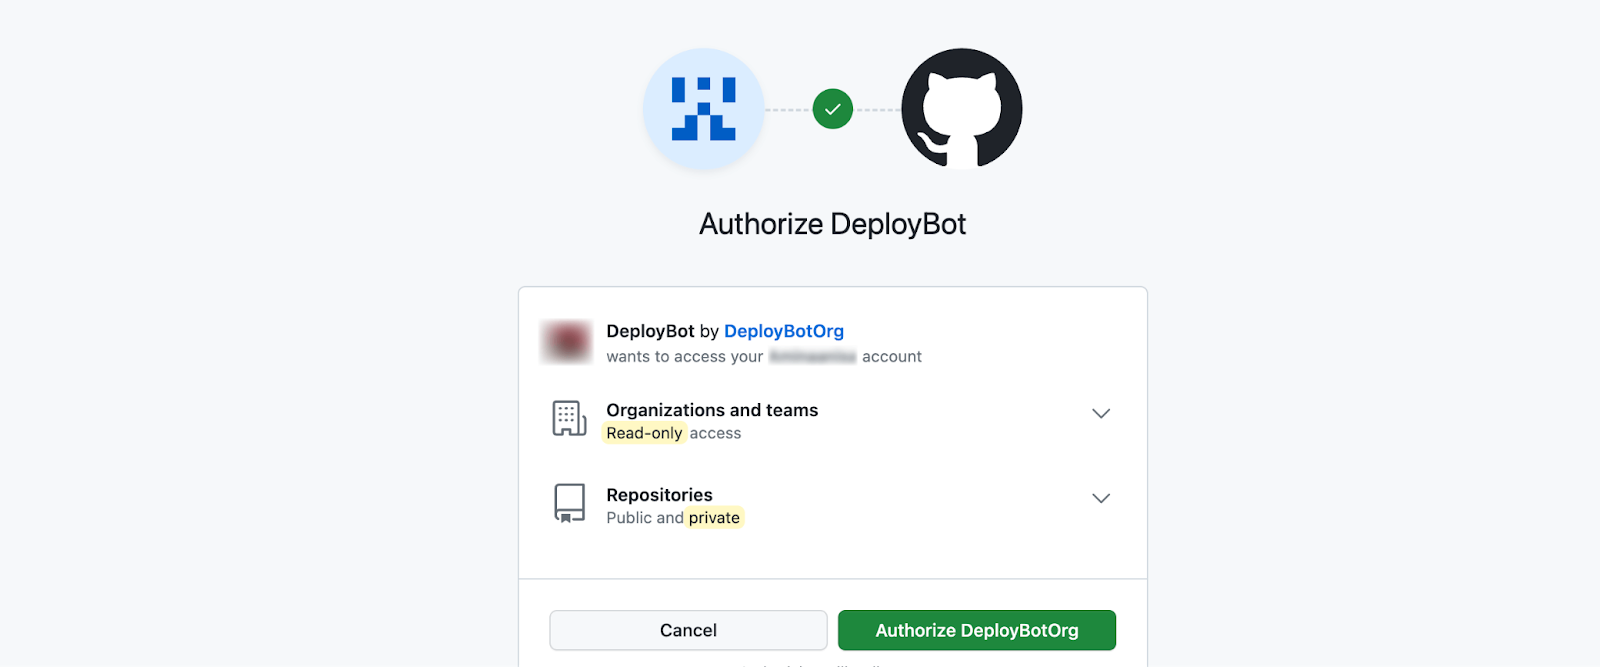
After approving ‘DeployBotOrg’, you will receive a successful authorization completion message. It means you will now be redirected to the repository connection page, or if not, then you will have to manually click the “this setup page” to continue.

Now, choose the repository that you want to connect with DeployBot. This allows you to make the same changes on EasyWP when you push something new on this repository. After selecting that repo, press the “Connect” button. Thus, your repo connection will be completed.

Step 3: Set up an Environment
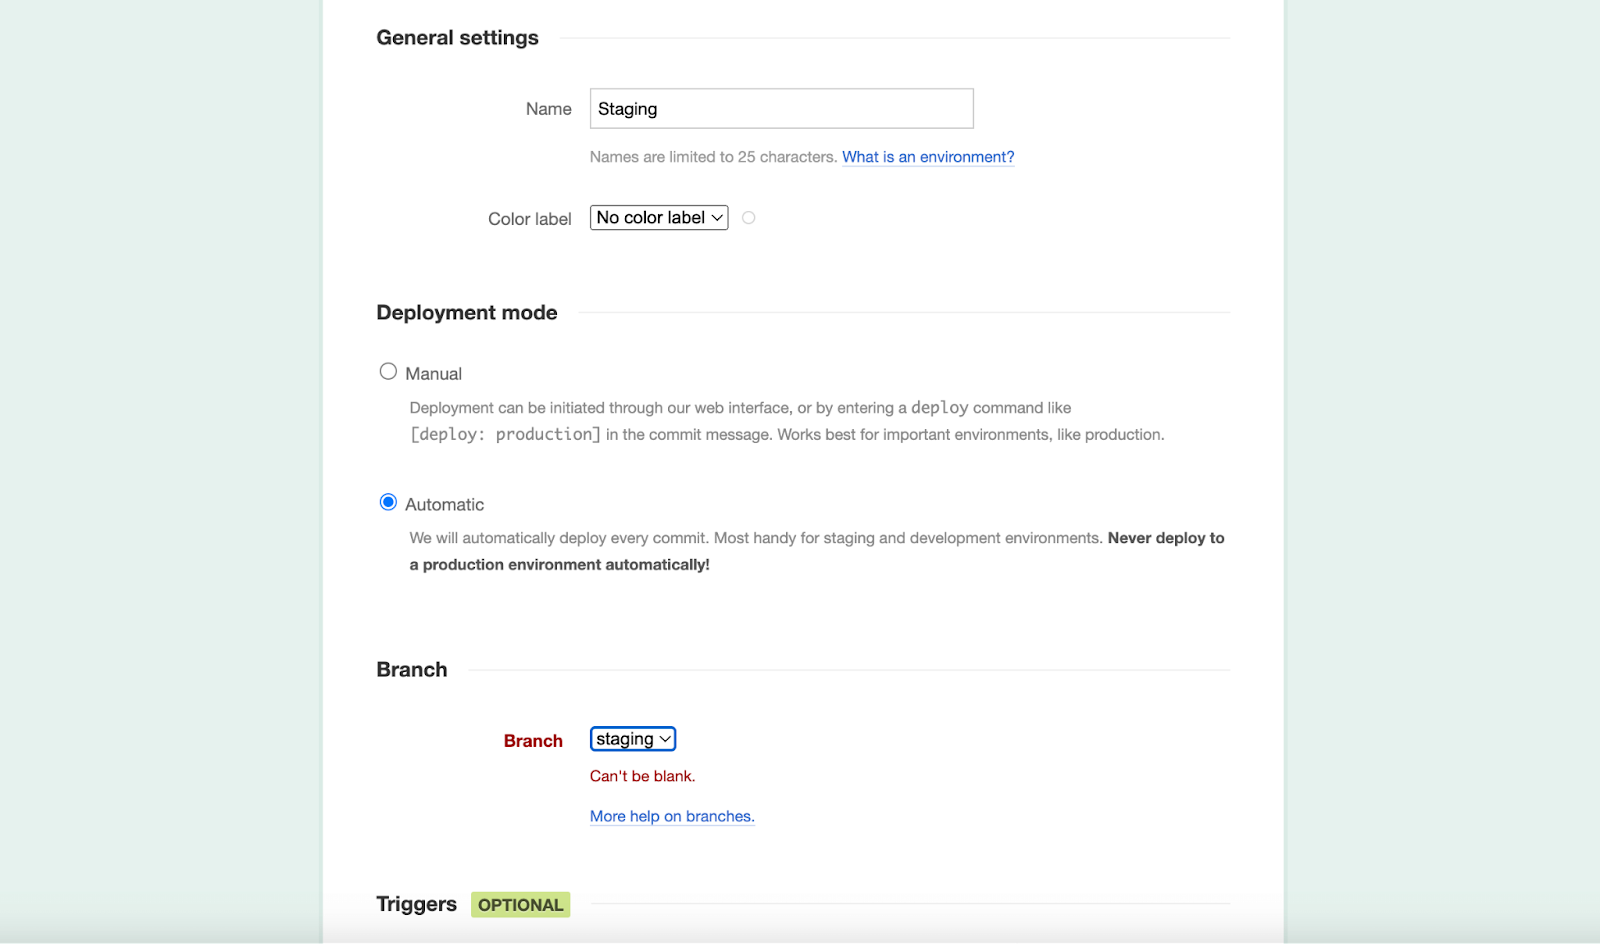
After repository integration, you need to create an environment by clicking the second option.

Here, you will find options for General settings, Deployment mode, and Branch. Before setting up the environment, you need to insert the following info:
- General settings
- Name: Enter the name of your environment. We're selecting staging here.
- Color label: Add any color you want. You can also keep it blank.
- Deployment mode
- Manual: It is suitable for a production environment where you should manually check each push and deploy afterward.
- Automatic: it's effective for staging and development environments as each push is deployed automatically.
- Branch: Select the type of branch you have created in the git repo. This lets you deploy code only when you make changes on that staging repo. If you select main, then pushing on the main branch will bring changes.
After filling out these fields, click the “Save” button.
Step 4: Configure Server Connection Via EasyWP SFTP

In the last step, you need to connect a server by clicking the third option, “Add a server”. It will redirect you to the deployment selection page, where you need to click “SFTP” as we're going to deploy EasyWP via SFTP.

Since we're adopting the SFTP option, you need to generate SFTP credentials from the EasyWP WordPress website. From the website dashboard, click the “Manage” button.
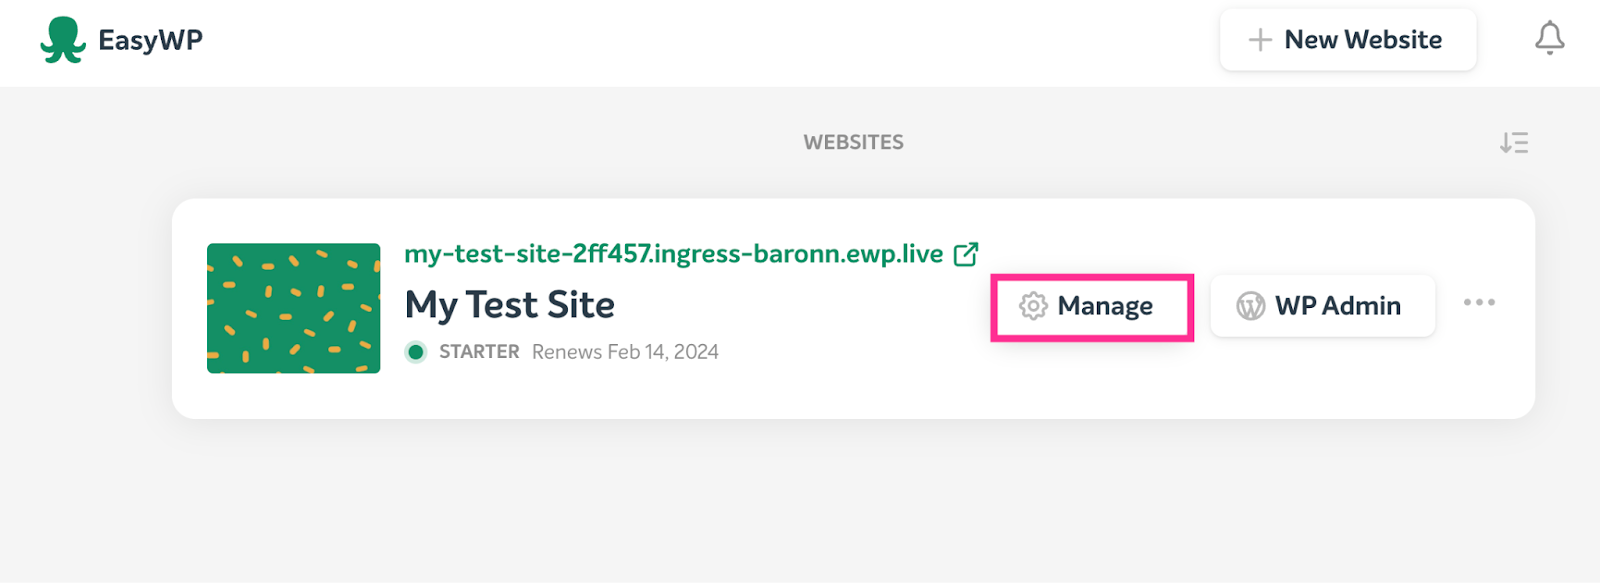
From here, go to the “File & Database” tab and select time to keep SFTP access active. After that, press the “Access” button.
Now, copy the Server, Username, Password, and port from here.

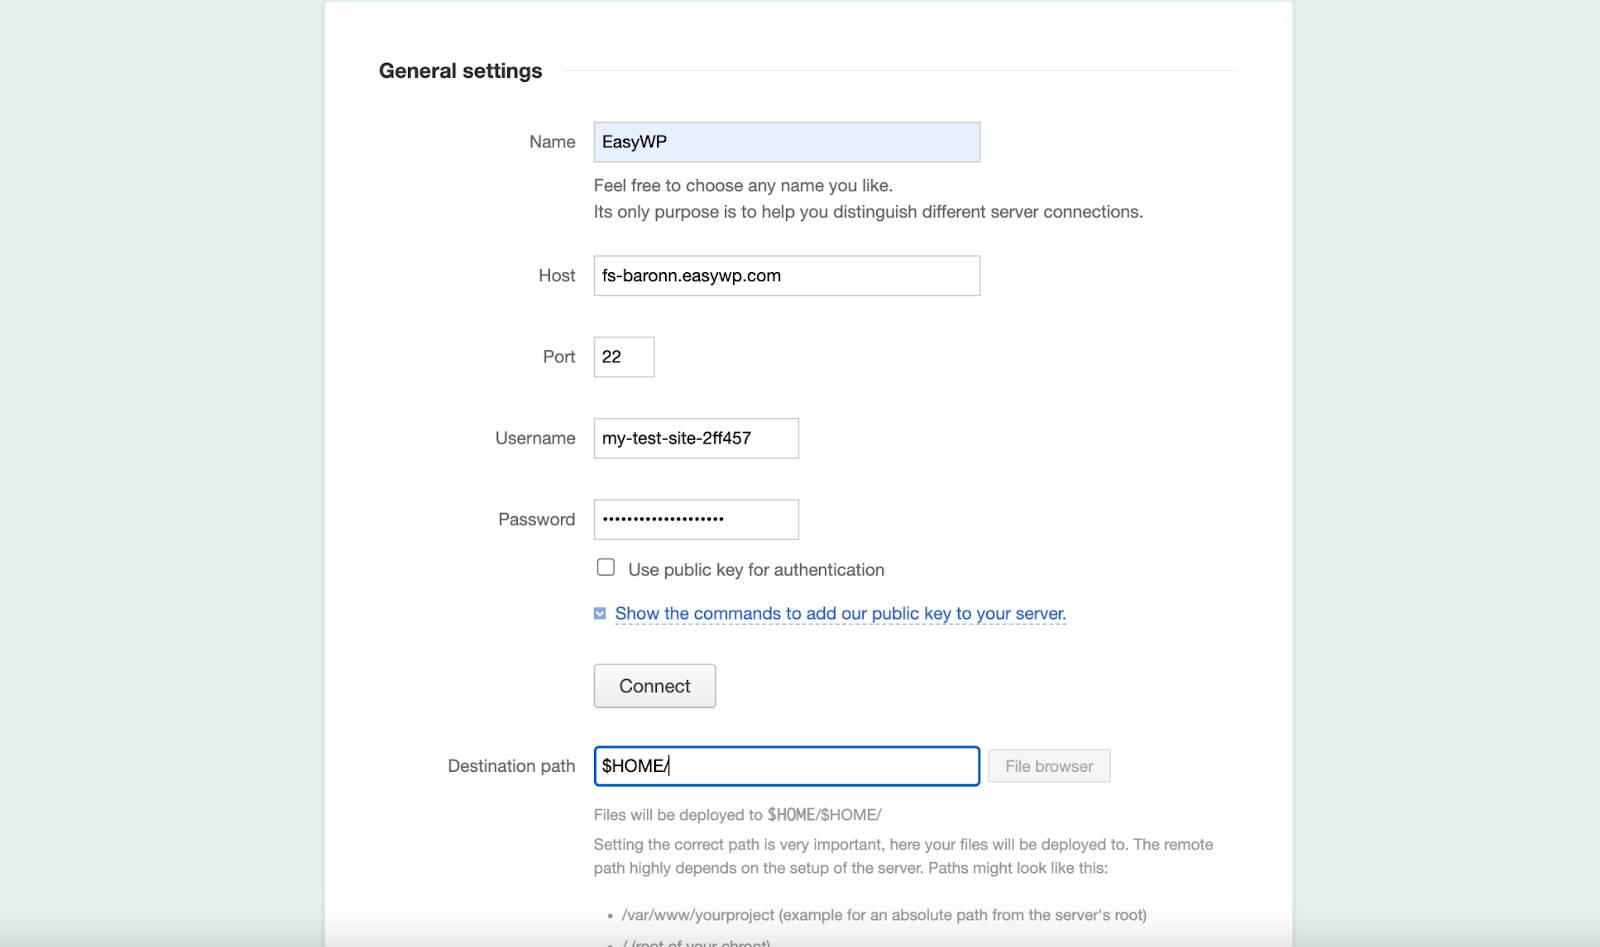
Then, fill up all the following general settings fields:
- Name: Enter the name of your server, EasyWP
- Host: Paste the server data here
- Port: Add port number
- Username: Insert the username of EasyWP SFTP deployments
- Password: Also, paste the password that you copied from the EasyWP WordPress website
Now, hit the “Connect” button.
By filling out fields with the correct info, you will be displayed with a message for a successful connection.
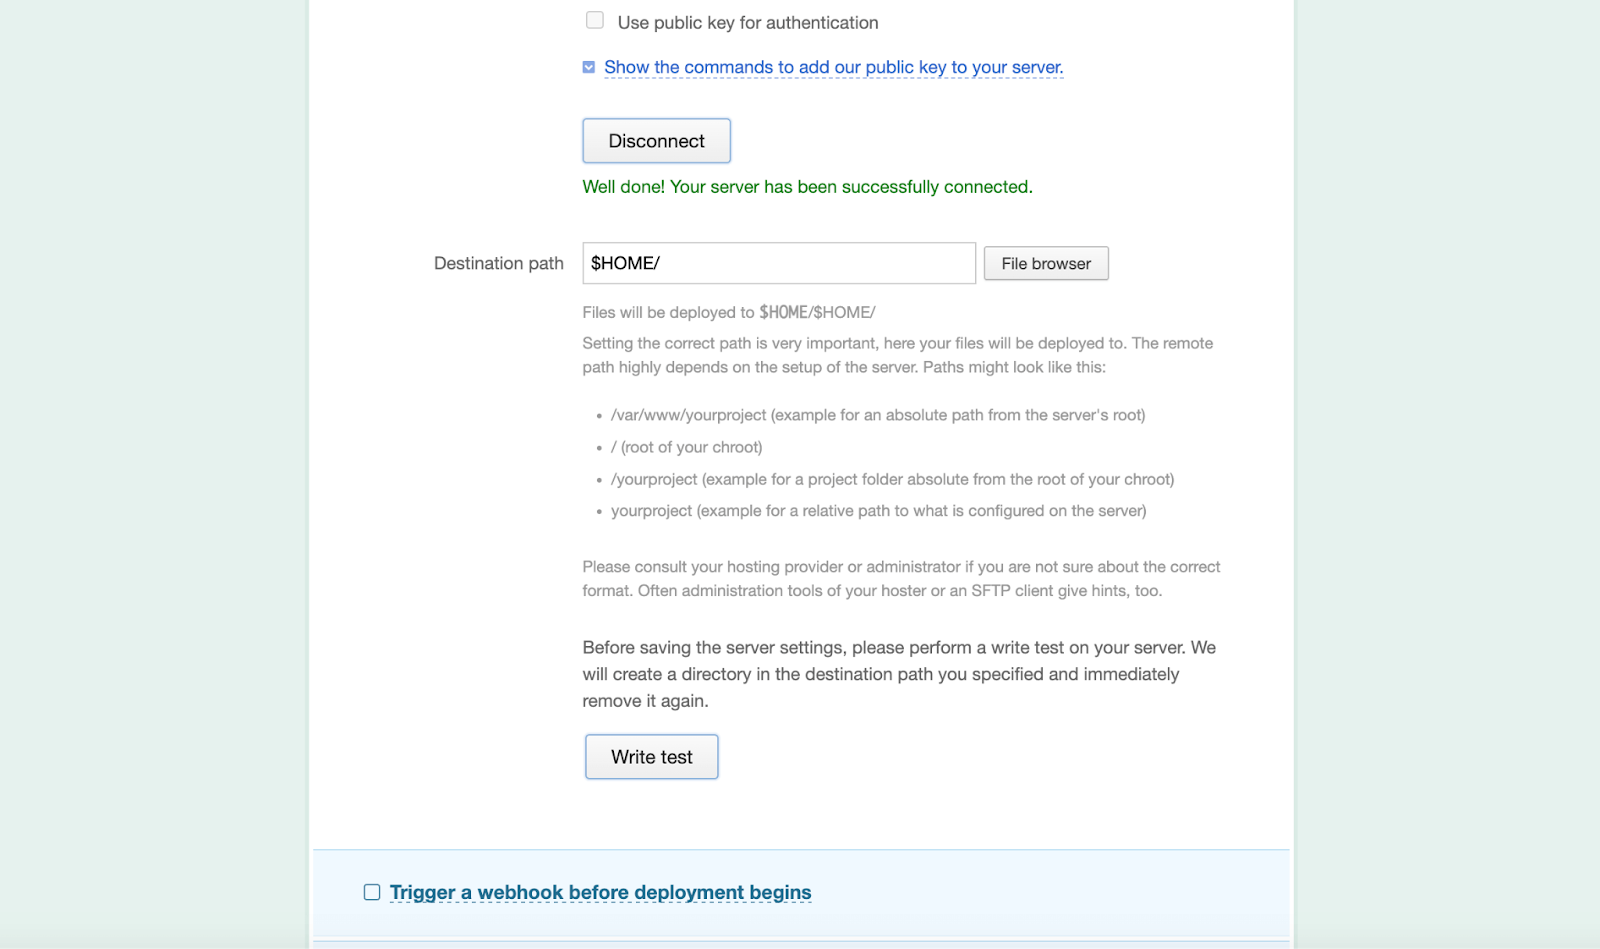
After that, insert the Destination path and click the “Write test” button.

You will again see a success notification for properly integrating EasyWP with DeployBot.
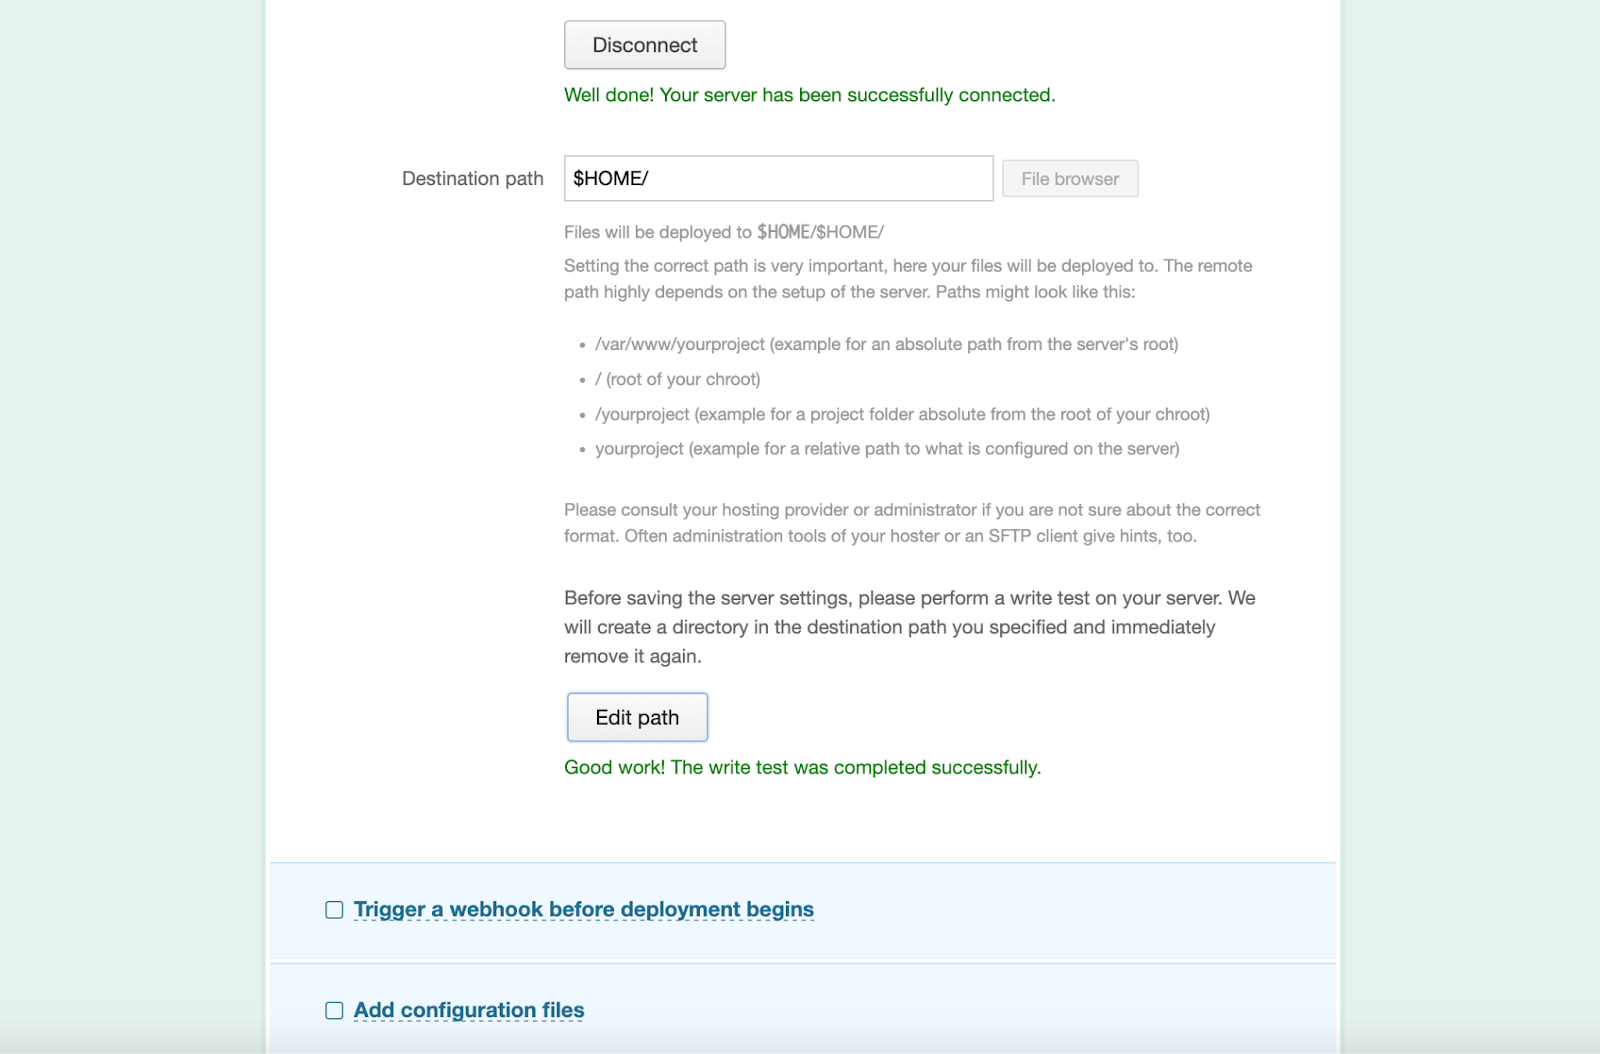
Then, click the “Save” button after performing all successful attempts.

Thus, deployment is completed into EasyWP via SFTP, and you will see the integrated EasyWP server under the “Servers & Settings” tab.

Turn Your Code Deployment Process a Breeze Integrating EasyWP With DeployBot
As you can see, integrating into the EasyWP server for deployment was a walk in the park with DeployBot here. It stands as a powerful solution that simplifies the complexities of code deployment with other servers like Cloudways & WPEngine, too.
Not to mention, its collaborative coding support, multi-server deployment ability, automatic rollback, etc, make it a comprehensive tool for developers and teams alike.
By Following the above steps, you can now seamlessly deploy into the EasyWP hosting provider using DeployBot. But do bear in mind that regular monitoring is also essential for error-free deployment every time. So, boost your code deployment experience using DeployBot with proper observation.
In case of issues with any DeployBot integration, refer to the logs for debugging purposes. Do you still need help with integrating DeployBot into your EasyWP server? Feel free to reach out to our dedicated support team.


