Deploying Into Krystal Using DeployBot (4 Simple Steps)
As a developer, you understand the intricacies of crafting code that powers modern applications. From intricate algorithms to seamless user experiences, every line of code is a testament to your dedication and skill. However, the true challenge often lies in the deployment process – a critical step that can make or break your hard work.
Manual code deployments can quickly become a developer's worst nightmare. Juggling multiple environments, managing version control, and ensuring seamless integration is time-consuming and error-prone. One missed step, and your meticulously crafted application could be left vulnerable to downtime, security risks, or even catastrophic data loss.
But what if I show you a straightforward way to streamline this process, eliminating all your headaches and minimizing the risks associated with manual deployments? This is when you need the dynamic duo of Krystal, a high-performance hosting platform, and DeployBot, a powerful deployment tool that automates the entire process.
Imagine a universe where you can confidently push your code, knowing that a reliable tool like DeployBot will seamlessly handle the deployment process. You will no longer need to stay awake late at night to transfer files or frantically troubleshoot deployment issues manually.
With this innovative solution, you can sit back and watch as your code is automatically deployed to your Krystal or any other popular hosting providers like EasyWP, Cloudways, WPEngine, WordPress.com, Flywheel, Kinsta, Hostinger or Pagely., ensuring a smooth and consistent experience for your users.
But the benefits don't stop there. By combining the power of Krystal and DeployBot, you'll also gain access to robust features like zero-downtime deployments, rollback capabilities, and comprehensive deployment logs – all designed to give you peace of mind and keep your application running smoothly.
In this tutorial, I will dig deep into the intricacies of deploying into Krystal using DeployBot, guiding you with some easy steps and sharing best practices for streamlining your workflow.
So let’s dive in to find how you can easily deploy into the hosting server Krystal using DeployBot, but before that, let’s begin by understanding the basics…
Why Use DeployBot for Your Code Deployment
DeployBot offers a feasible and effortless code deployment process with its highly functional features.
Here are the core advantages of leveraging DeployBot as a code deployment tool:
- Best for one-click code deployment on multiple servers.
- Both Manual and Automatic deployments are possible in DeployBot.
- You will get a notification for every deployment.
- New Relic and Bugsnag integrations are available to analyze performance and application stability.
- Ensures quick rollback for problematic releases.
- The server connection is super smooth and easy.
- Eliminates the need to track changes and upload files manually.
- Allows you to monitor deployment processes from time to time.
4 Simple Steps to Deploy Into Krystal Using DeployBot
Building an easy code deployment method is completely impossible without the right tool. So, here we have used the most user-friendly code deployment tool, DeployBot, and demonstrated the complete code deployment process with a robust hosting solution, Krystal.
Now, if you’re a new user, follow this guide from the start. In case you already have a repository and server connected with DeployBot before then, simply skip to step 4.
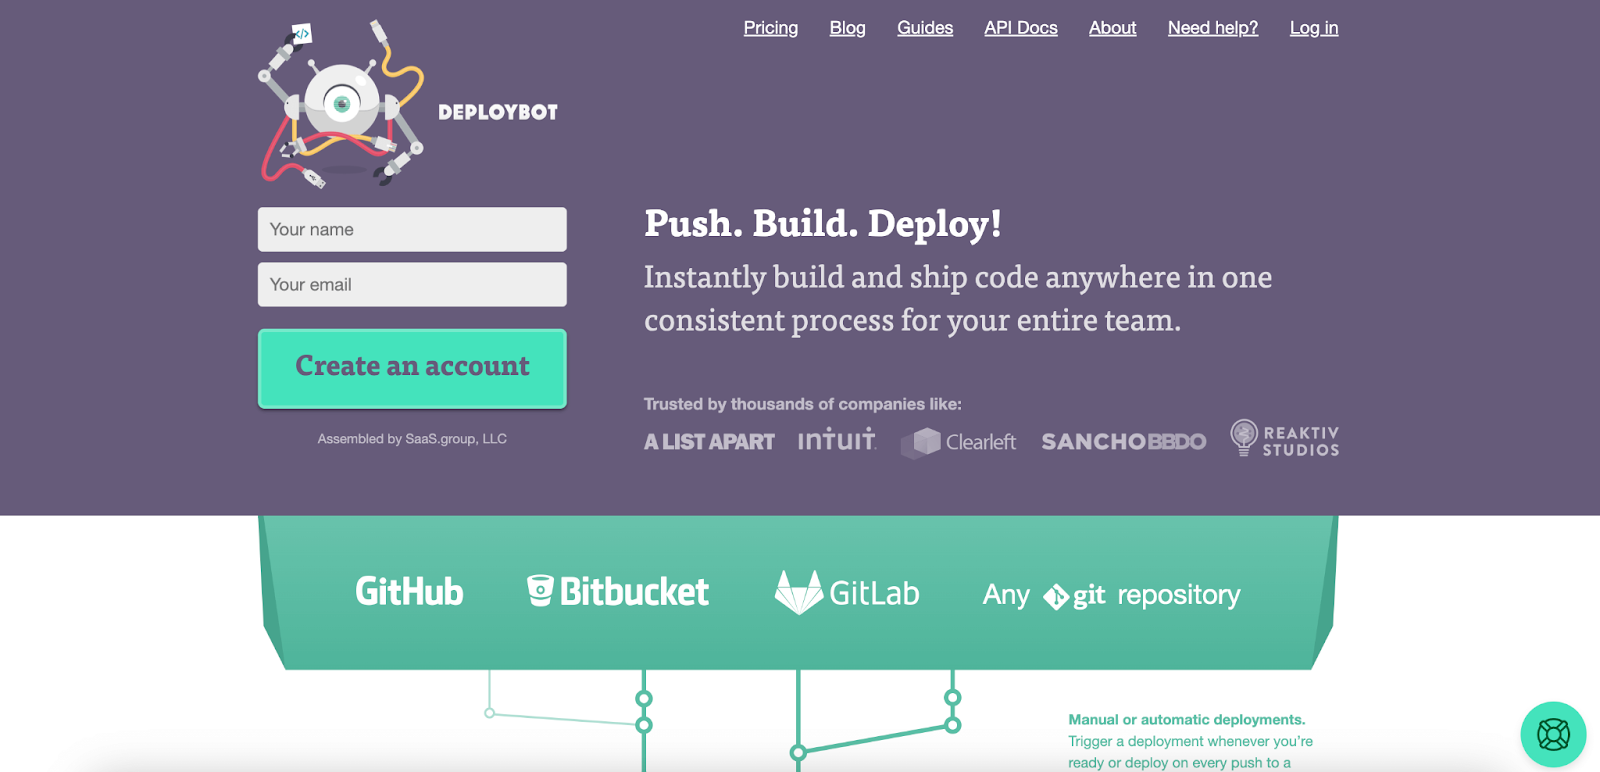
Step 1: Create an account on DeployBot
To get started with server configuration, you have to first register on DeployBot using your name and email. So, go to DeployBot and create an account by filling out “Your name” & “Your email” fields. After that, press the “Create an account” button to carry out the next step for deploying Krystal into DeployBot.
Step 2: Set up a repository in DeployBot
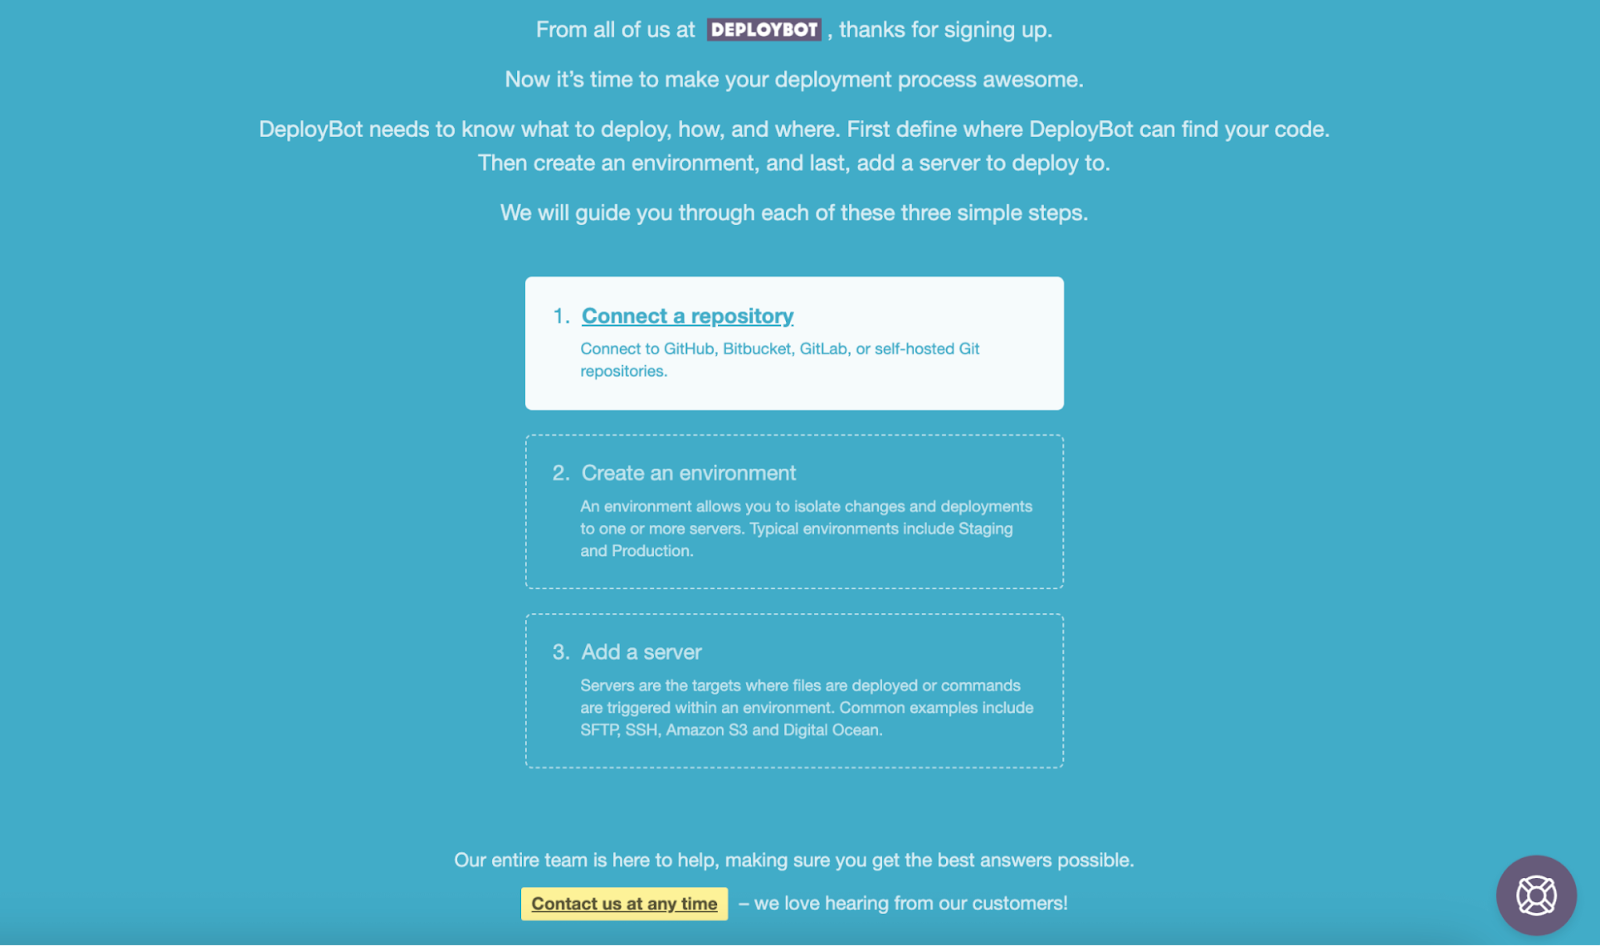
After creating an account on DeployBot, you will be redirected to the configuration to set up a smooth deployment process. You have to undergo three steps one by one. First, start with the repository, which you can configure by pressing the “Connect a repository” option.
For this time, we’ll connect the Codebase repo with DeployBot. To do that, click “Others” and choose “SSH key” as the Authentication method. Now, click the “Download key” text.

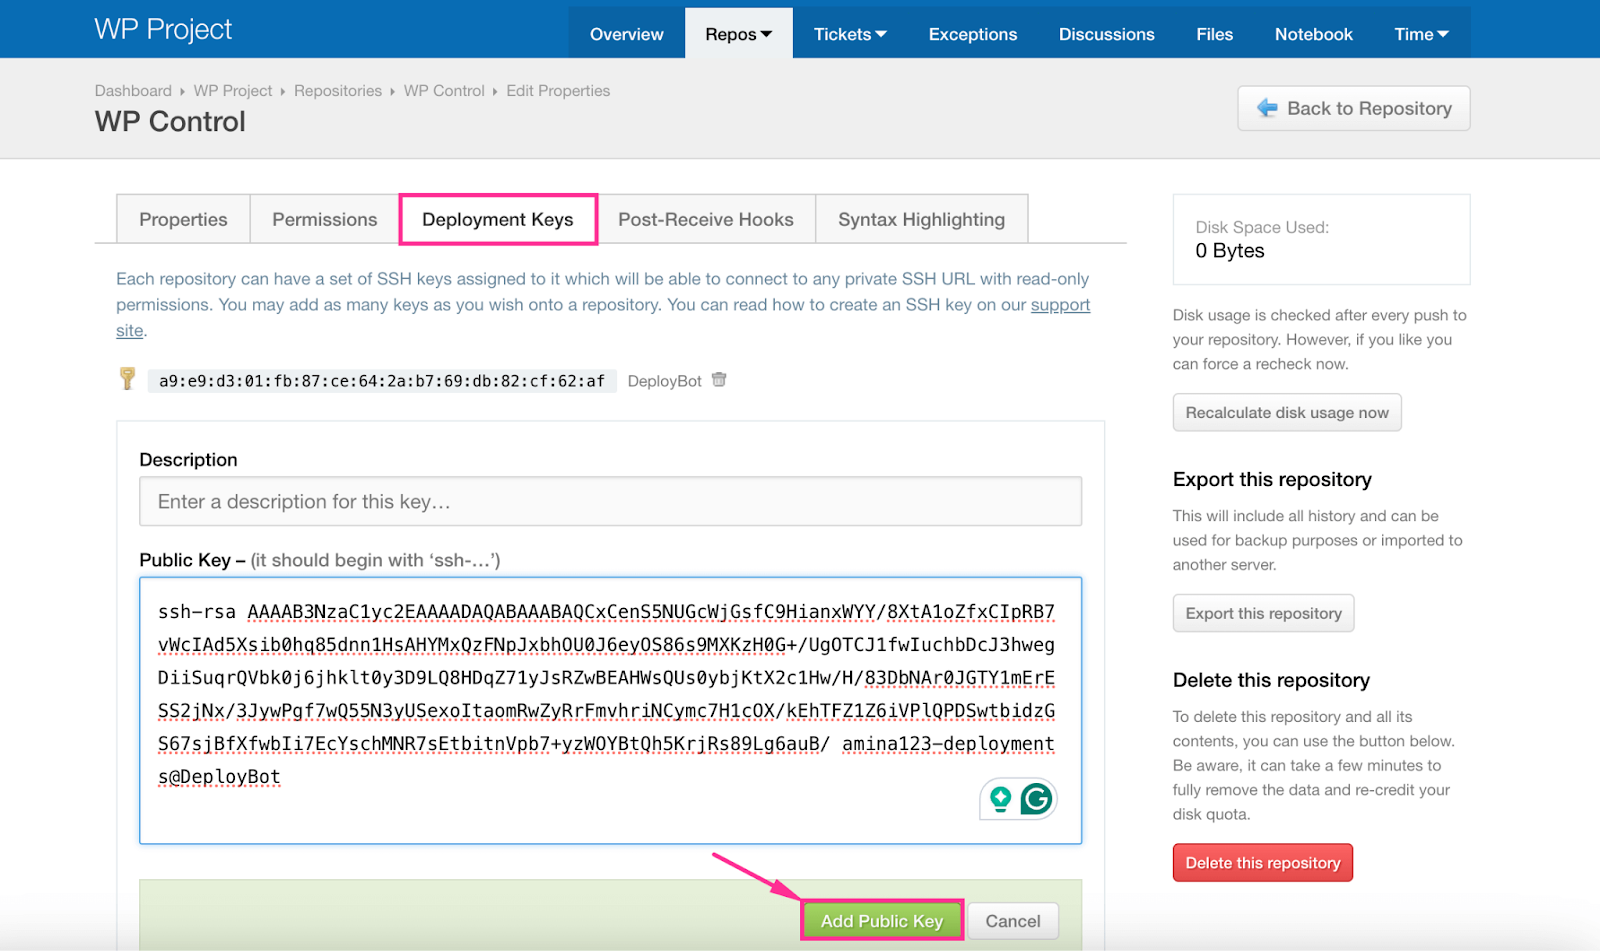
After that, visit the repo that you want to connect with DeployBot and navigate to the “Deployment Keys” tab. Here, add the downloaded public key and press the “Add Public Key” button.
Then, copy the “SSH Transport” from the drop-and-down menu.

Now, paste it into the “Repository URL” field and choose “SSH key” as the authentication method. After that, enter the Title and Color label for your repo. Then, hit the “Connect” button to wrap up the repository connection.

Step 3: Build an environment for your deployment process
In the third step, you have to create an environment by hitting the second option.

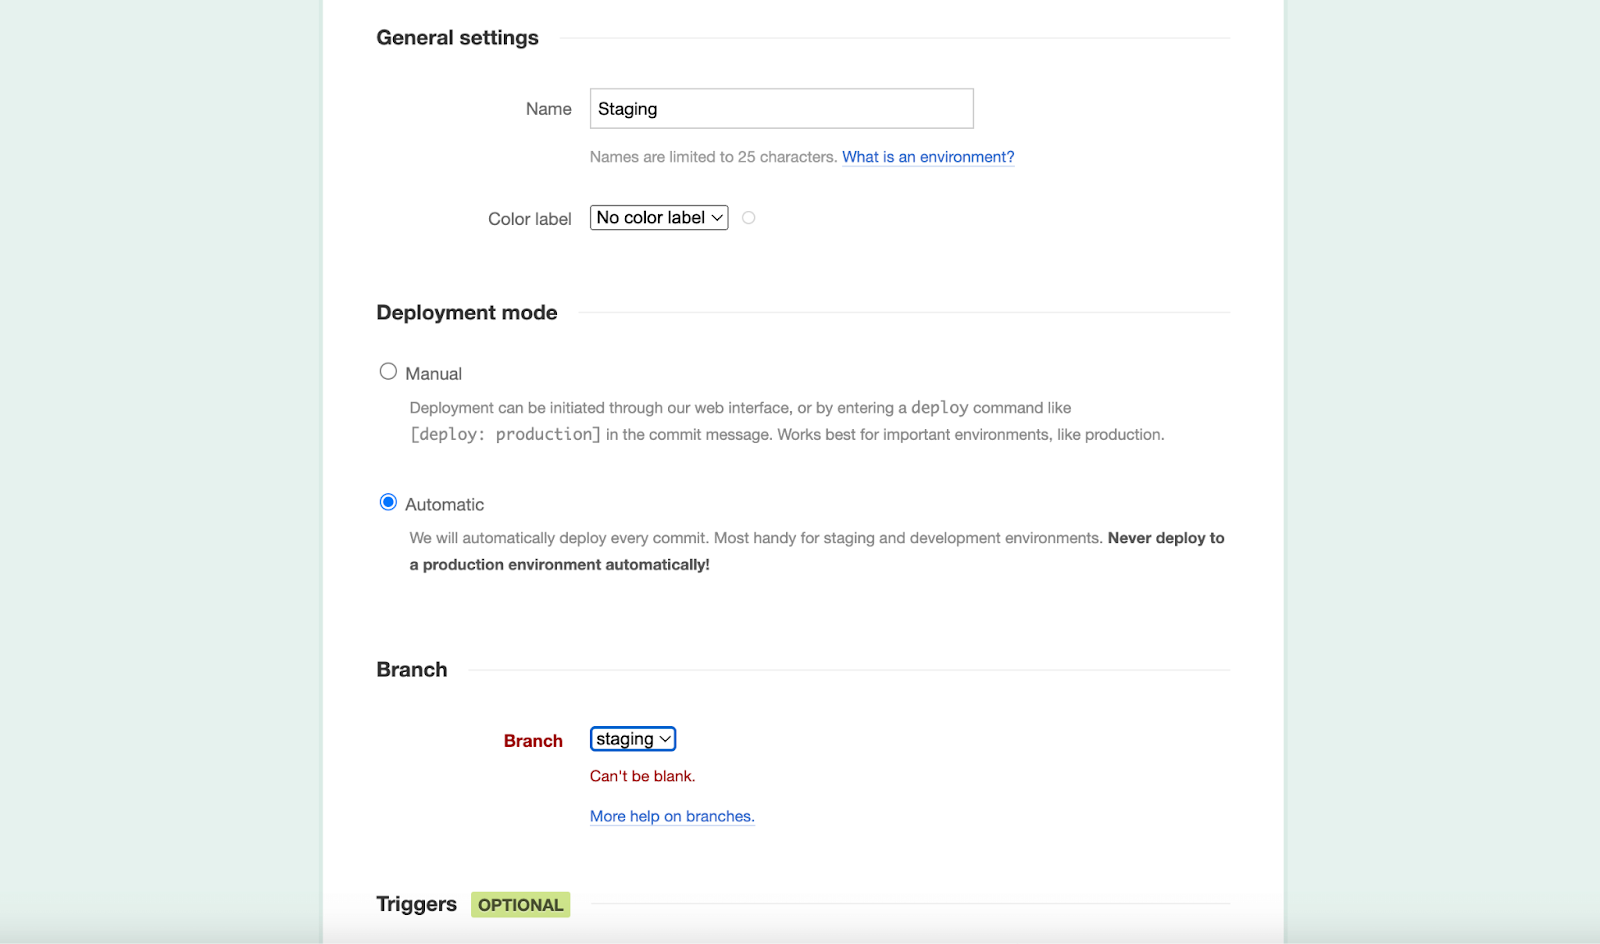
After clicking the “Create an environment” option, it will take you to the settings of building an environment on DeployBot. Here, you need to fill out the following fields:
- General Settings:
- Name: Enter the name of your environment.
- Color: Select a color for your deployment environment.
- Deployment mode: You have to select either Manual or Automatic deployment mode. Choose the deployment mode that suits your environment.
- Manual: It means in-person assistance will be required to initiate the deployment process. Manual deployment is suitable for the production environment.
- Automatic: This deployment system can take place automatically, which is best for development and staging environments.
- Branch: Select the type of branch you have created in the repo.
After configuring the above fields, press the “Save” button.
Step 4: Connect Krystal with DeployBot
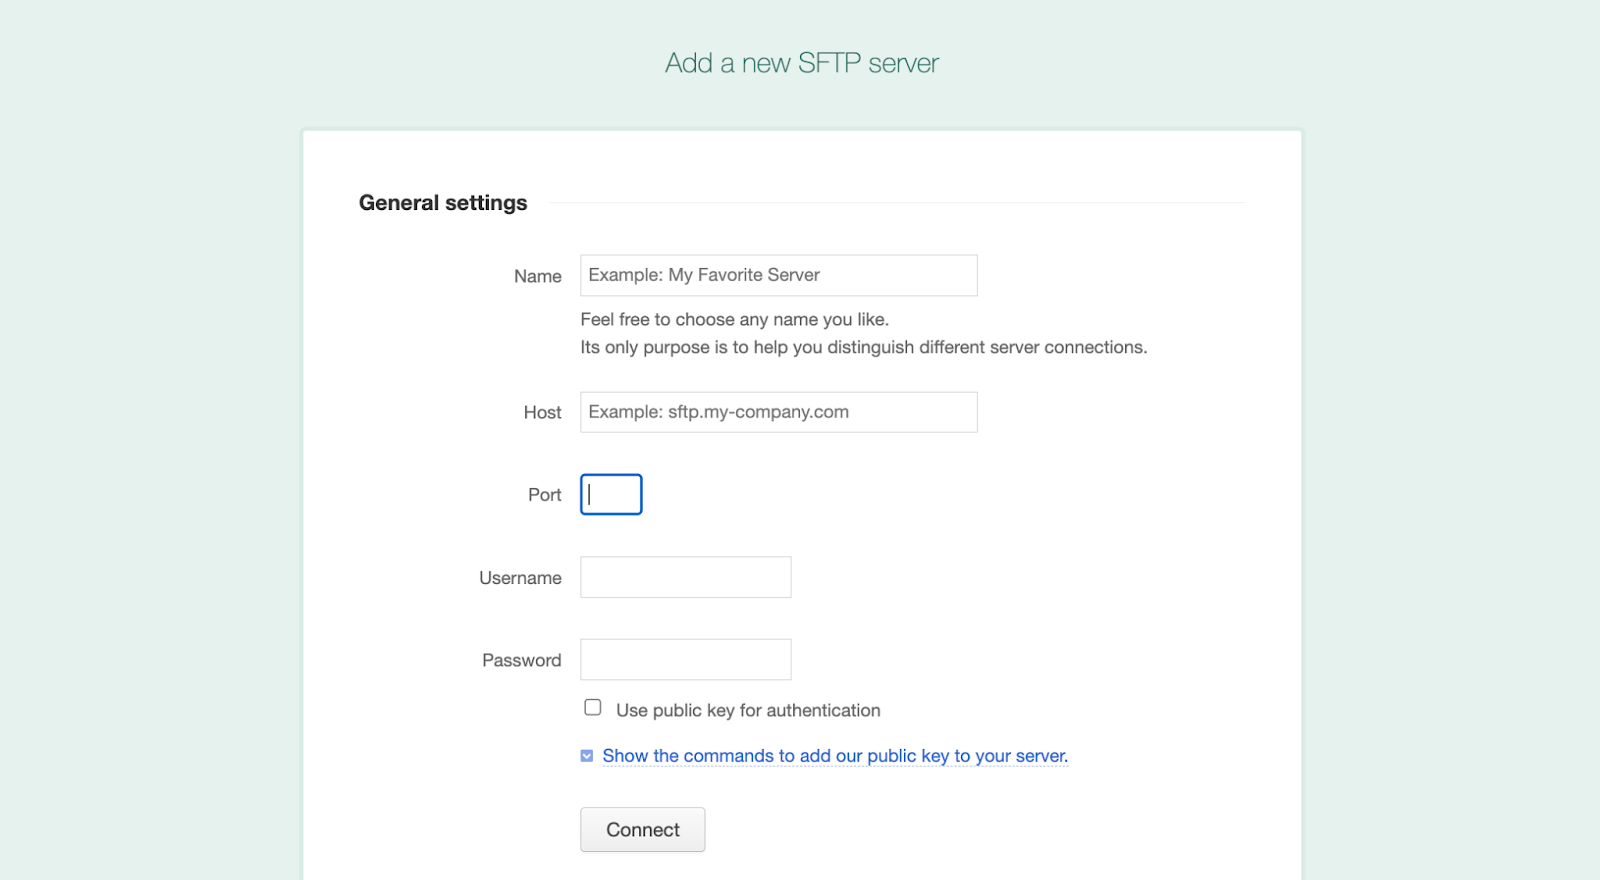
After building a perfect environment for your deployment process, you need to make the necessary settings for deploying into Krystal using DeployBot. To do that, navigate to “Servers & Settings” and press the “Add a server” button. After that, select “SFTP” which will redirect you to the settings tab. Here, you need to insert some credentials that you will find from Krystal.
Now, go to Krystal and click on “Manage” for the site that you want to connect with DeployBot. Then, you will get to see the SFTP credentials for this site.

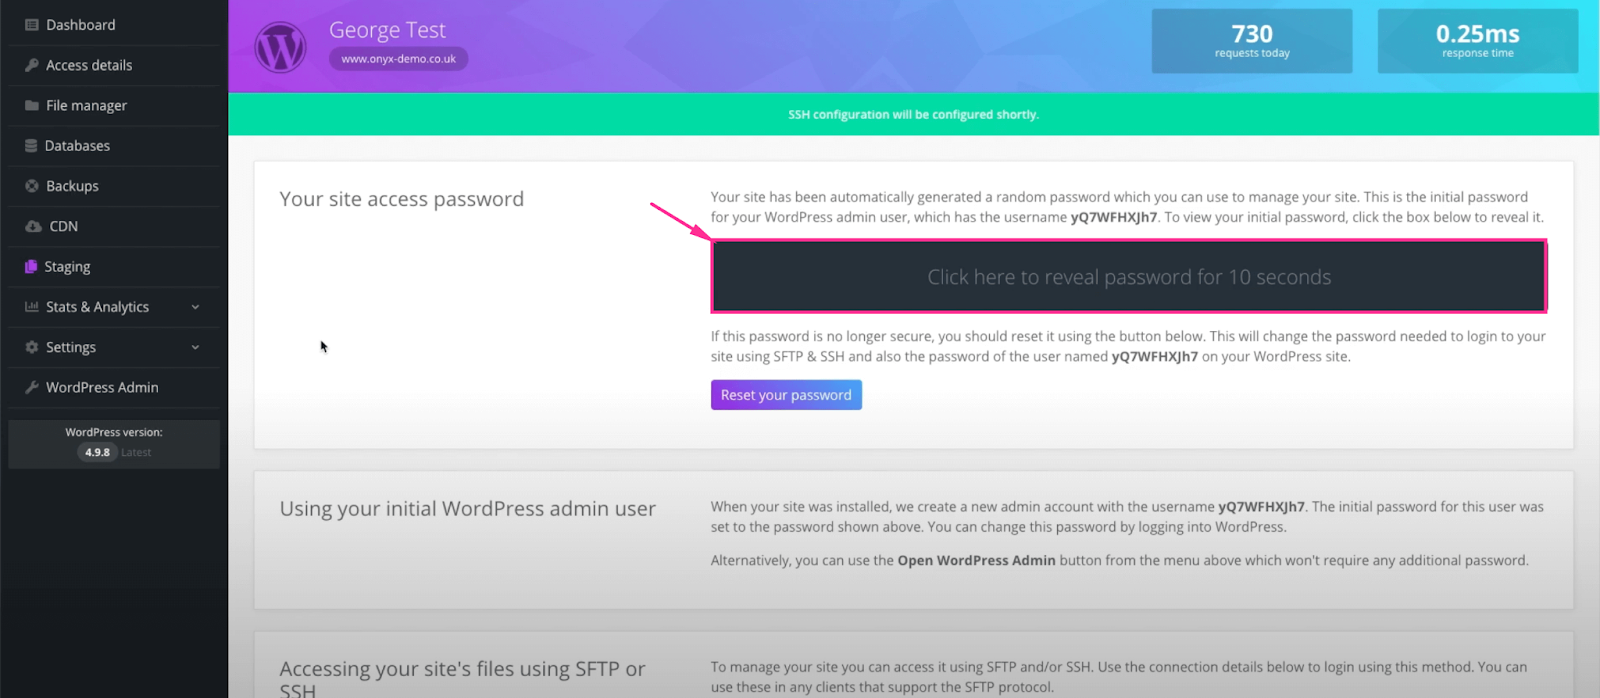
Navigate to the “Access Details” tab and scroll down until you see SFTP credentials. Now, hit “Enable SSH and SFTP access”. This will activate the Hostname, Port, and Username. 
For the Password, you need to scroll up and press the “Click here to reveal the password for 10 seconds” button. Thus, you will get to see the password for SFTP Connect.
Now, copy these credentials and paste Host, Port, Username, and Password in the selected fields after filling out the “Server Name” with Krystal. Then press the “Connect” button.
After that, insert the “Destination path” and hit “Write test” to connect the server with DeployBot. This will show a successful connection notification.
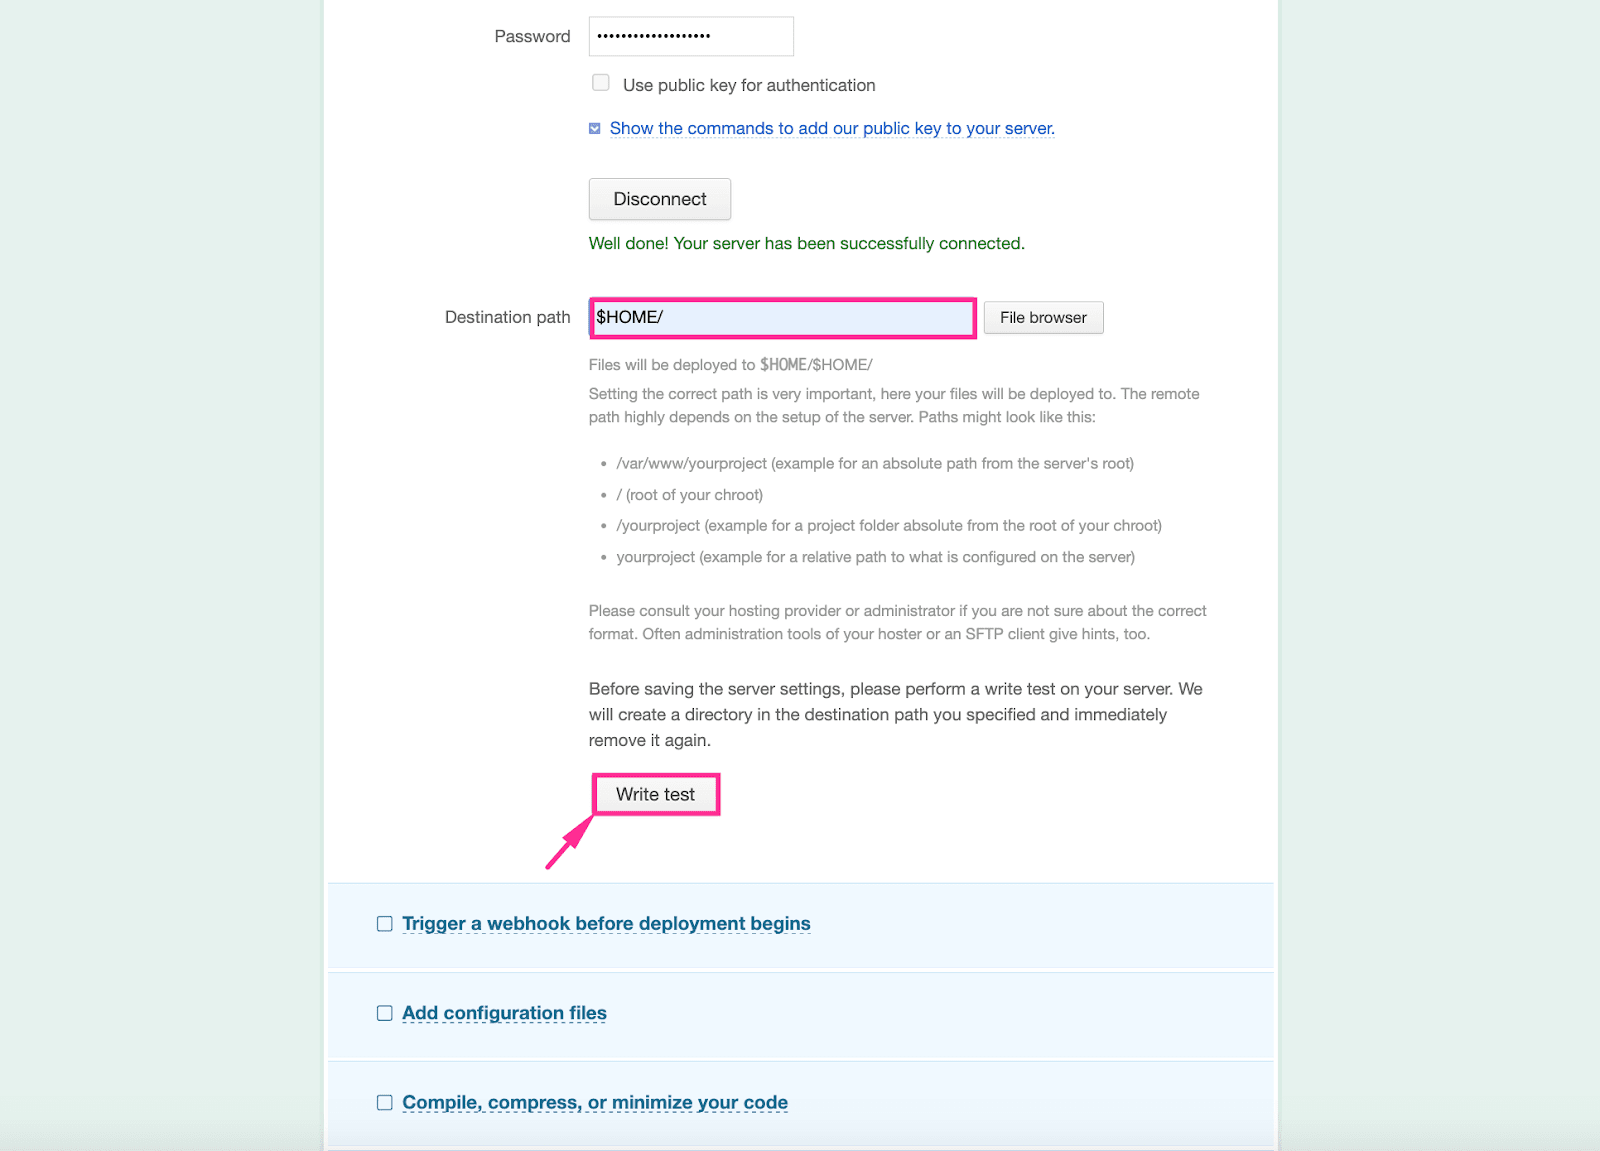
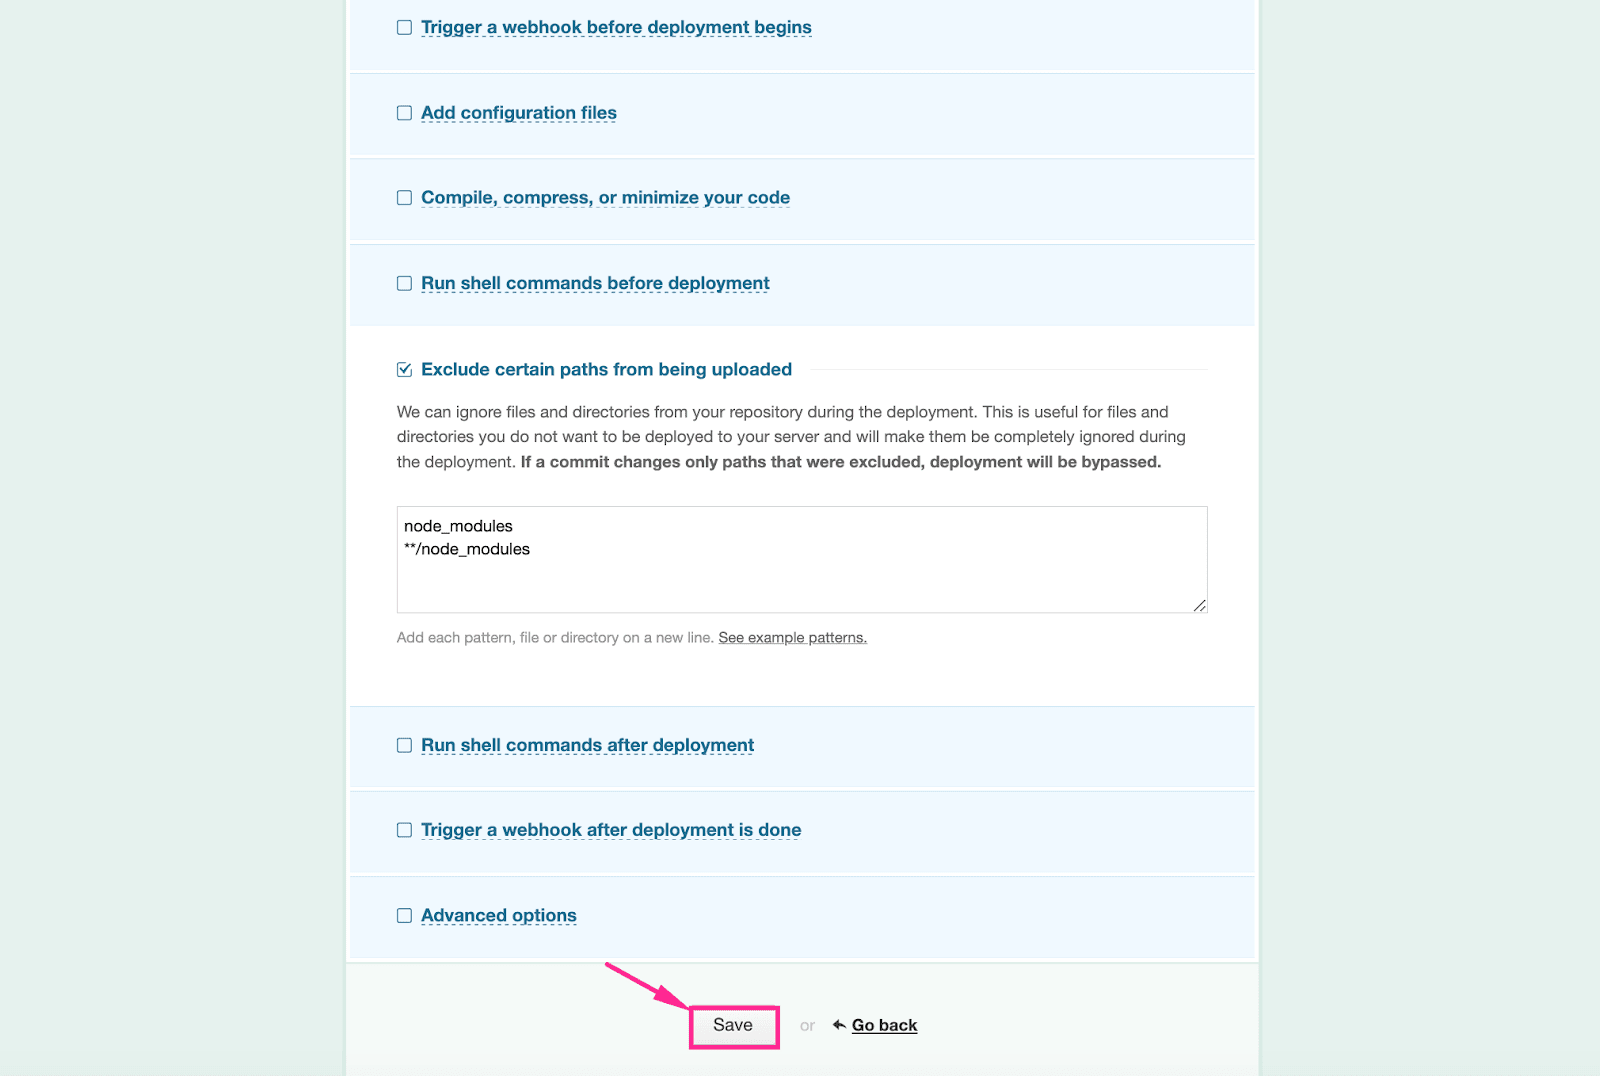
Then, scroll down and hit the “Save” button to complete the last configuration of connecting Krystal with DeployBot.
Unleash the Power of Hassle-Free Code Deployment Integrating Krystal Hosting With DeployBot
With Krystal's rock-solid hosting system and DeployBot's deployment wizardry, you've just upgraded your development game to a new level. Those deployment headaches and complexities? Consider them ancient history now. You can now confidently say hello to an era where your focus shifts back to what truly drives you – creating exceptional applications that shine.
Moreover, by combining DeployBot with Krystal's dependable hosting environment, you've opened the door to a world of features built to make your deployment journey a breeze. From collaborative coding support to simultaneous rocket-fast deployments across various servers and safety nets like automatic rollbacks, DeployBot stands tall as the hero in this automation saga.
As you've followed my tutorial guide through setting up this dream team of automation tools, your path toward effortless code deployments is now paved, smooth, and clear. But remember, even with automation at play, keeping a vigilant eye on your deployments is the unsung hero behind snag-free launches every time. Dive into those detailed logs for insights and be ready to tackle any challenge head-on; after all, we're just a message away if you need backup or guidance.
With Krystal’s reliability and DeployBot's finesse by your side, you're not just deploying code anymore; you're unleashing a tidal wave of efficiency and peace of mind. So go ahead and let your creativity soar, knowing that your deployment process is in safe hands.
If you ever run into any hiccups during the integration or deployment dance, don't sweat it! DeployBot got your back with its trusty logs. They're like little detectives that dig deep to uncover what's causing the trouble so you can swoop in like a superhero and fix things up in a jiffy.
Also, don't forget about our awesome support squad – they're always on standby, ready to jump in and rescue you. Whether you need a hand setting up the integration, tweaking those configurations, or just some extra guidance on how DeployBot works its magic, we're only a message away. We've got your back every step of the way to make sure you rock this deployment journey.


