Atomic deployments for DigitalOcean
DigitalOcean is a great cloud hosting provider that allows you to set up a superb environment for your application for a really affordable price. They also have amazing community resources where you can find the answer to almost any question about setting up or running your own servers.
We’ve had a slick integration with DigitalOcean we launched very early in the life of DeployBot. It allows you to start deploying to your droplets in minutes and it was and still is a huge success. Recently we launched a new feature extending our SFTP deployments, called atomic SFTP deployments, that allows you to deploy a really complex application without causing any downtime or service interruptions. Today, we are extending support for atomic deployments to DigitalOcean integration as a new deployment server type called Atomic DigitalOcean.
You can read more about atomic deployments in the original blog post, so I’m not going to repeat it all here. If you haven’t heard about them, I definitely recommend you check it out. It might just change the way you deploy forever and you will not be sorry. Instead of repeating the original blog post, in this post I will guide you through the process of integrating with DigitalOcean and setting up atomic deployments.
First, you will need a DeployBot account, unless you have it already. With our special offer it’s only 99 cents for the first three months, so there’s no excuse to not get one right now. Next, we’re going to need you to find your DigitalOcean API key.

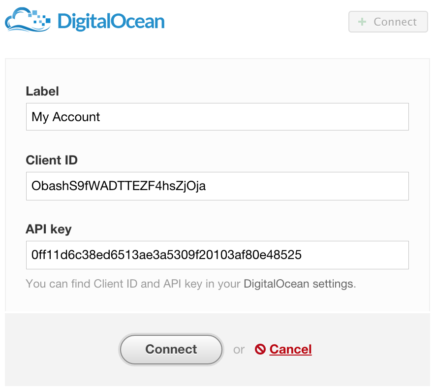
Once you got the API key, set up the integration in DeployBot on Integrations page. This will add our public key to your DigitalOcean account and allow us to connect to the API so that we can fetch the list of droplets for you. Please note, that although our public key will be added to your account, it will not be added to the existing droplets. You will however be able to download and add that key manually later in the process.
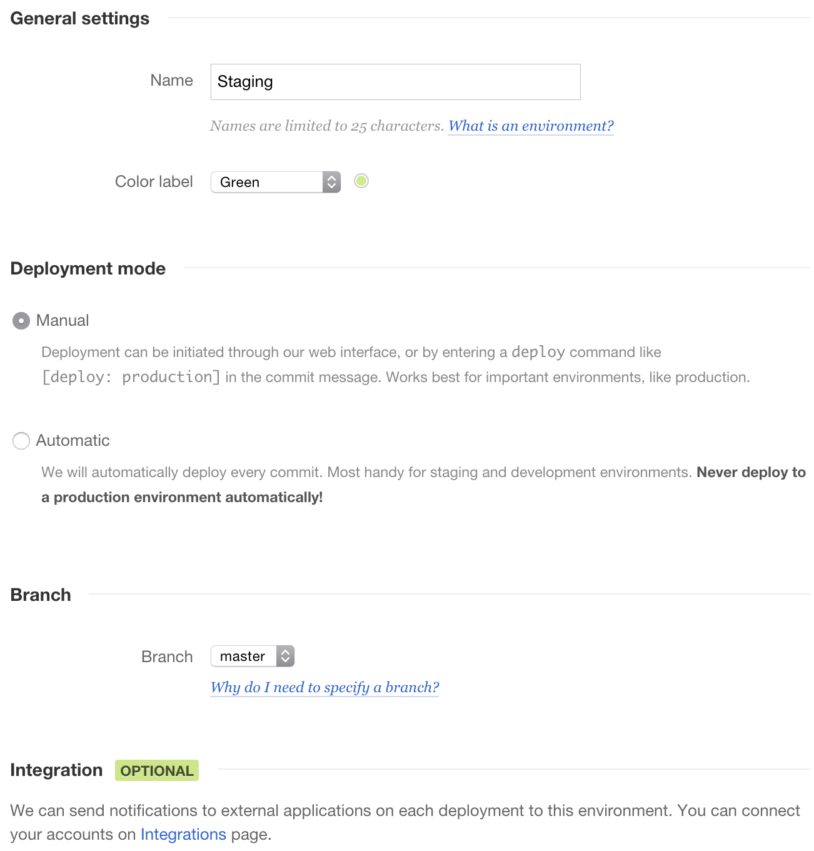
After that, you can move on to create your first deployment environment.Below is a sample environment we’re going to create. Some of the important things that you can select here are branch name that we will deploy from, mode of deployment — manual or automatic and whether you want to trigger any integrations upon deployment: like Slack, Hipchat, Campfire, New Relic or Bugsnag.


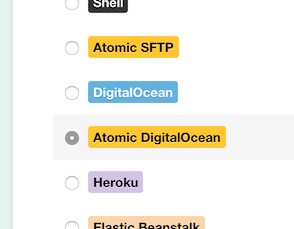
Now that our environment is set up, let’s add a new server. Server is a way to to define where your code will be pushed to and in what form. There are many server types to pick from, but right now you need Atomic DigitalOcean.
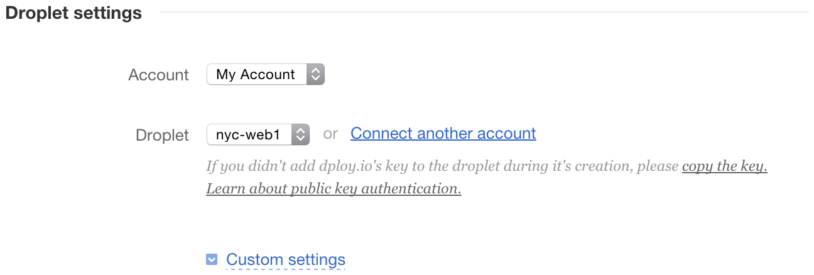
Time for the most interesting part. In the server form you will need to pick a name for a new server (to your liking) and select a droplet you want us to deploy to.

Here is where you will be able to copy the key you need to add to your droplet’s ~/.ssh/authorized_keys file in case you are deploying to a droplet created before you integrated with DeployBot. In custom settings you will also be able to pick a username for us to use and a port your SSH is running on, among other things.
At this point, everything specific to DigitalOcean setup is done. After the settings we’ve shown here, there will be fields to setup application path and commands that you can use, and this is all described in a fair amount of details in our original atomic deployments blog post, so please check it out.
Once you’re done setting up, you will have a really reliable deployment process that protects yourself and your users from the unexpected complications during updates. We also think this way of deploying should really complete your DigitalOcean hosting experience, as you will not only get an inexpensive yet performant cloud setup, but also a great interface for deploying to it, in the best traditions of PaaS systems like Heroku or Elastic Beanstalk.
Please let us know what you think about this integration or if you hit any issues trying to set things up, we’re always glad to help!


