New Feature released: Server Page and File Browser
Our developers are constantly working on improving DeployBot and creating a great user experience. As a freelancer or small agency you probably know a few things about UX design and how important it is to turn complex problems into simple solutions. In our opinion, good UX design also means that the application interface offers help and guidance during the setup process. In DeployBot that includes configuring repositories, environments and servers.
After putting some work into the navigation design and improving the DeployBot sidebar, we added a feature which lets you view detailed log files of your deployments. We've now taken a step back to improve the configuration process. The setup of servers and the destination path for your deployments still happens in one configuration dialog, but in two separate steps.
Connect a Server
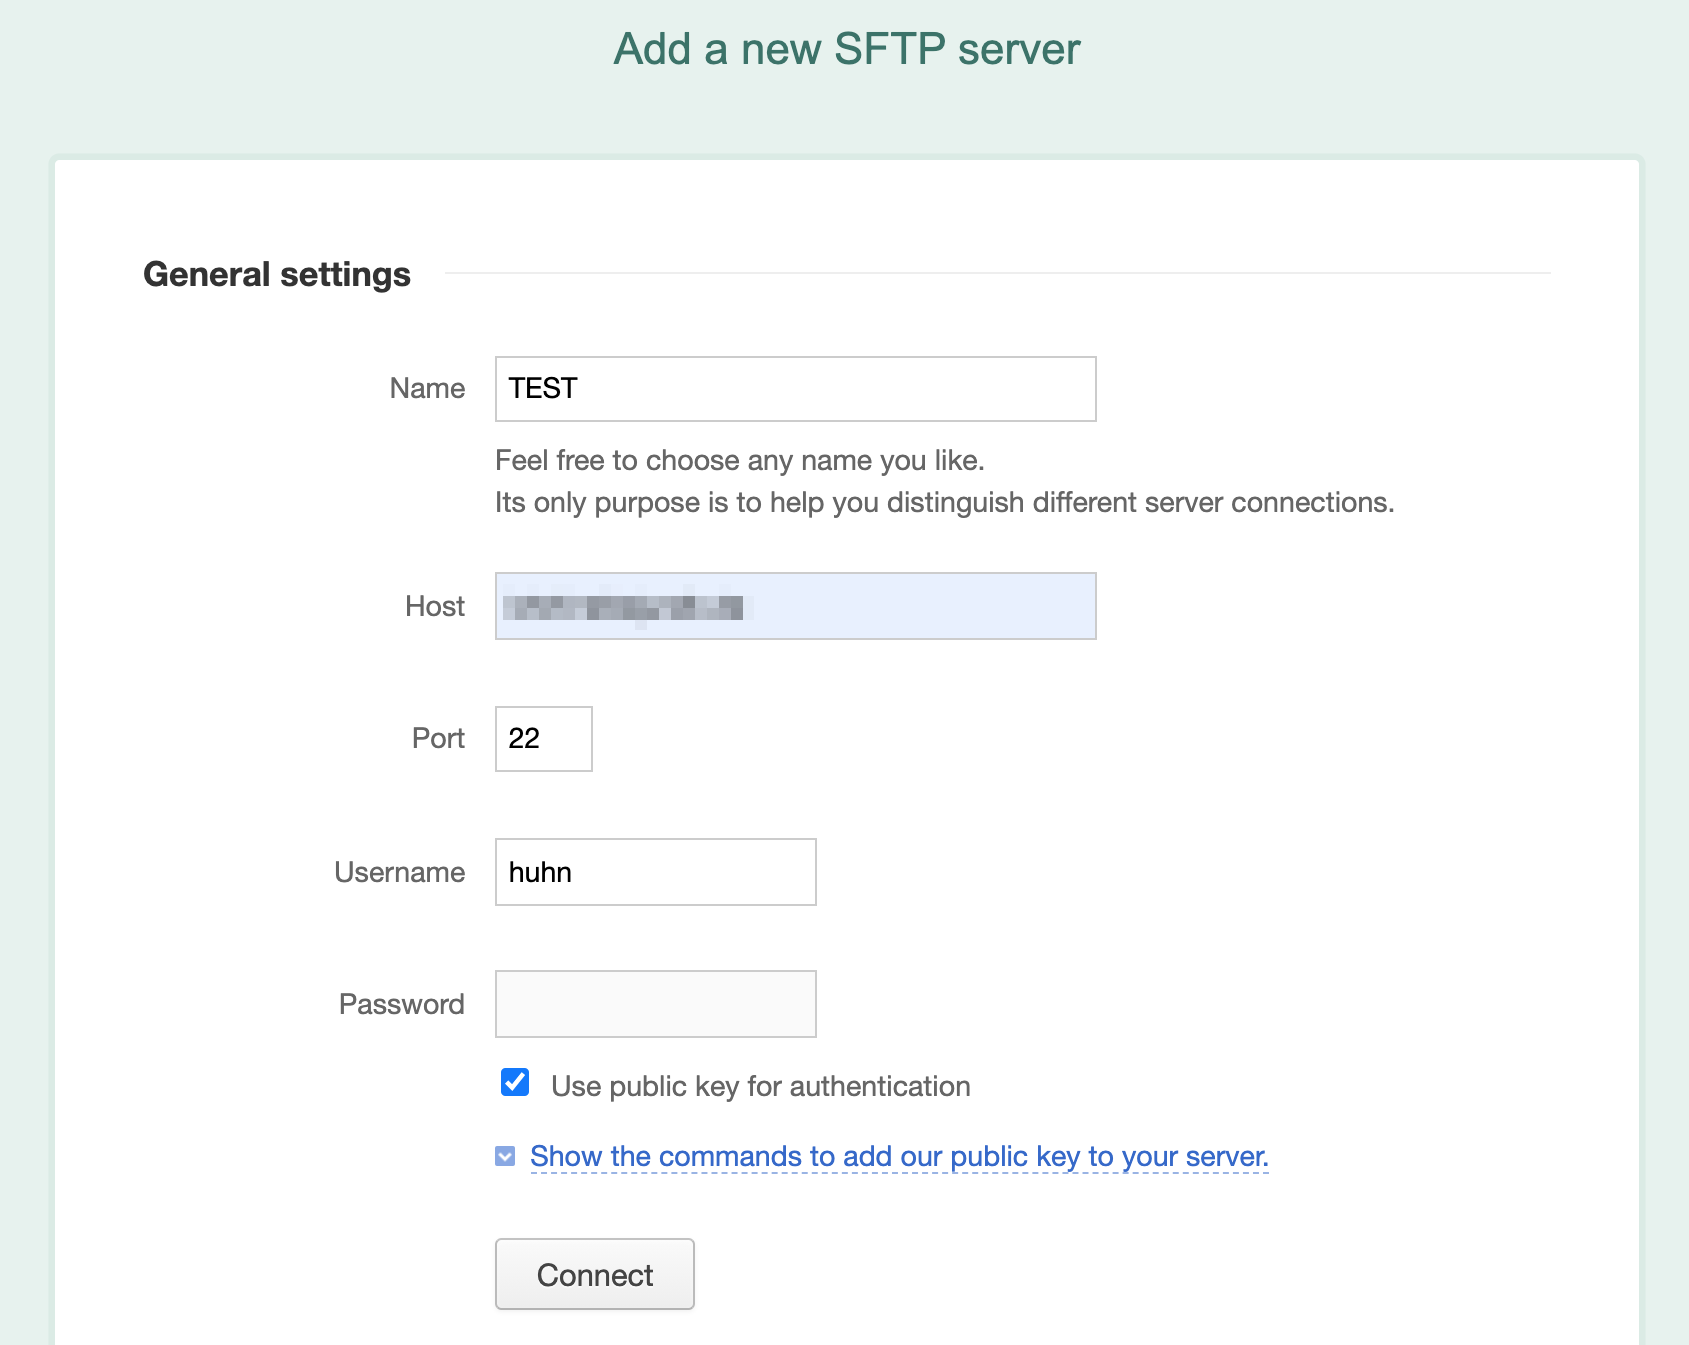
So, let's get straight to the point and have a look at the new setup. After you've decided to add a new server to an environment (Atomic SFTP or SFTP), you enter a name, the host name or IP address, the port number, and your credentials – nothing new here. Before you can define the destination path for your deployments, though, you have to click the Connect button to make sure DeployBot can connect to the remote system.

DeployBot is running a test and checks if it can log into the remote machine with the provided user credentials. If everything is correct, you should see the message:
"Well done! Your server has been successfully connected."
If not, please make sure that the username and password match. If you’re using a public SSH key for authentication and see an error message in DeployBot, double check that the key has been added to the file ~/.ssh/authorized_keys and that the permissions are set correctly.
Note: Keep in mind that you can only modify a server’s settings when you’re disconnected. If you’d like to change the credentials or the name shown in the dashboard, please click the Disconnect button first, change the settings, and re-connect.
DeployBot is here to help you: it comes with a number of integrations for external tools and can quickly deploy your work to different environments. You can find an ever growing collection of beginners’ guides on our website:
Enter the Destination Path
Only when DeployBot is connected to the server, you can enter the destination path. Please be extra careful: this is where your files will be deployed to. The standard setup is your home directory on the remote machine ($HOME/), so you probably have to adjust this and enter the path to the website you want to deploy.
If you already know the exact path name, you can simply enter it in the field Destination path.
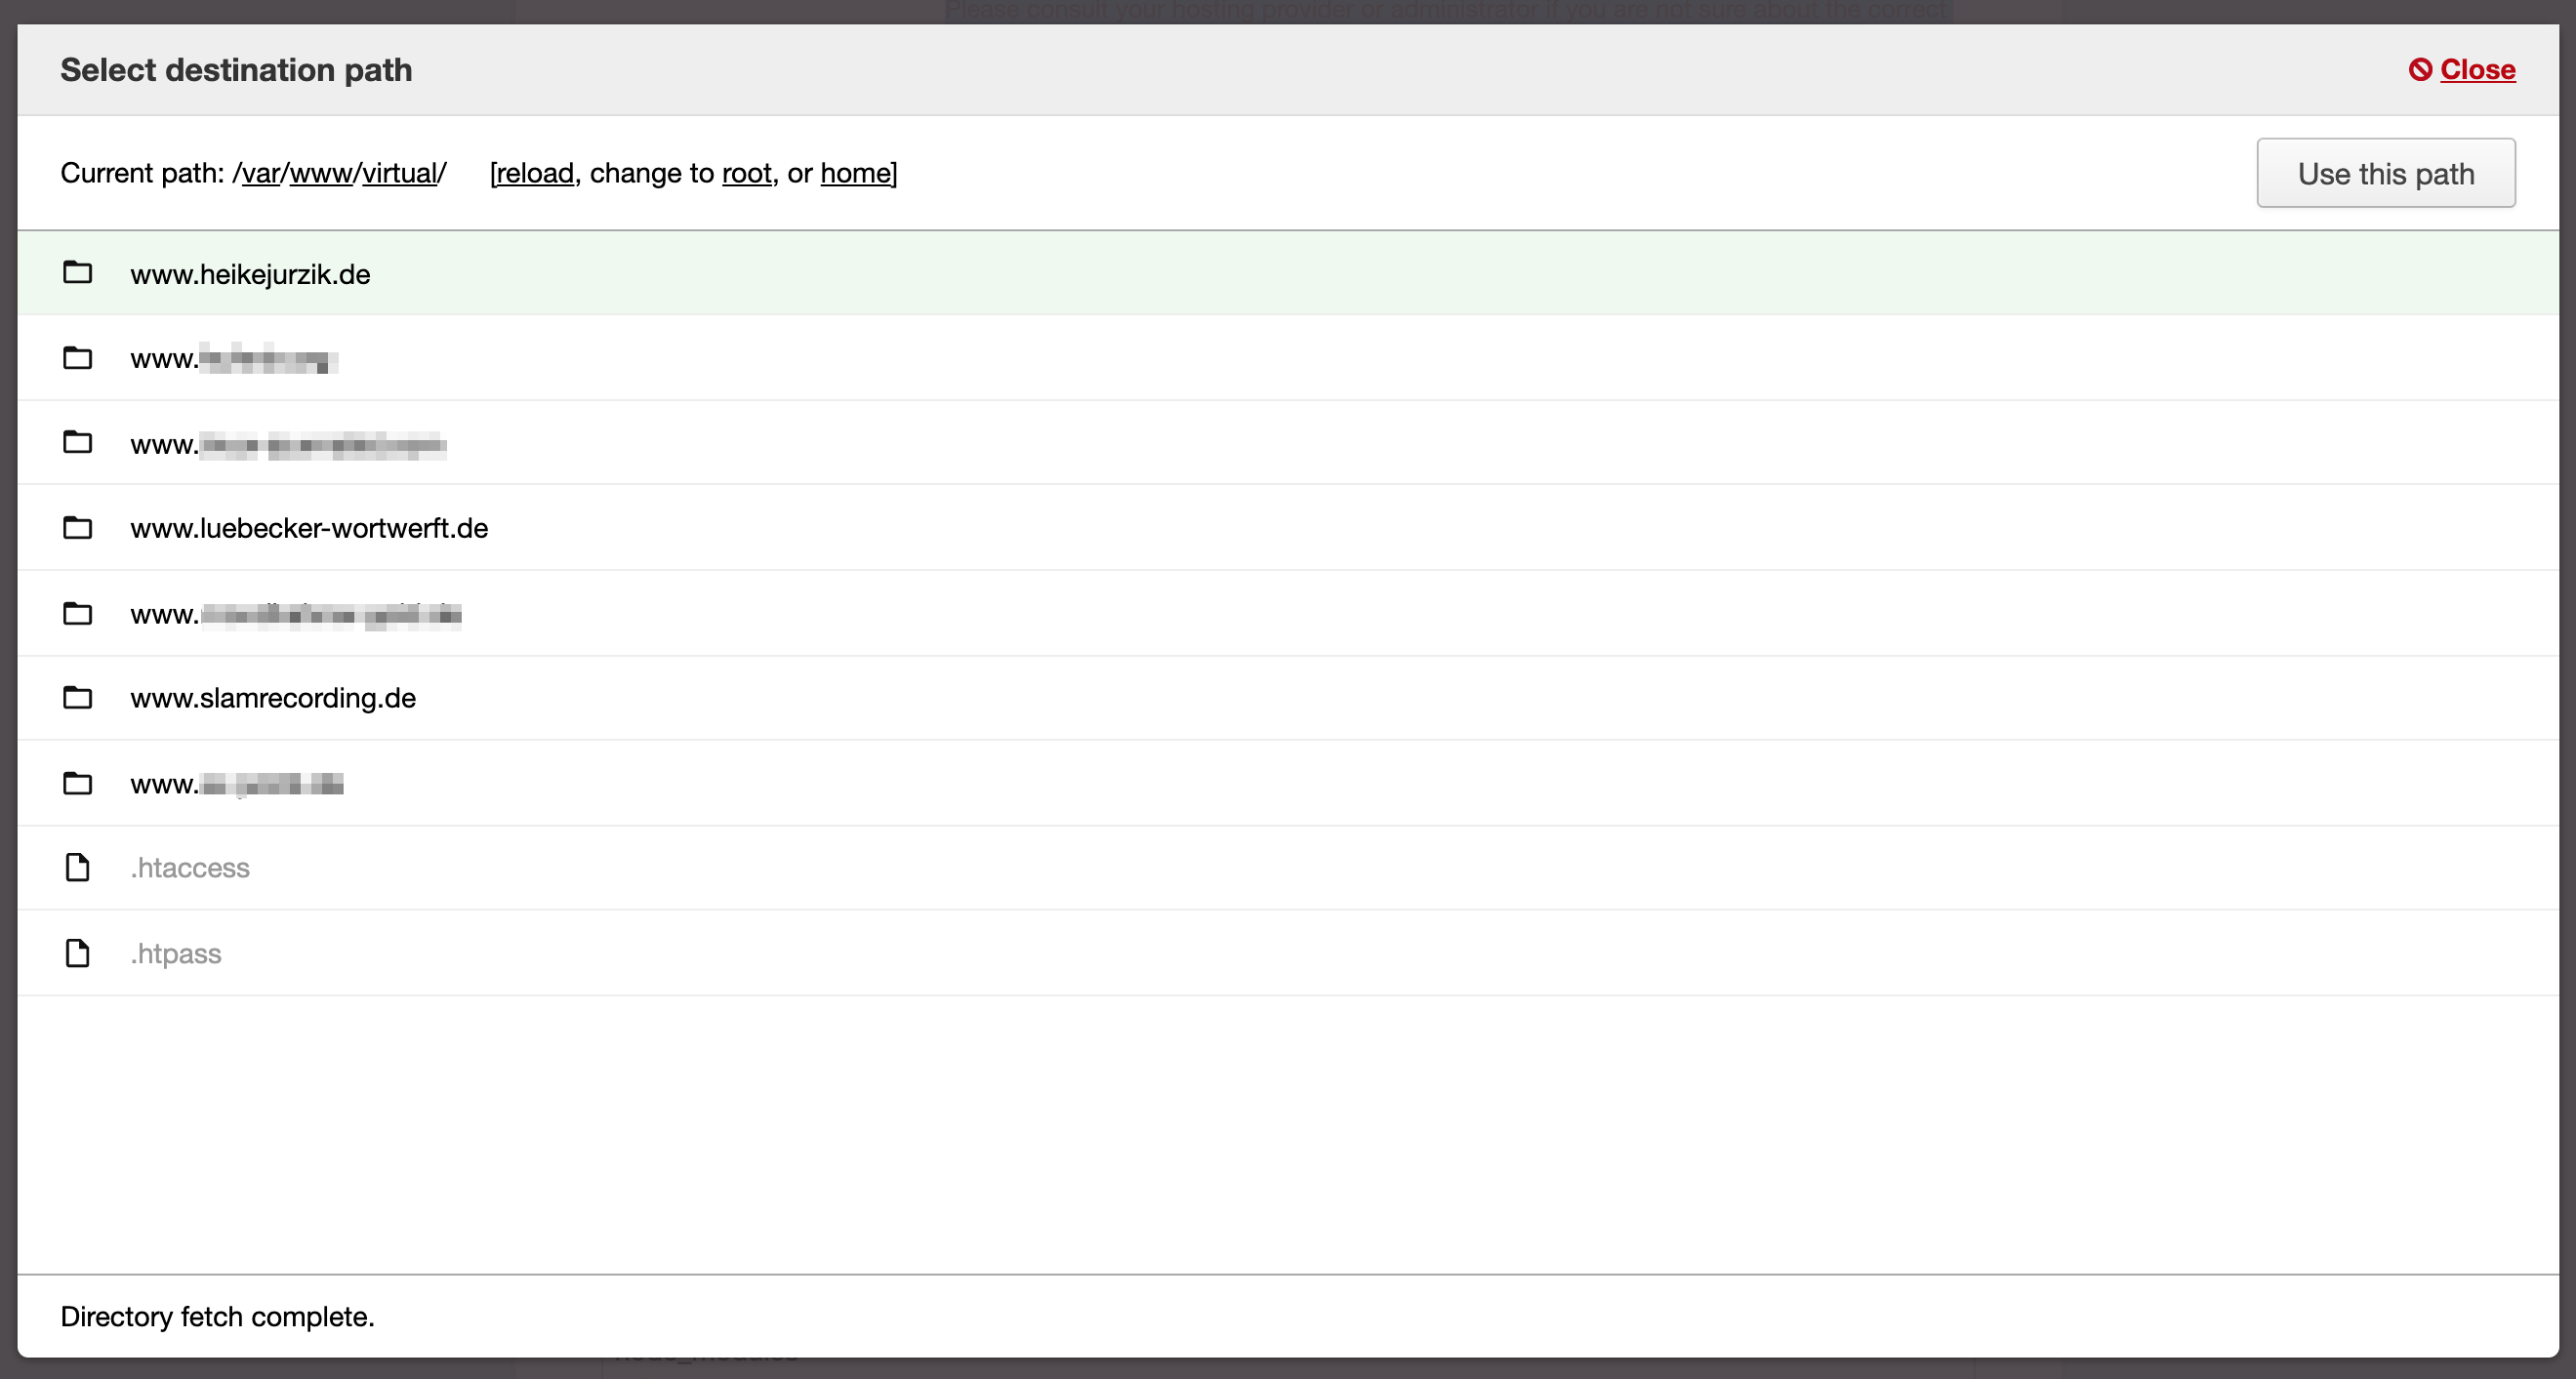
If you're unsure, our new file browser is here to help. Click the button next to the field to open a new window that looks like a simple file manager. DeployBot needs a short moment to fetch the directory structure of the remote system and then displays the home directory of the user who's logged in (including hidden files and directories, which names start with a .).

To open a folder, use a single mouse click. We've also added some links at the top of the file browser: root (changes to the root folder, /) and home (which brings you back to the home directory).
Tip: To navigate back to the previous folder, simply click on the link next to Current path. Once you've found the correct destination path, you can confirm it via Use this path in the top right corner.
Before you can save the settings, please perform a write test with the button of the same name. DeployBot then temporarily creates a directory in your destination path and immediately removes it again. If everything works out, you should see something like "Good work! The write test was completed successfully." If not, you can click the button Edit path to change the current settings.
Happy to help!
We hope you like the new feature and find it easier to set up a new server and select the correct destination path. If you have any suggestions or comments, please get in touch – happy deploying!


