The Simplest Way Of Setting up Atomic SFTP Deployments on DeployBot
With the evolution of deployment tools in this digital era, deploying your applications and updates shouldn't feel like navigating a minefield. Yet, for many developers, the manual intricacies and potential pitfalls of SFTP deployments have long been a source of frustration.
From the nerve-wracking dance of transferring files to the nail-biting prospect of missed dependencies, the world of SFTP deployment has left many developers yearning for a simpler, more foolproof solution.
This is where DeployBot makes an entry as your trusted ally that transforms the SFTP deployment landscape. If you've ever found yourself juggling the complexities of manual SFTP transfers, you know the headaches they can induce – missed files, broken links, and the perpetual anxiety of a site left hanging in the balance.
Now, as the demand for secure and efficient code deployment grows, the importance of Atomic SFTP deployment is at its peak. Atomic SFTP deployment adds an extra layer of security to conventional file transfer methods, which is why it is becoming a more popular and sought-after deployment system among developers.
Thankfully, now setting up Atomic SFTP deployments on DeployBot is also a matter of time. It revolutionizes code deployment with a single click and brings changes to all WordPress sites at once.
Eager to learn what Atomic SFTP and Zero Downtime deployments are and how you can get started with Atomic SFTP deployment using DeployBot?
In this guide, I will show how you can simply set up Atomic SFTP deployment and rejuvenate your development workflow, saving time, reducing errors, and ensuring seamless website updates with ease, along with highlighting what Atomic SFTP and Zero Downtime deployment is and why one should opt for Atomic SFTP over traditional deployment methods.
So, let's dive right in to unlock the secure and streamlined code deployment process.
But first, let’s start by knowing about the basics…
What are Atomic SFTP and Zero Downtime Deployments?
Atomic SFTP is an efficient method of deployment that ensures the integrity and consistency of the files being transferred. It involves transferring your files securely using the Secure File Transfer Protocol (SFTP) in a single, atomic operation. This means that all files are either successfully transferred as a complete set or none at all, eliminating any possibility of partial or inconsistent deployments. It helps you maintain the stability and reliability of applications during the deployment process.
Atomic SFTP has three big advantages over regular FTP for deploying code:
- Atomicity - Changes are uploaded as one unit. If there are any errors, the full deployment is rolled back. This prevents partial or broken updates that cause problems.
- Safety - Files go to a temp folder first, not directly to live site folders. This ensures important files are not overwritten or deleted accidentally.
- Speed - No multiple transfers needed. All changes go to one temp directory first, then get moved to final locations in one operation. Faster with fewer errors than moving many files individually.
In summary,
- Atomicity prevents partial or broken deployments through all-or-nothing deploys.
- Safety is improved by using a temp directory, avoiding accidentally overwriting real files.
- Speed is faster due to the single upload and move process versus multiple file transfers.
On the other hand, Zero downtime deployments refer to a deployment strategy that ensures the continuous availability of an application or service during the process of updating or releasing new versions.
By employing techniques such as rolling updates, blue-green deployments, canary releases, or using load balancers to redirect traffic seamlessly between old and new versions, zero downtime deployments aim to eliminate any interruptions or service disruptions for end users. This approach allows your business to deploy software updates without affecting user experience or causing downtime.
Why Consider DeployBot for Code Deployment?
DeployBot offers an encyclopedic code deployment system that lets you transfer code anywhere to establish smooth code shipment for developers and teams alike. It offers a robust set of features to facilitate code deployment. Here are the reasons why you should adopt DeployBot for code deployment:
- It allows you to select manual and automatic deployment while code transfer.
- DeployBot ensures zero downtime deployments during code shipment.
- It sends a notification via Slack and other communication channels after each Deployment.
- Third-party integrations such as Bagsnag and New Relic are available for analyzing performance and application.
- It instantly rolls back if you undergo a problematic release.
- You can track deployment in real-time.
- It empowers sharing release notes to keep everyone notified about upcoming updates.
- Your users don't need to access the server for deployment.
How to Set up Atomic SFTP Deployments on DeployBot
This guide is for beginners who haven’t used DeployBot. It will walk you through every configuration you need to make to set up Atomic SFTP deployments via DeployBot.
In case you have a repository and environment connected with DeployBot, then start with step 4 and set Atomic SFTP deployments. So, let's start following the step that suits you:
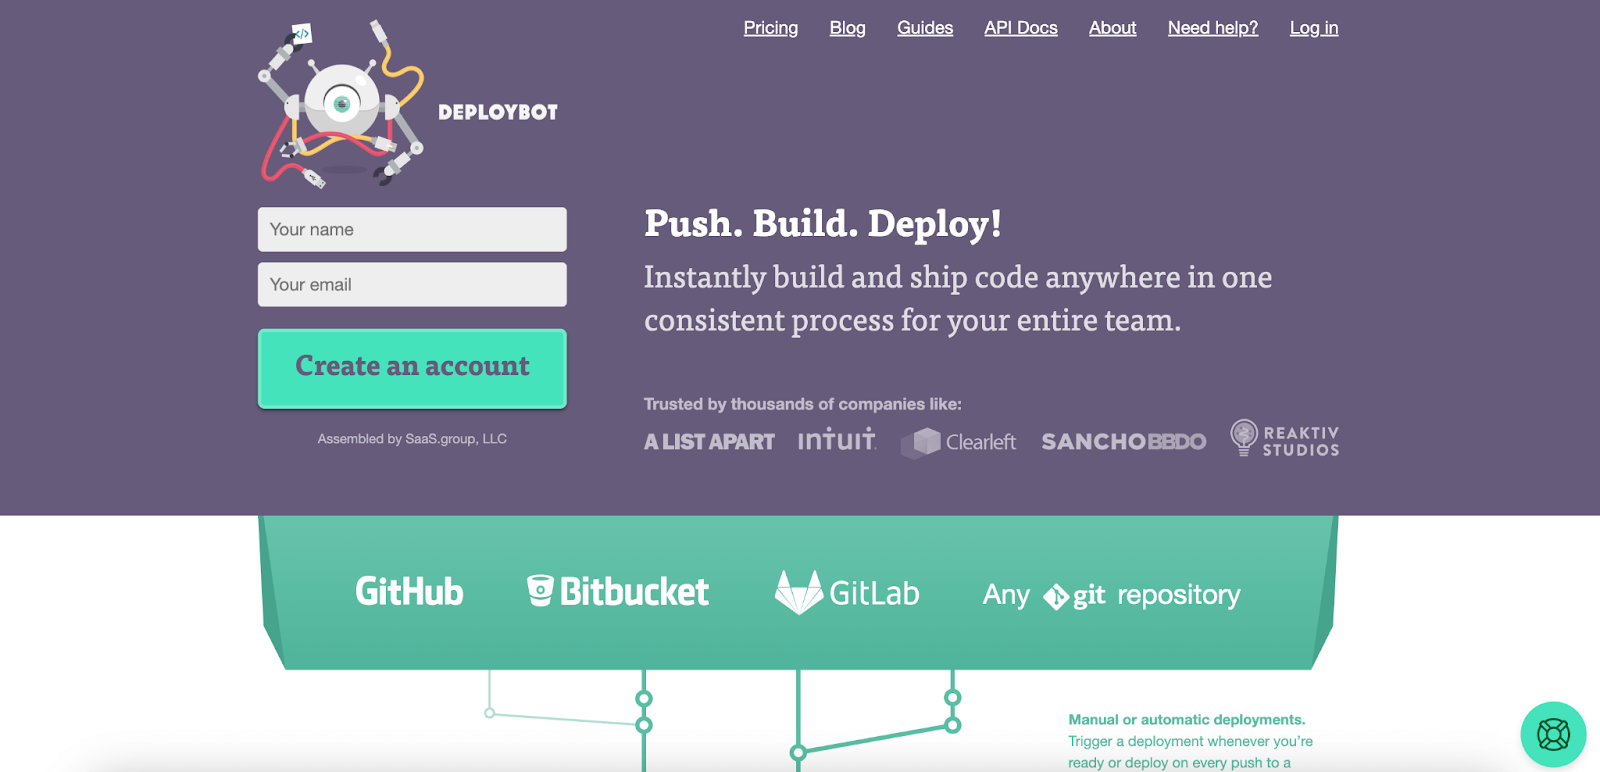
Step 1: Create a DeployBot account.
Before getting started with the initial setup, you need to sign up for DeployBot, a WordPress deployment tool. To do that, visit DeployBot and fill out the “Your name” and “Your email” fields. Then press the “Create an account” button. This will create an account on DeployBot and redirect you to the setup page.
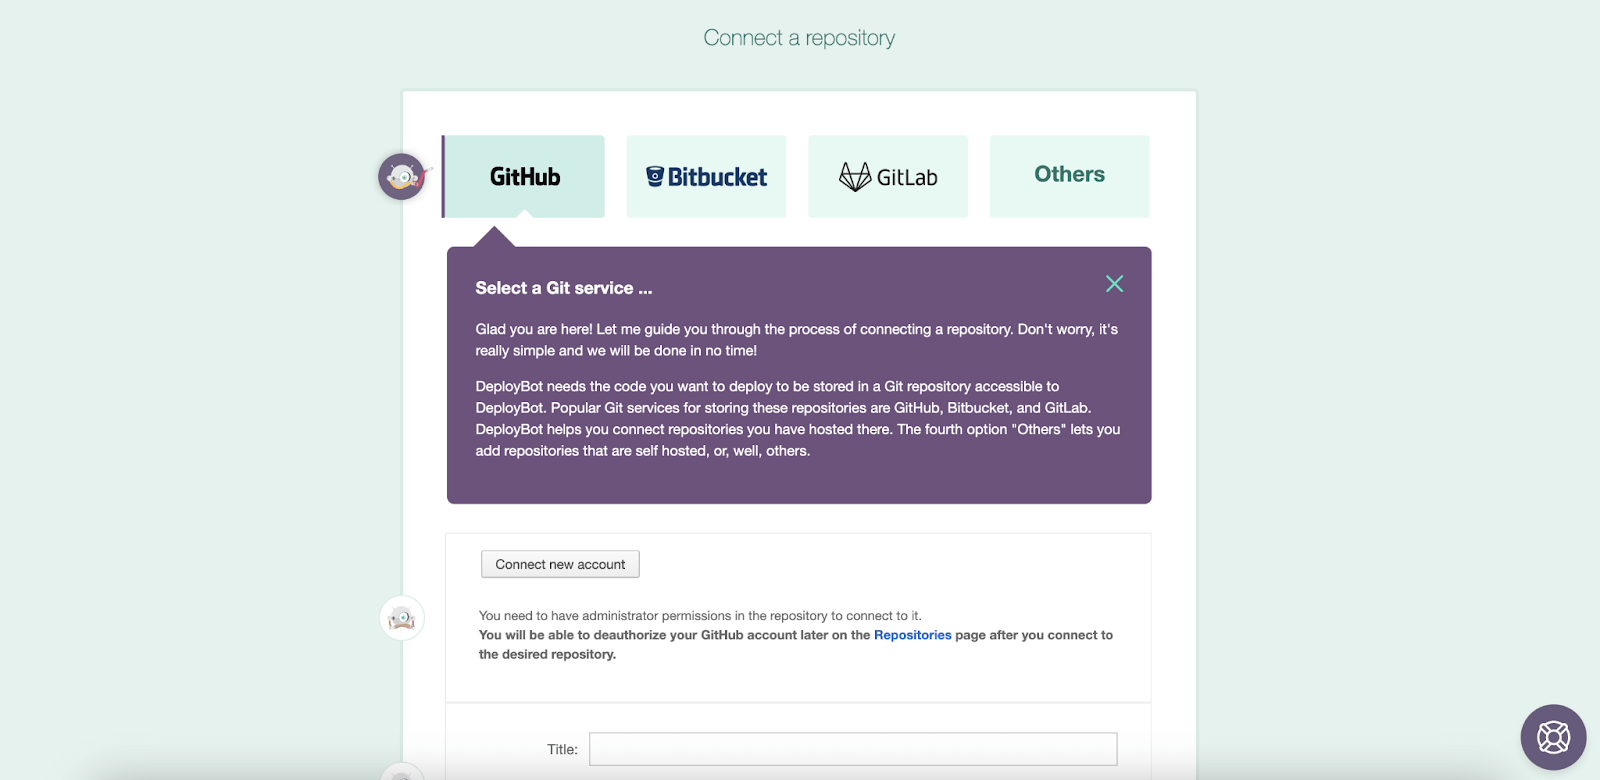
Step 2: Setup Repository Connection.
In this step, you need to add a GitHub, Bitbucket, GitLab, or other self-hosted repository by clicking the “Connect a repository” option. 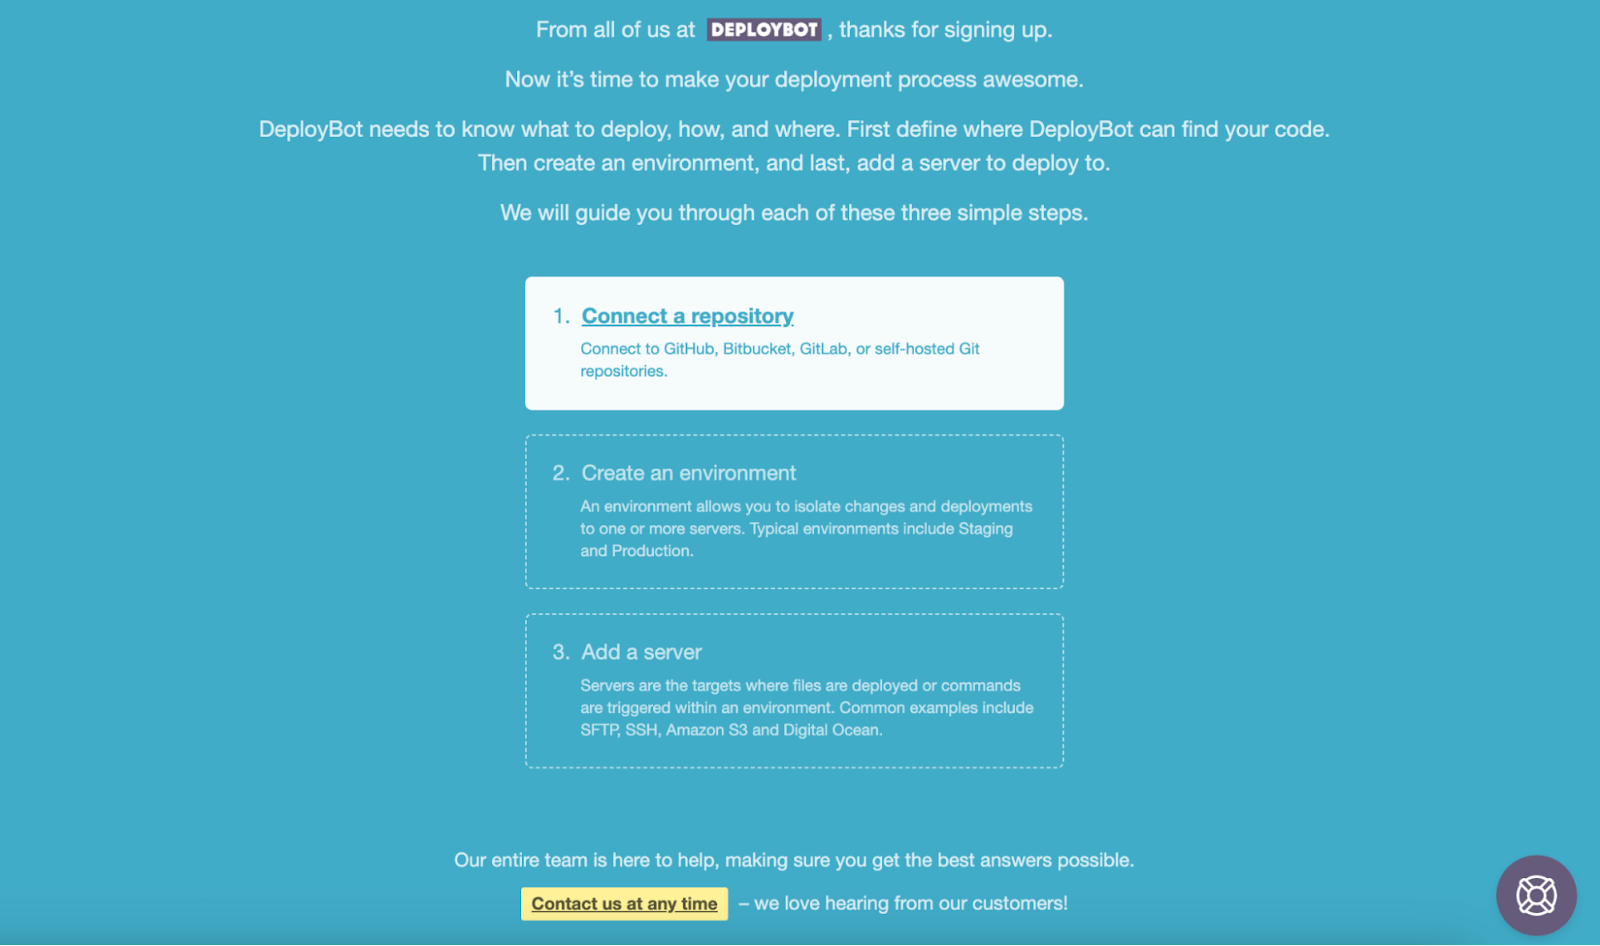
It will open up a repository configuration page from where you need to select a repository and press the “Connect new account” button. Here we're selecting a GitHub repo to connect with DeployBot.
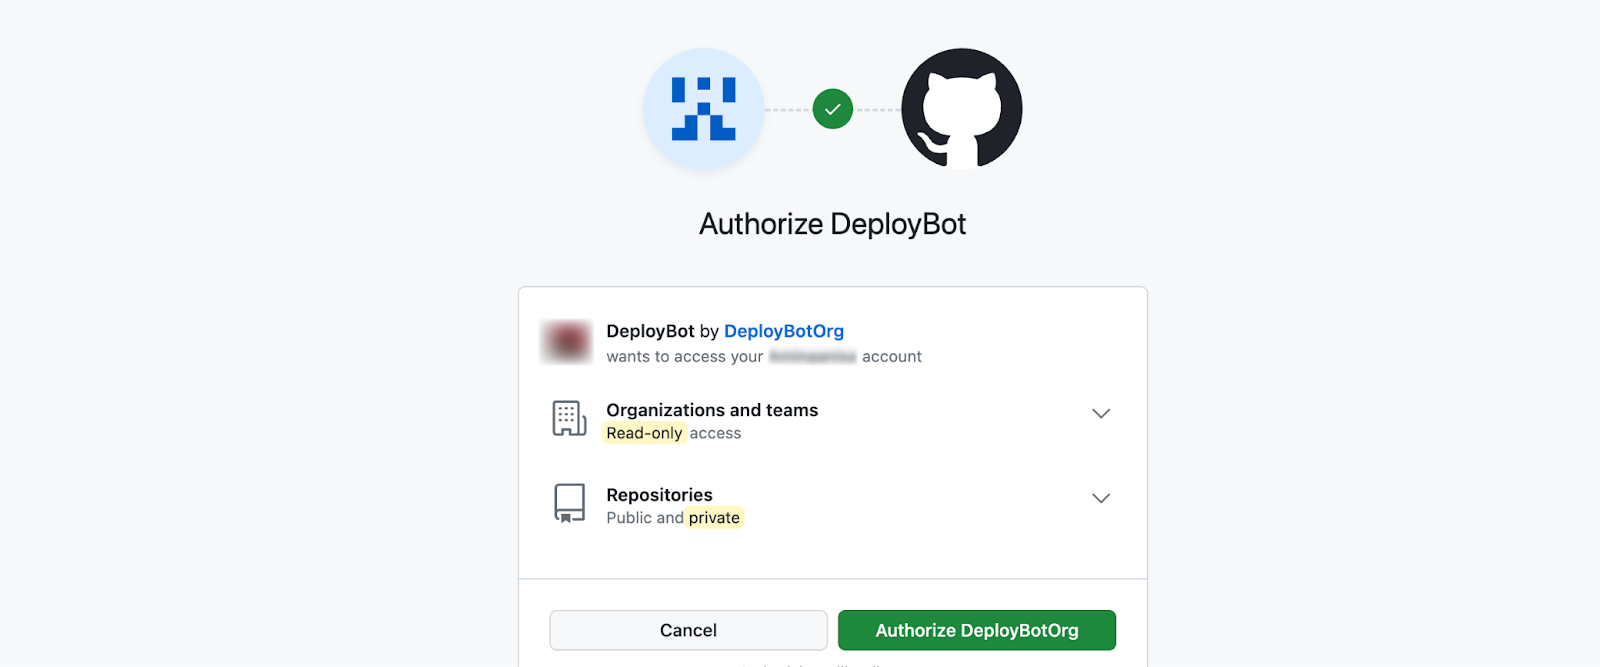
Now, you will get an authorization message that you need to verify to allow repository connection with DeployBot. For authorization, click the “Authorize DeployBotOrg” button.
After allowing the repository connection with DeployBot, you will get to see the following message. It means you”ll now be redirected to the authorized application. If you don't then, manually click the setup page.

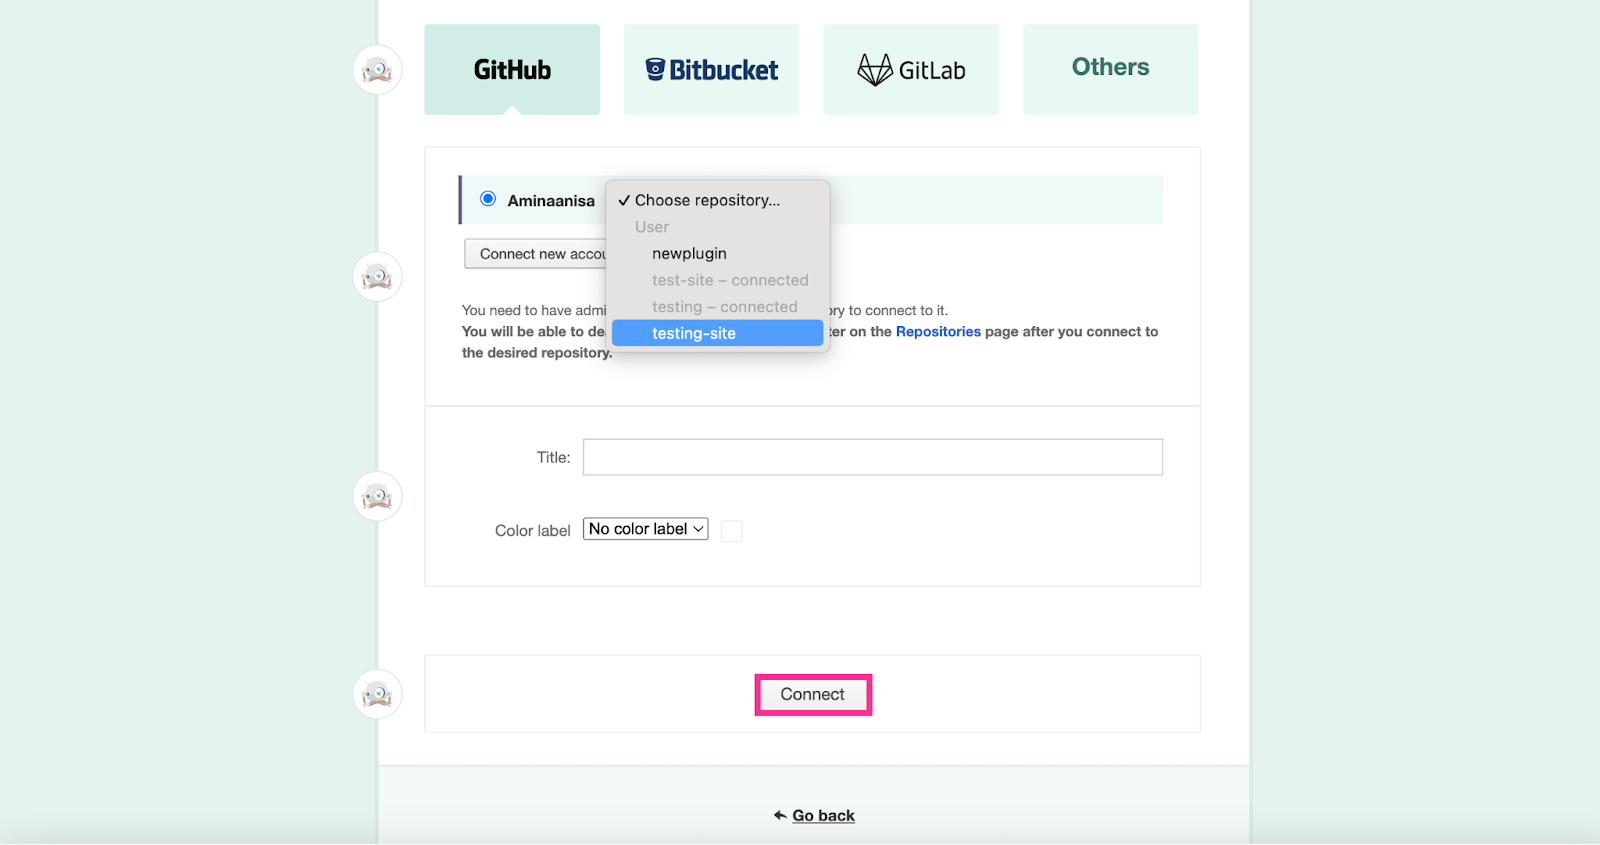
Now, select a repo that you want to integrate with DeployBot. This will bring changes directly to the server whenever you add something new to that repo.
Here, choose a repo from the drop and down menu and enter “Title” and “Color Label”. Then, hit the “Connect” button. Thus, your repository will be connected.
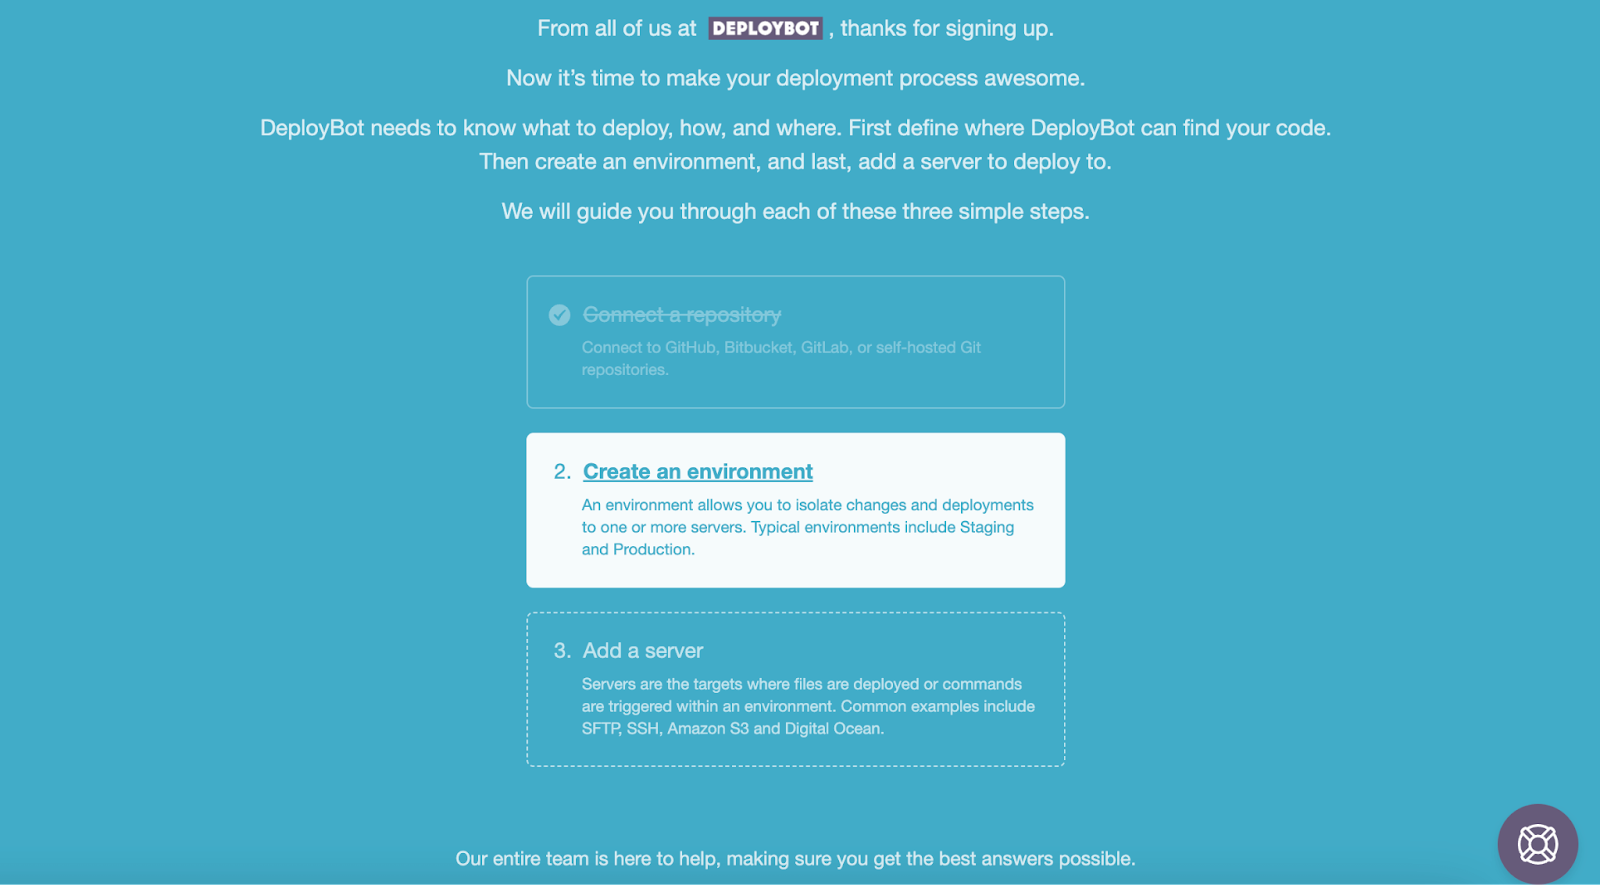
Step 3: Create an Environment for DeployBot.
In this step, you need to create an environment by clicking the second option named ”Create an environment”.
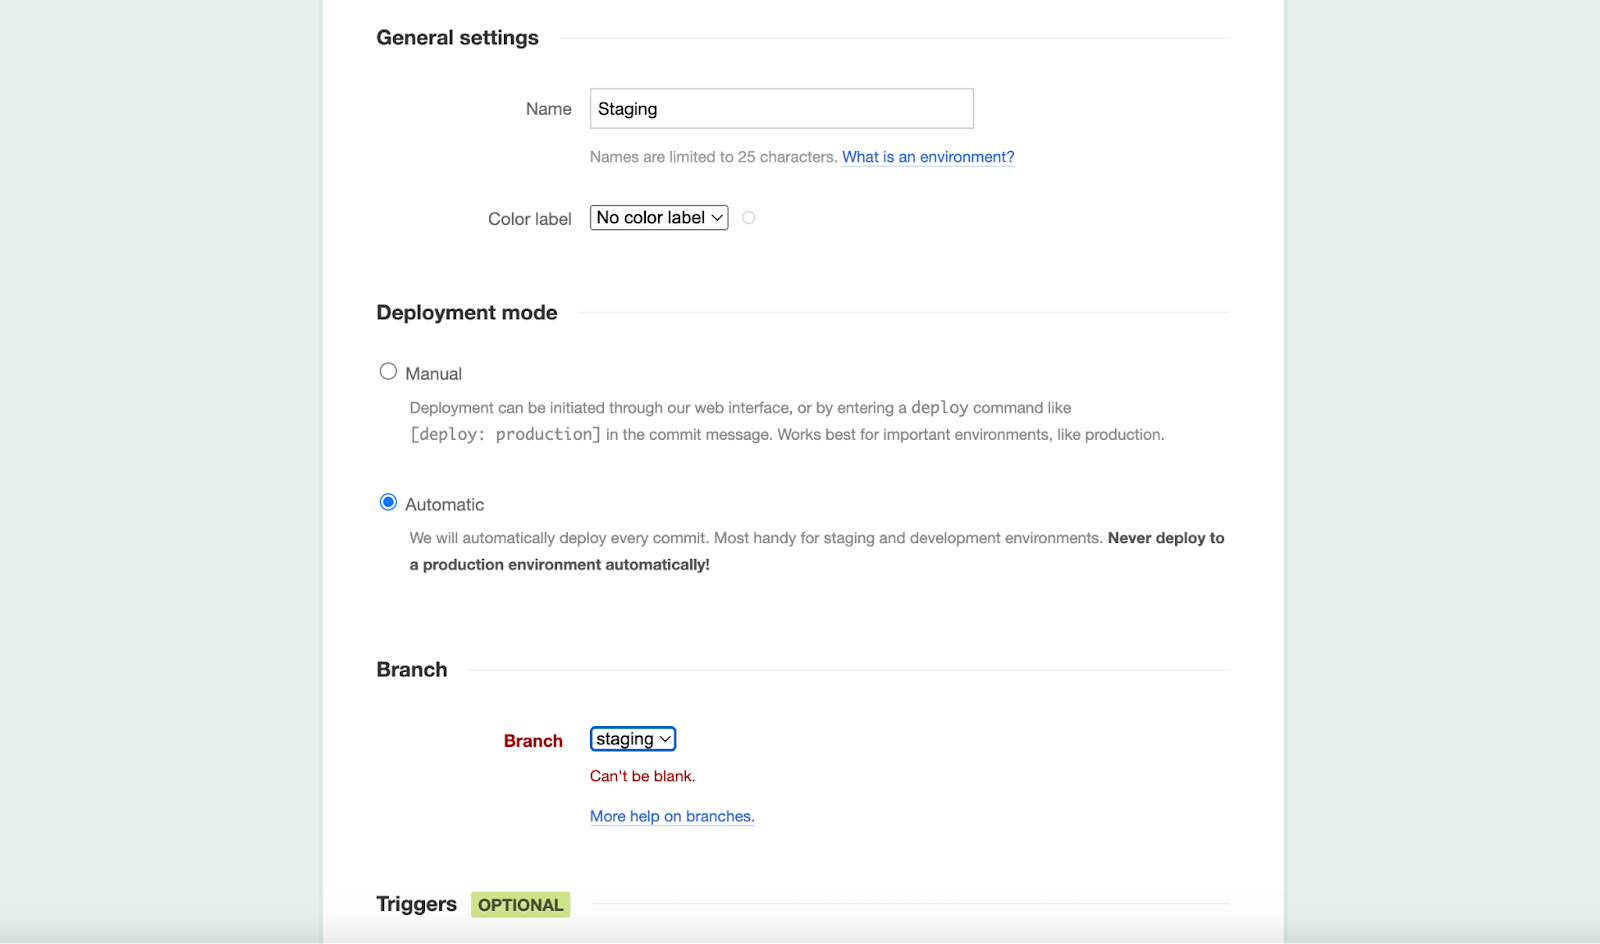
After pressing the second option, you will be redirected to the environment settings. First, here come the General settings, where you will get to set the Name and Color label.
Then, you need to select Deployment mode for your environment. There you will find two options: Manual and Automatic deployment. Manual one is good for production environments, and automatic is good for staging or development environments where automation works the best.
Now, go to the “Branch” section and choose the branch you have created in the Git repo. This will bring changes to all your sites whenever you push something new to that branch. Lastly, scroll down and click the “Save” button.
Step 4: Configure Server Connection Using Atomic SFTP.
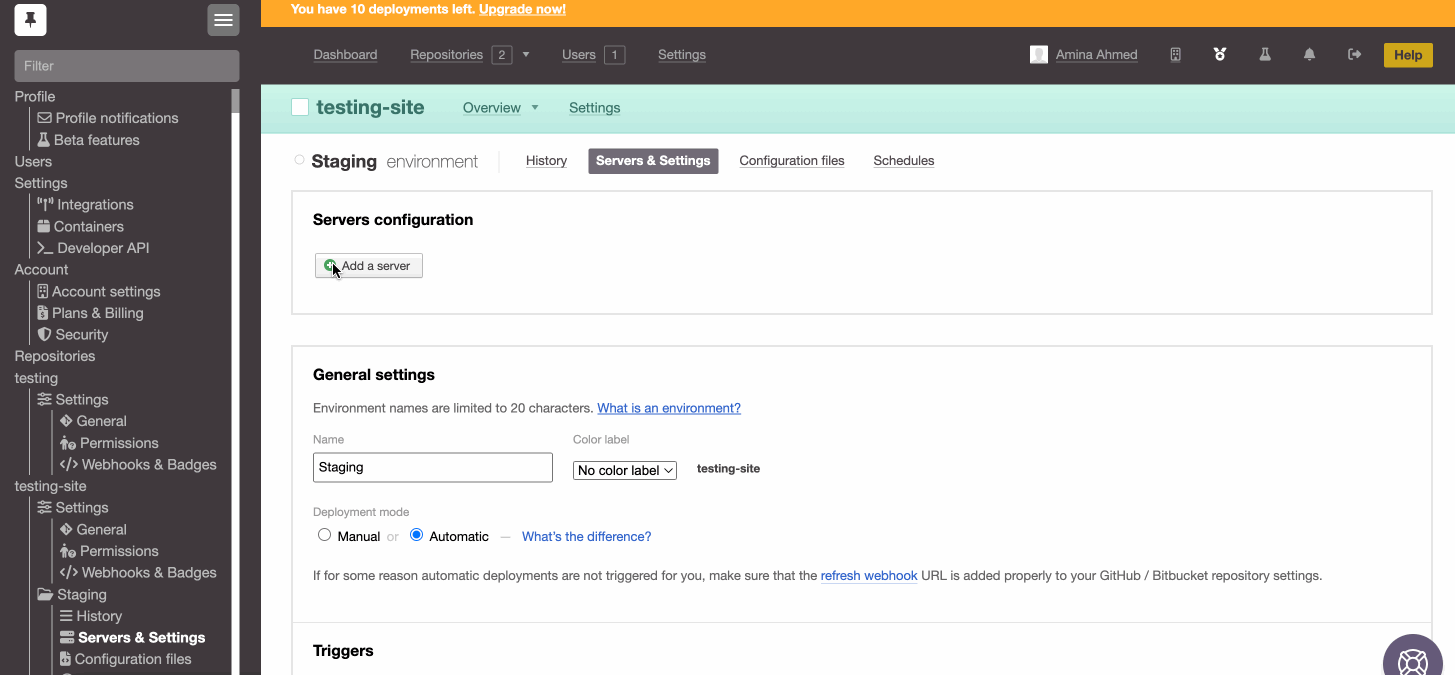
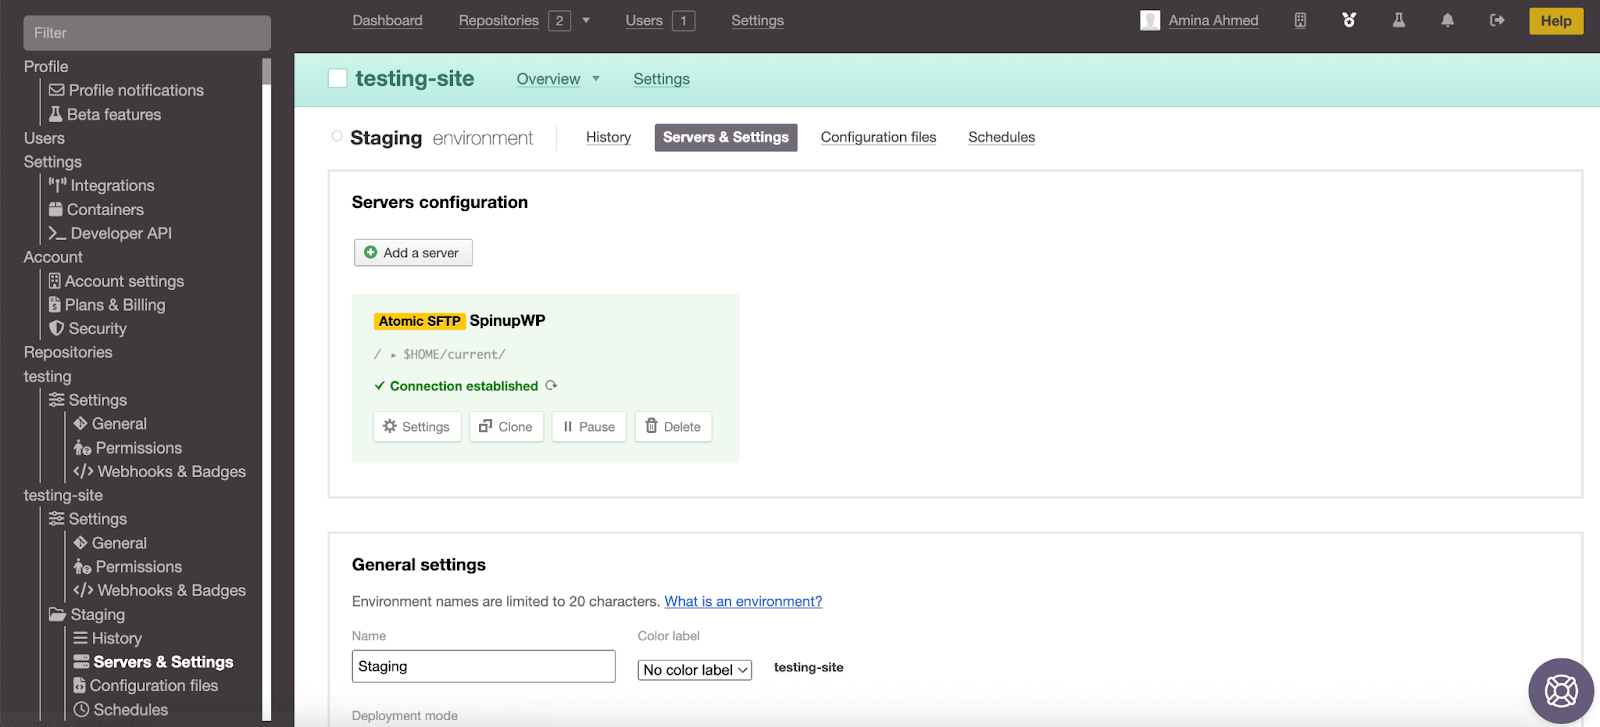
After setting up the environment, go to the “Server and Settings” tab and click “Add a server”. Then select “Atomic SFTP” which will redirect you to the configuration page. Make up your mind about which server you want to connect with DeployBot.
Here, I am using the SpinupWP server to integrate with DeployBot.
In this case, you need to connect Git and DeployBot one by one to SpinupWP. First, connect Git by following this guide.
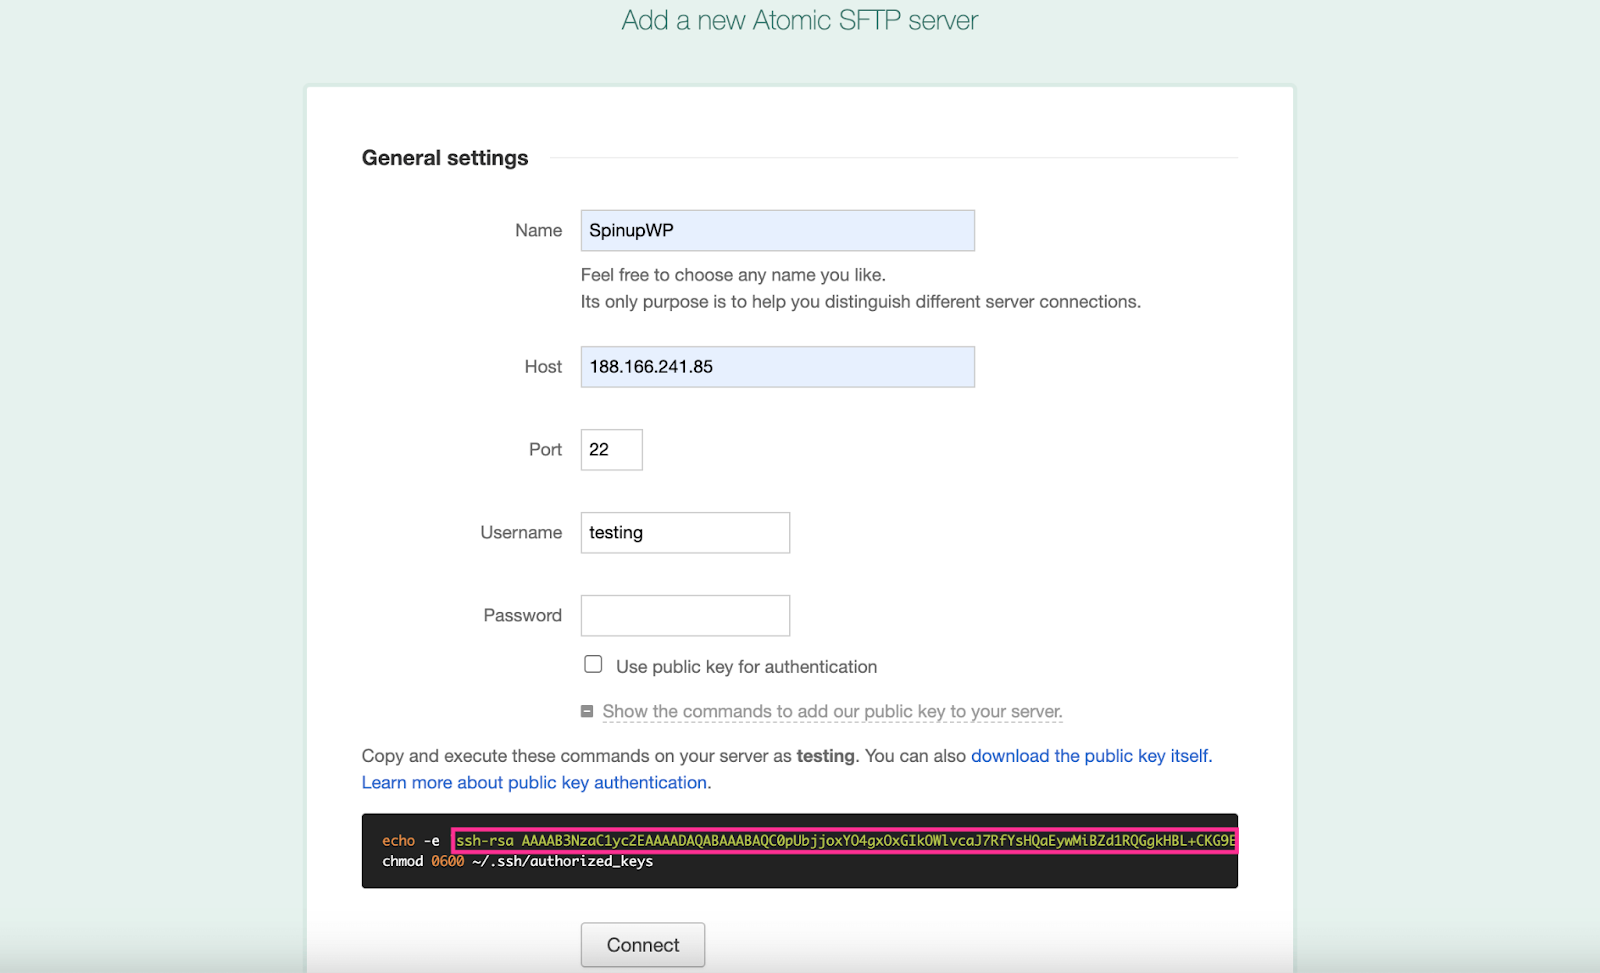
Then, connect DeployBot by generating an SSH key. You will find this key in the General settings of connecting the Atomic SFTP server. You just need to click the text “Show the commands to add our public key to your server”.
The highlighted text below is the SSH key.
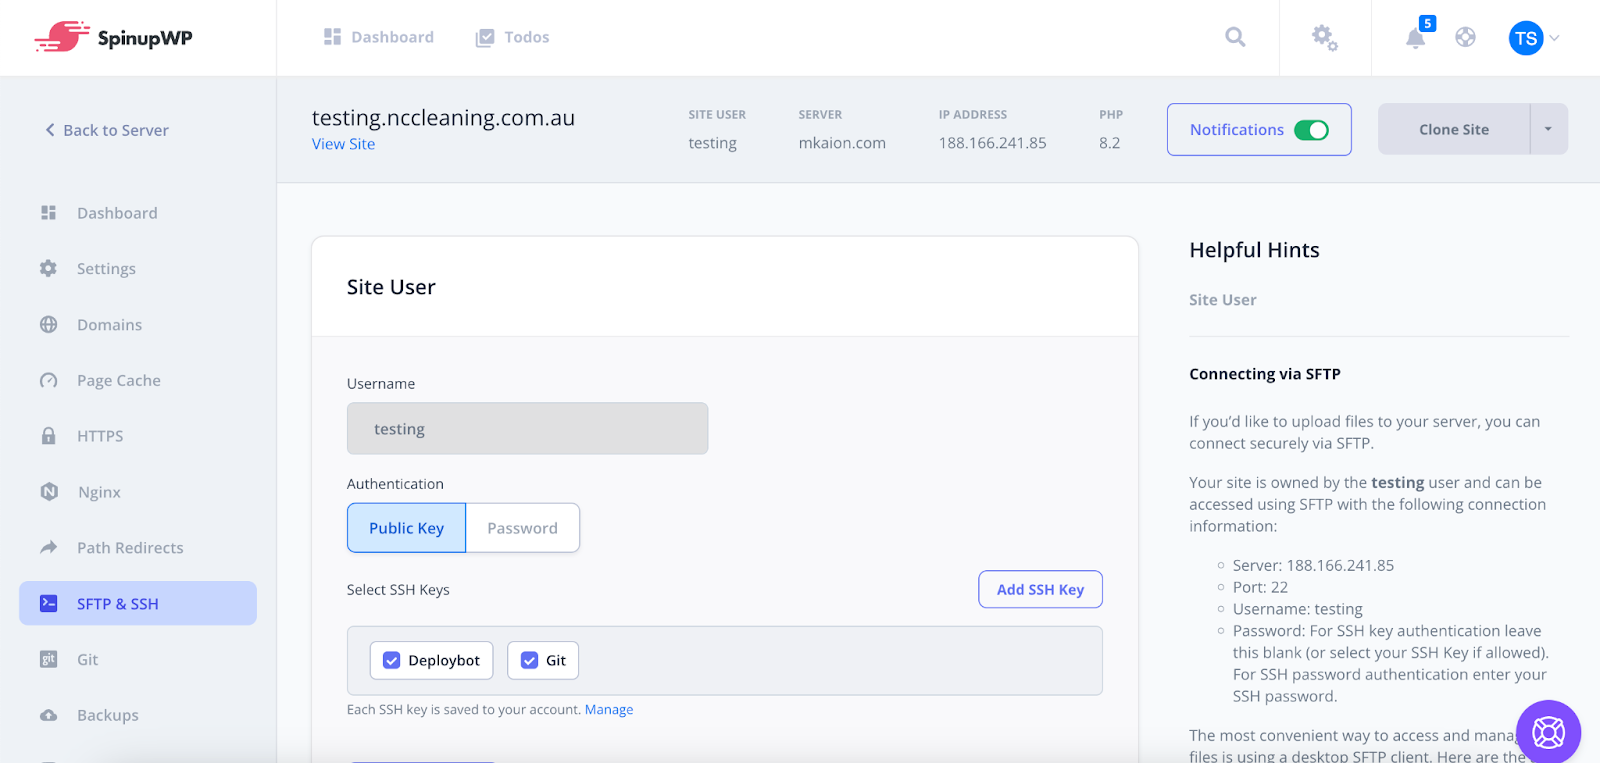
After connecting Git and DeployBot, you will find SFTP credentials on the “SFTP & SSH” tab.
From here, copy the Server, Port, and Username.
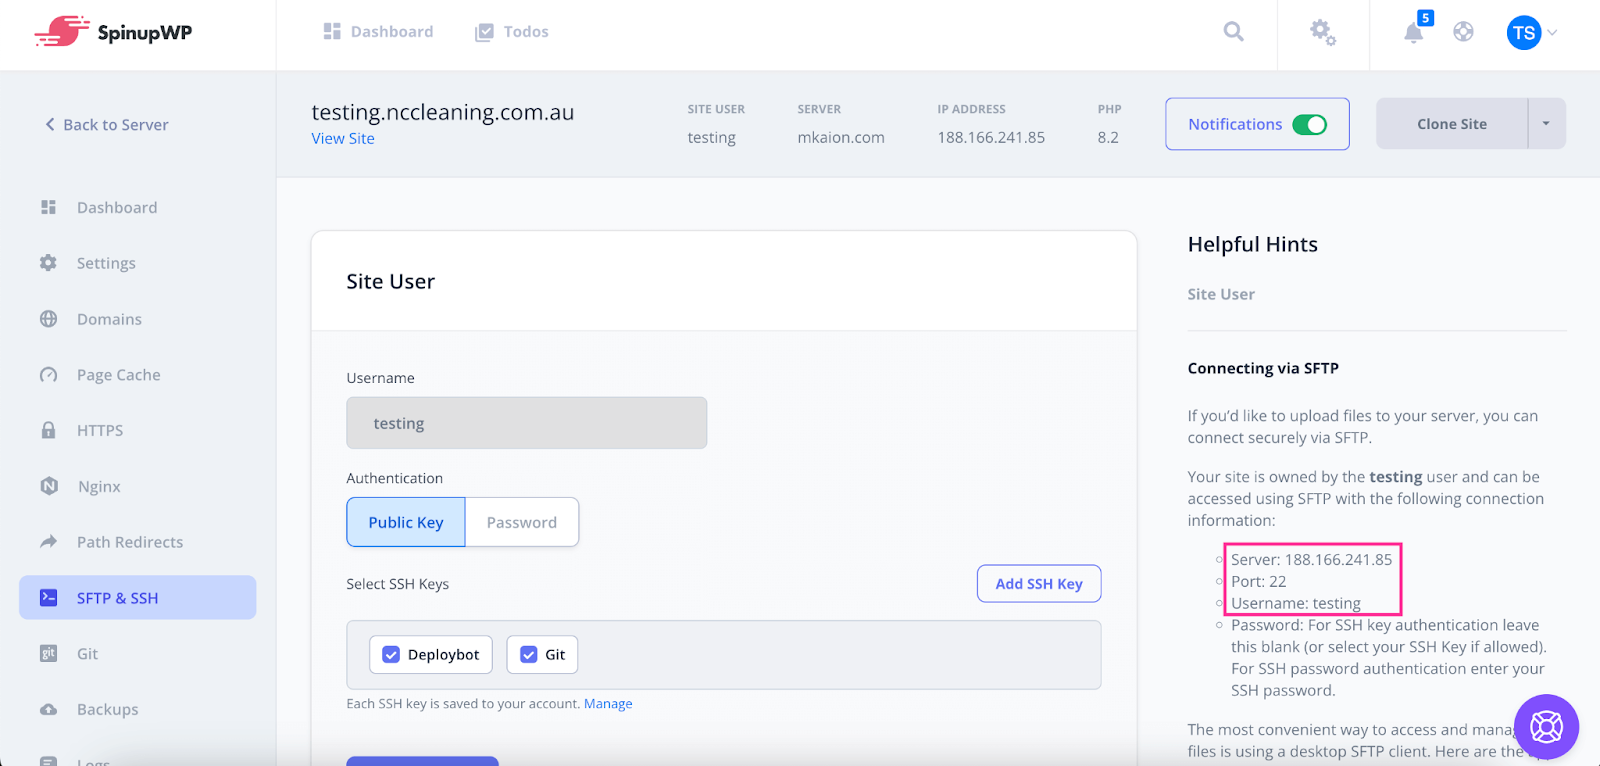
After that, paste these credentials on the respective General settings fields. For public key authentication, keep the password field blank and right-click the “Use public key for authentication” option. Then, hit the “Connect” button.
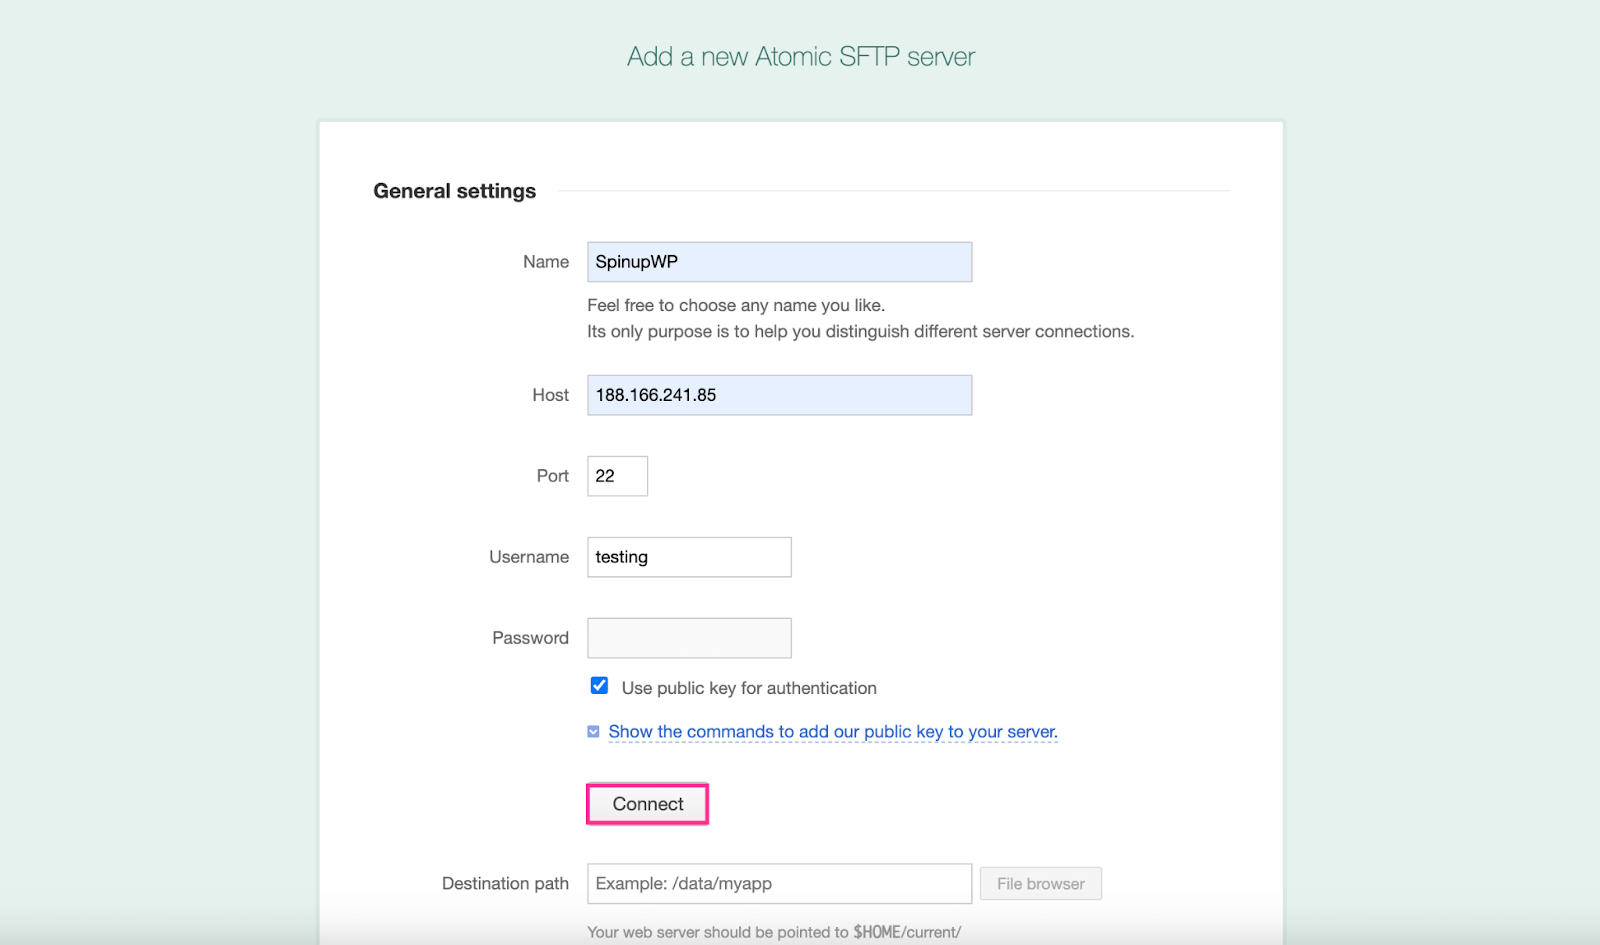
This will show up a message for successfully connecting your server. Now, enter the “Destination path” and press the “Write test” button.
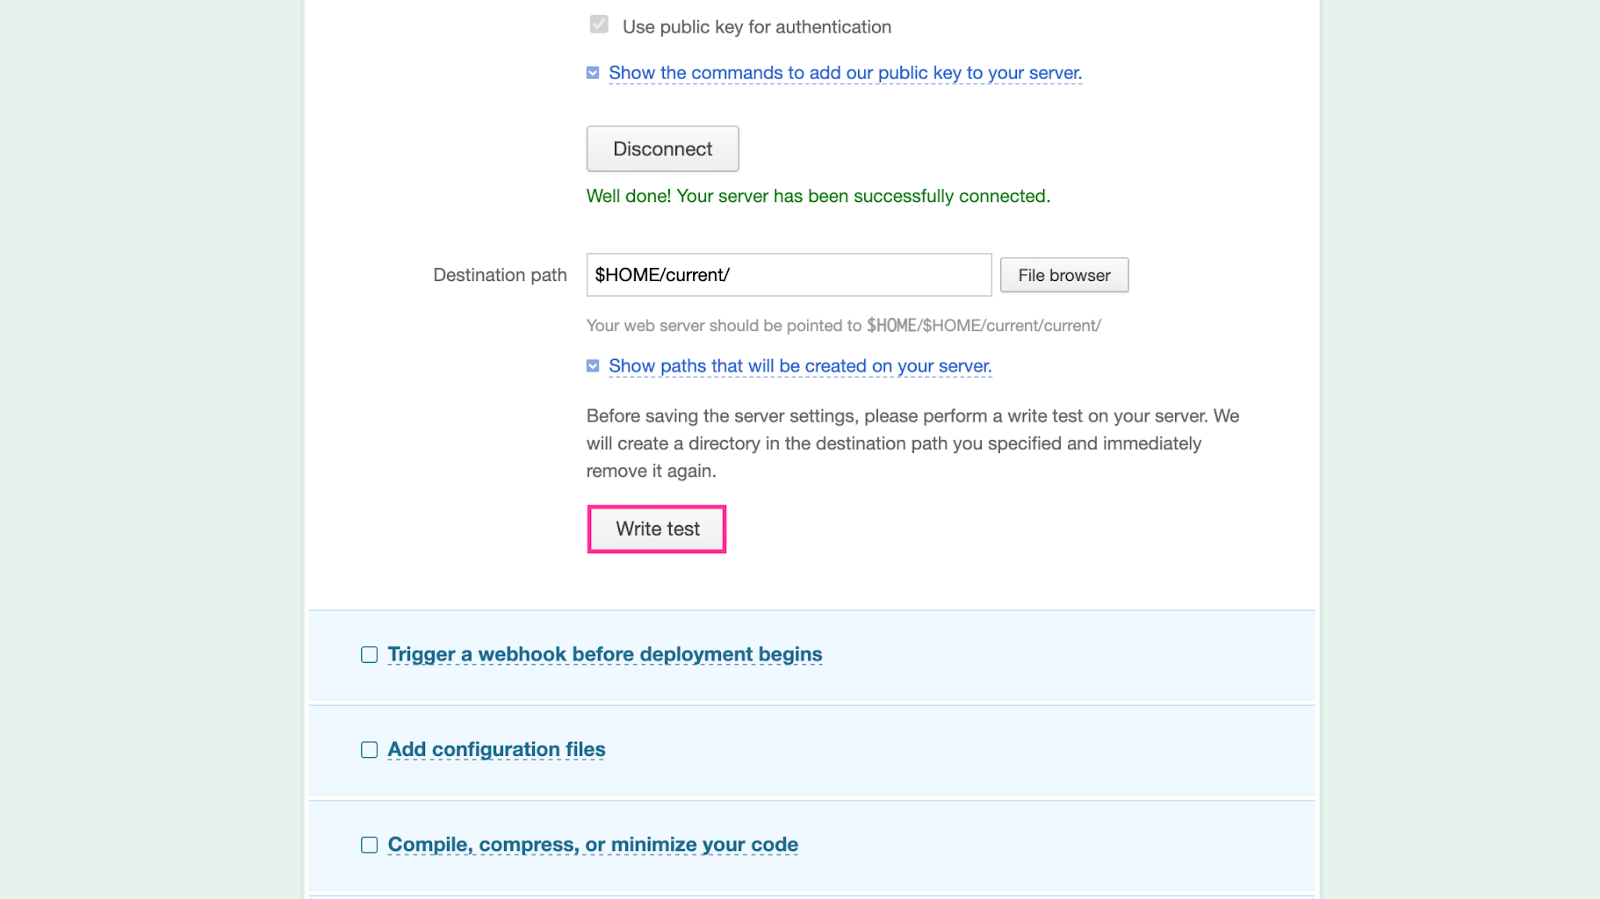
Finally, scroll down until you see the “Save” button and press it. This will complete your server connection with DeployBot.

Now, check the “Servers & Settings” tab, and there, you will get to view your server connected via Atomic deployment.
Make Your Atomic SFTP Setup A Breeze With DeployBot
As you know by now, DeployBot offers seamless code deployment with its robust features such as zero downtime deployments, real-time tracking, instant rollback to unpleasant releases, etc.
But now you know it further reinforces the whole process through Atomic SFTP deployment that ensures the safety and security of your transferred files.
The guide that I have demonstrated above will not only save you from piles of work but also make your project development easier and faster than ever. So, follow the steps mindfully and make code deployment a breeze.
Not only set up atomic SFTP deployments, but you can also deploy into popular servers like WPEngine, Cloudways, and EasyWP at ease with DeployBot. If you are still confused or need assistance with setting up atomic SFTP in DeployBot, feel free to reach out to our support team.


