How to Deploy into SpinupWP Using DeployBot
If you are a busy developer, deploying code changes and new features to a WordPress site can be quite a headache for you. Pushing code from your local environment to a staging or production server often involves lots of manual work, like SSHing into servers, pulling code, running build commands, and configuring services. It's an error-prone process that can quickly become a time sink for you.
In this digital development era, without the aid of an appropriate tool, navigating such a hectic code deployment process can turn out to be a challenging endeavor that introduces hurdles and obstacles while maintaining a collaborative workflow.
However, the scenario is completely different with WordPress deployment tools as this empowers your one click and brings instant changes to all the connected WordPress websites at once, and for such hassle-free deployment of your code, one such tool that you can always count on is DeployBot, your ultimate ally of trouble-free code shipment.
Are you curious to find out how?
In this tutorial, we’ll feature the easiest deployment method into SpinupWP using DeployBot. So, let’s start exploring this comprehensive walkthrough with the basics of DeployBot…
What is DeployBot?
DeployBot is a WordPress deployment tool that allows you to ship codes to multiple servers seamlessly and at once. This means it manages codes to different servers when you push something new to a repository.
What Makes DeployBot a Top Choice for Deployment?
DeployBot can be a lifesaver tool for someone who is struggling with manual code deployment and spends hours pushing and deploying codes to different servers or websites. You might be wondering how come. Or how is it different from other WordPress deployment tools?
Here are the reasons why DeployBot is considered a top-notch deployment solution:
- Easy deployment: You can follow one method and ship codes to any SpinupWP-like servers.
- Manual & automatic deployment: It offers complete flexibility to select manual or automatic deployment.
- Monitor deployment: With the integration of Bugsnag and New Relic, you can observe the deployment performance and overall growth.
- Data protection: It lets you roll back to unstable and faulty releases.
- Real-time monitor: DeployBot shows real-time progress of the deployment.
- Deploy Notification: It sends a notification after each successful deployment.
- Permission management: It ensures smooth permission management for your teams and clients.
- Flawless deployment: This tool for deployment makes deploying code easier than ever with zero downtime.
Steps to Deploy into SpinupWP Using DeployBot
This tutorial will give you an inside and out guide on how to deploy and manage codes into SpinupWP using DeployBot. Thus, whether you're a beginner or a registered DeployBot user, this guide will get you covered.
Note: If you're already a user of DeployBot and have a repository and environment connected, then directly jump to step 4. Or else, follow the guide from the start by creating a DeployBot account mentioned below:
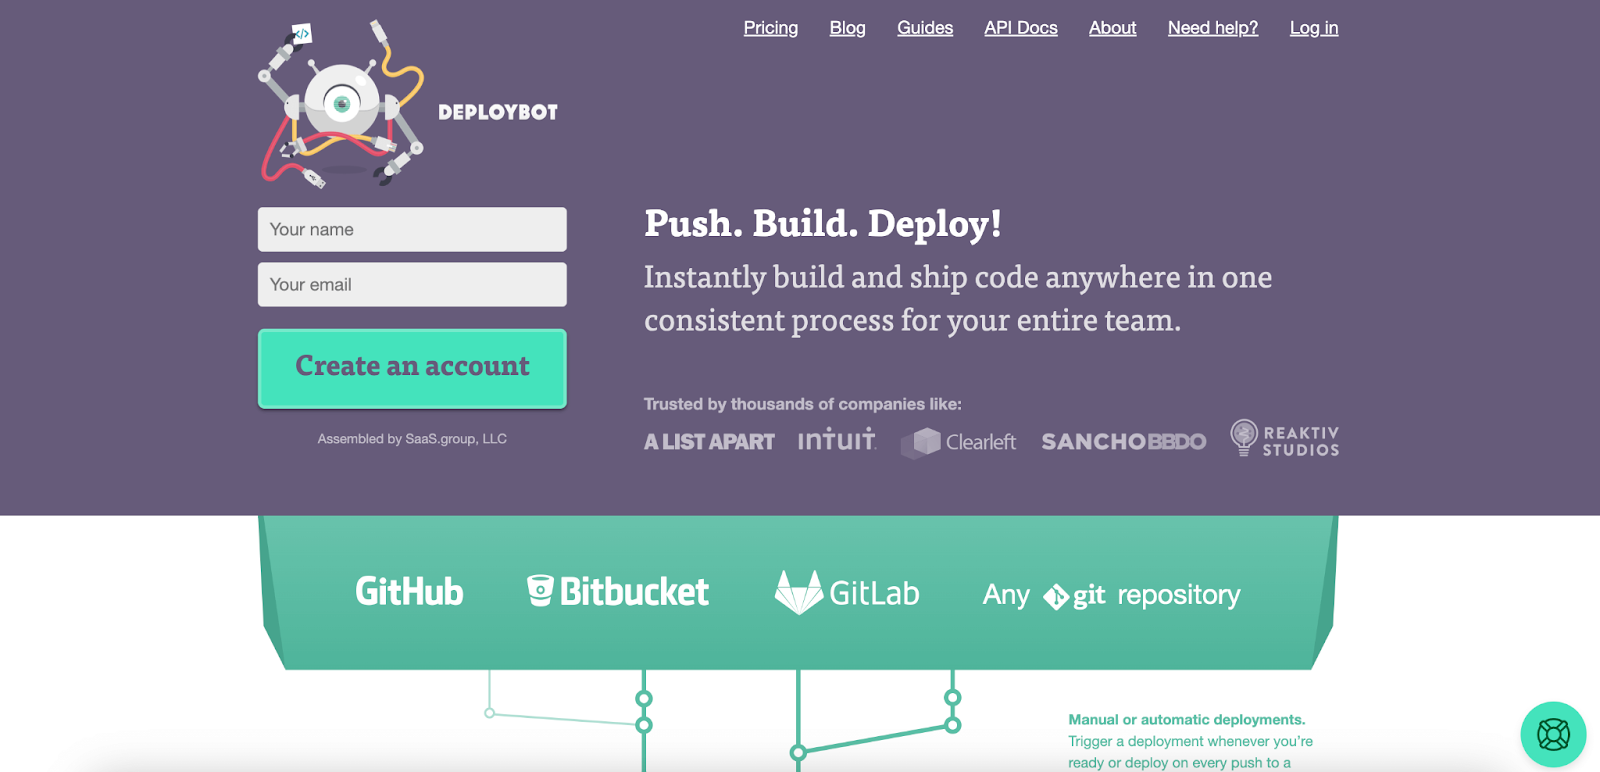
Step 1: Sign up to Create a DeployBot Account.
First, you need to get started with a DeployBot account by signing up with “Your Name” and “Your Email”. In the email field, enter an email that you frequently check. This will smooth out further communication with DeployBot.
After filling out fields with credentials, press the “Create an account” button. Thus, you will be redirected to your account, where you need to make other setups.
Step 2: Add a Repository to DeployBot.
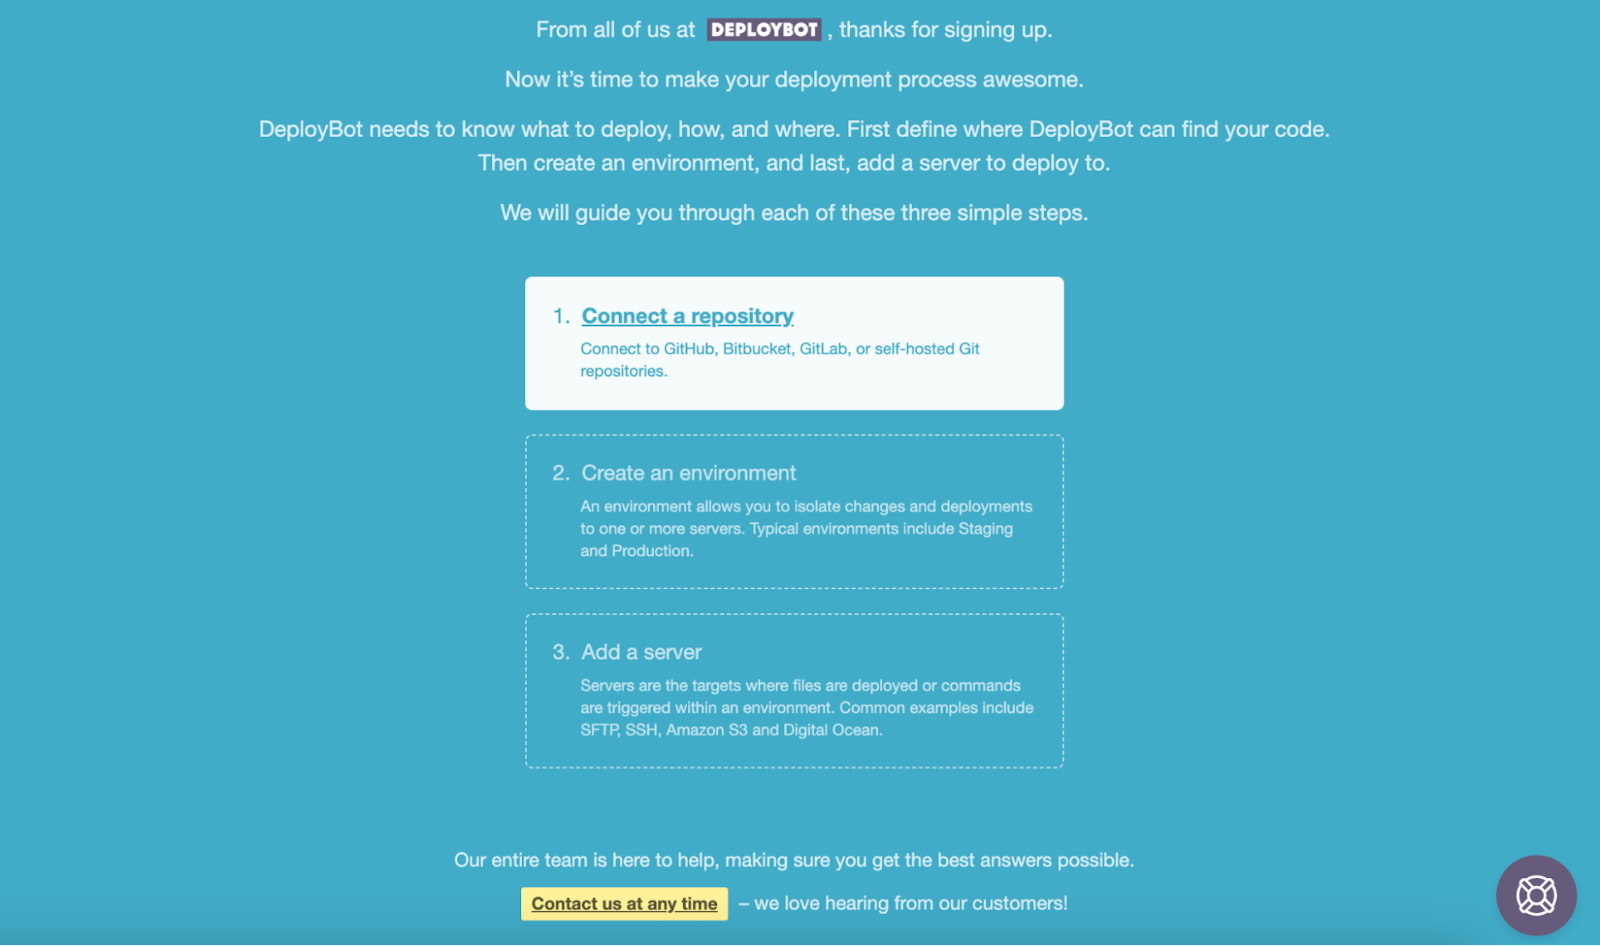
After signing up, you will get to see options for the repository connection, environment setup, and server adding. First, start with a repository.
To connect a repository, press the number one option.
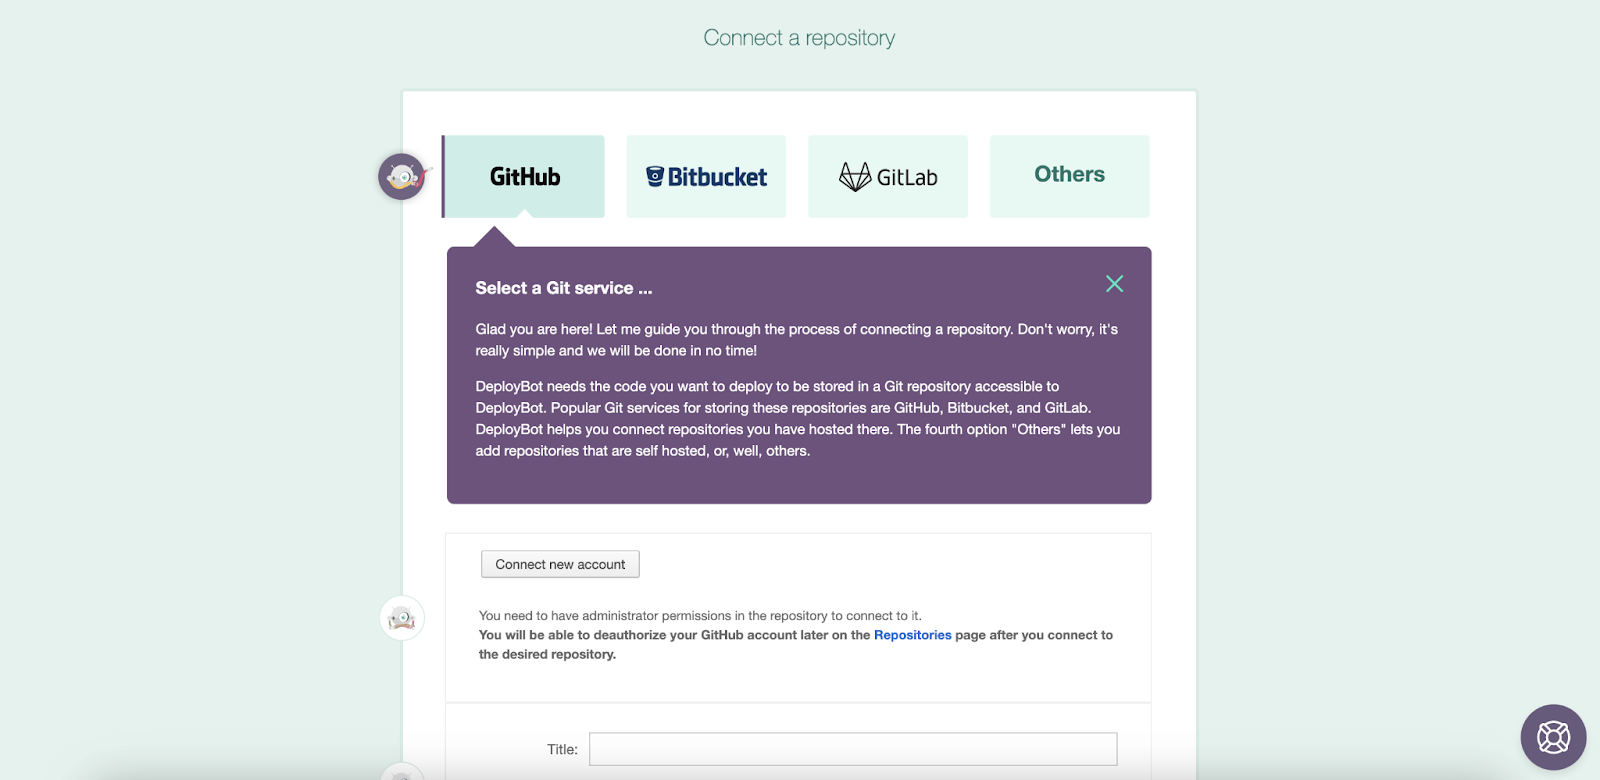
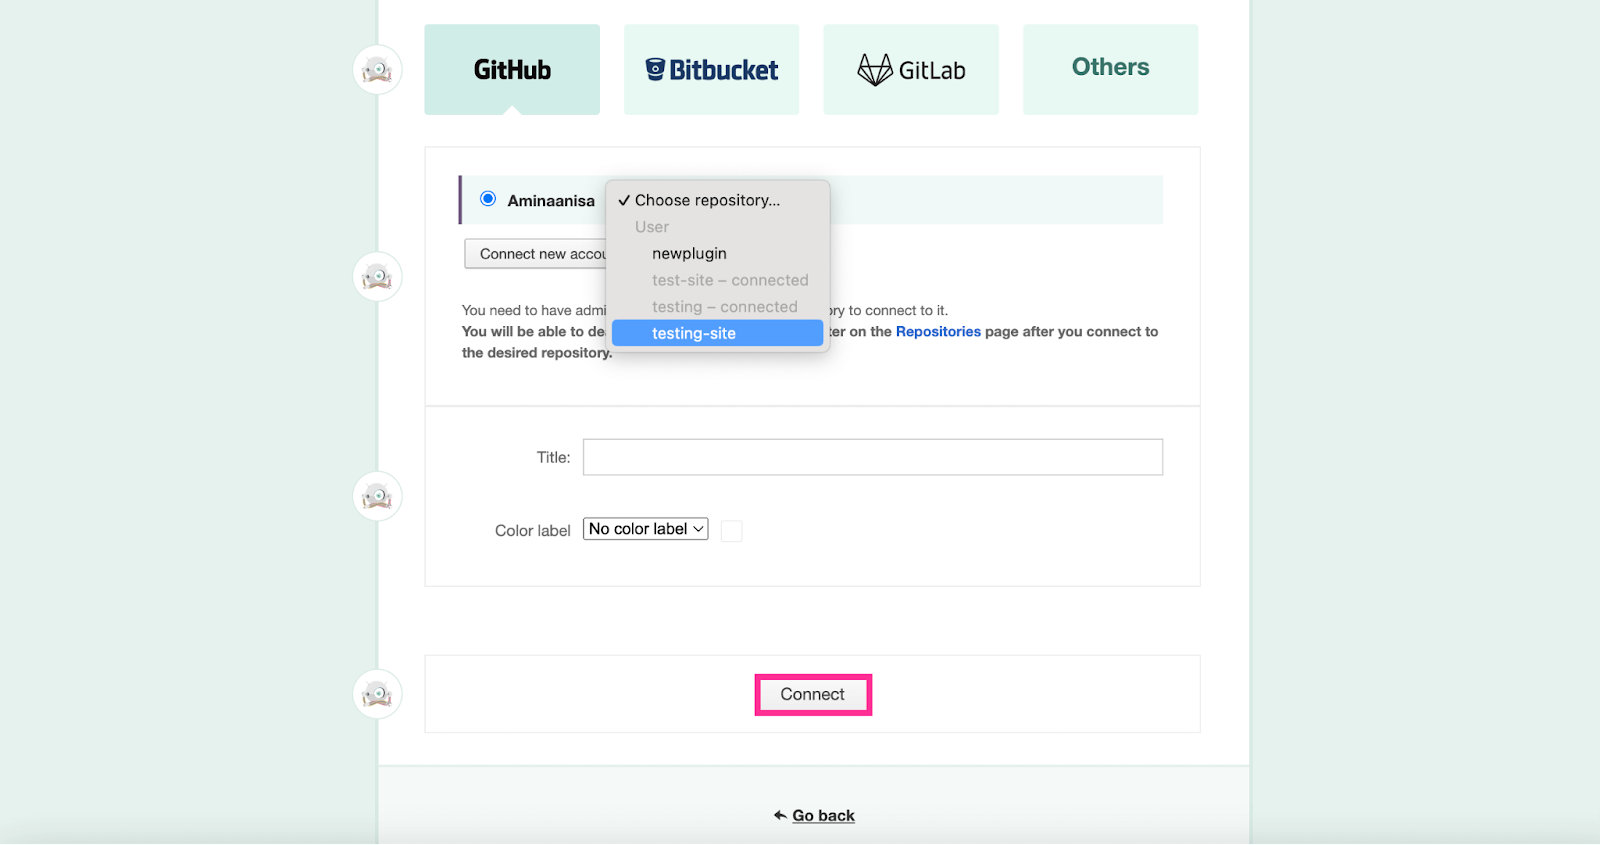
It will take you to the repository tab, where you will view multiple self-hosted repositories such as GitHub, Bitbucket, GitLab, and many more. Here, we're selecting GitHub to deploy and manage codes into SpinupWP. Then, hit the “Connect new account” button.
There you will receive an authorization notification that you must build a connection between “DeployBot” and “GitHub”. For that, click the green marked “Authorize DeployBotOrg” button.
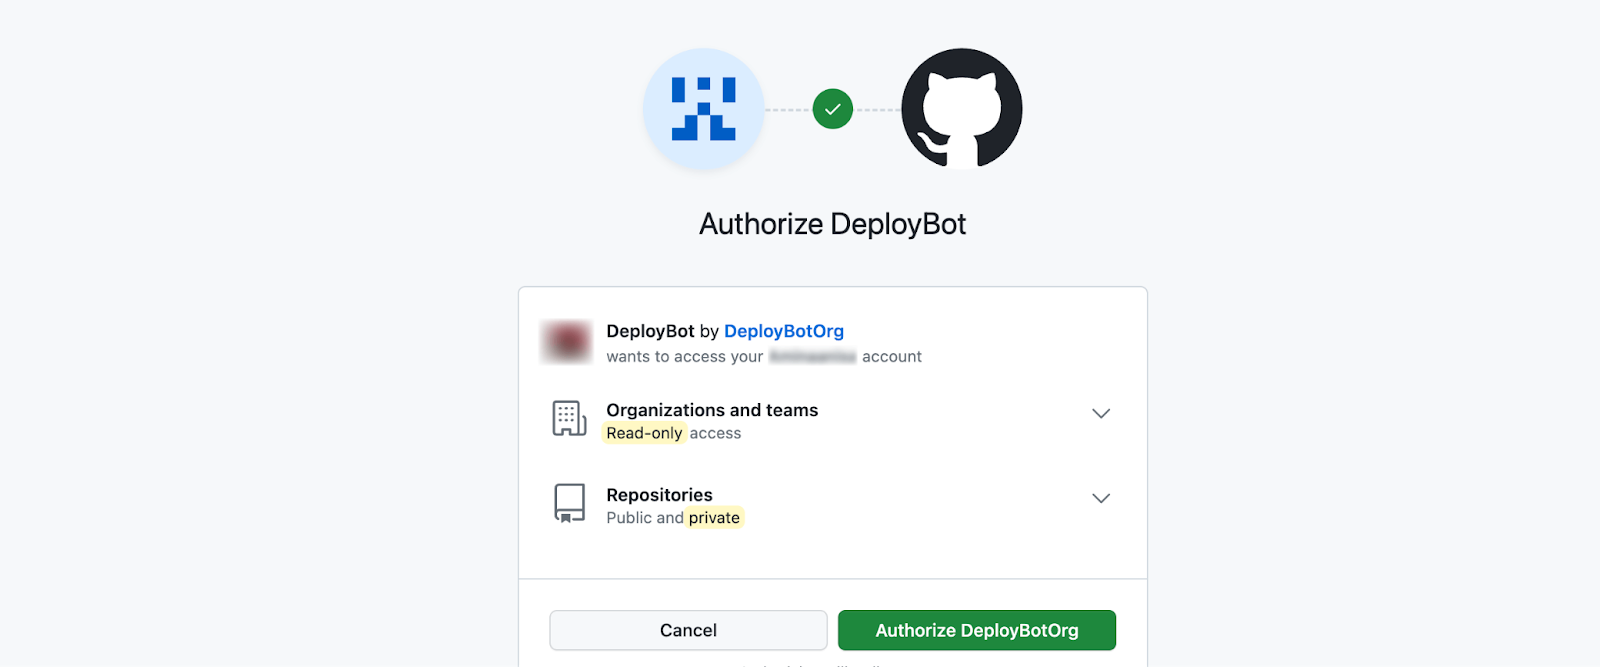
Now this will send an authorization completion message mentioning that you will be redirected to the authorized application. For any reason if you didn’t, press the “setup page” by yourself.

Then, you need to select a repo that you want to connect with SpinupWP. It means if you make any changes on this repo, the exact change will take place in the SpinupWP as well. Therefore, your one click is sufficient to make changes to all your sites.
After selecting a repo, add a label color and press the “Connect” button. This will make this repo connected with DeployBot.
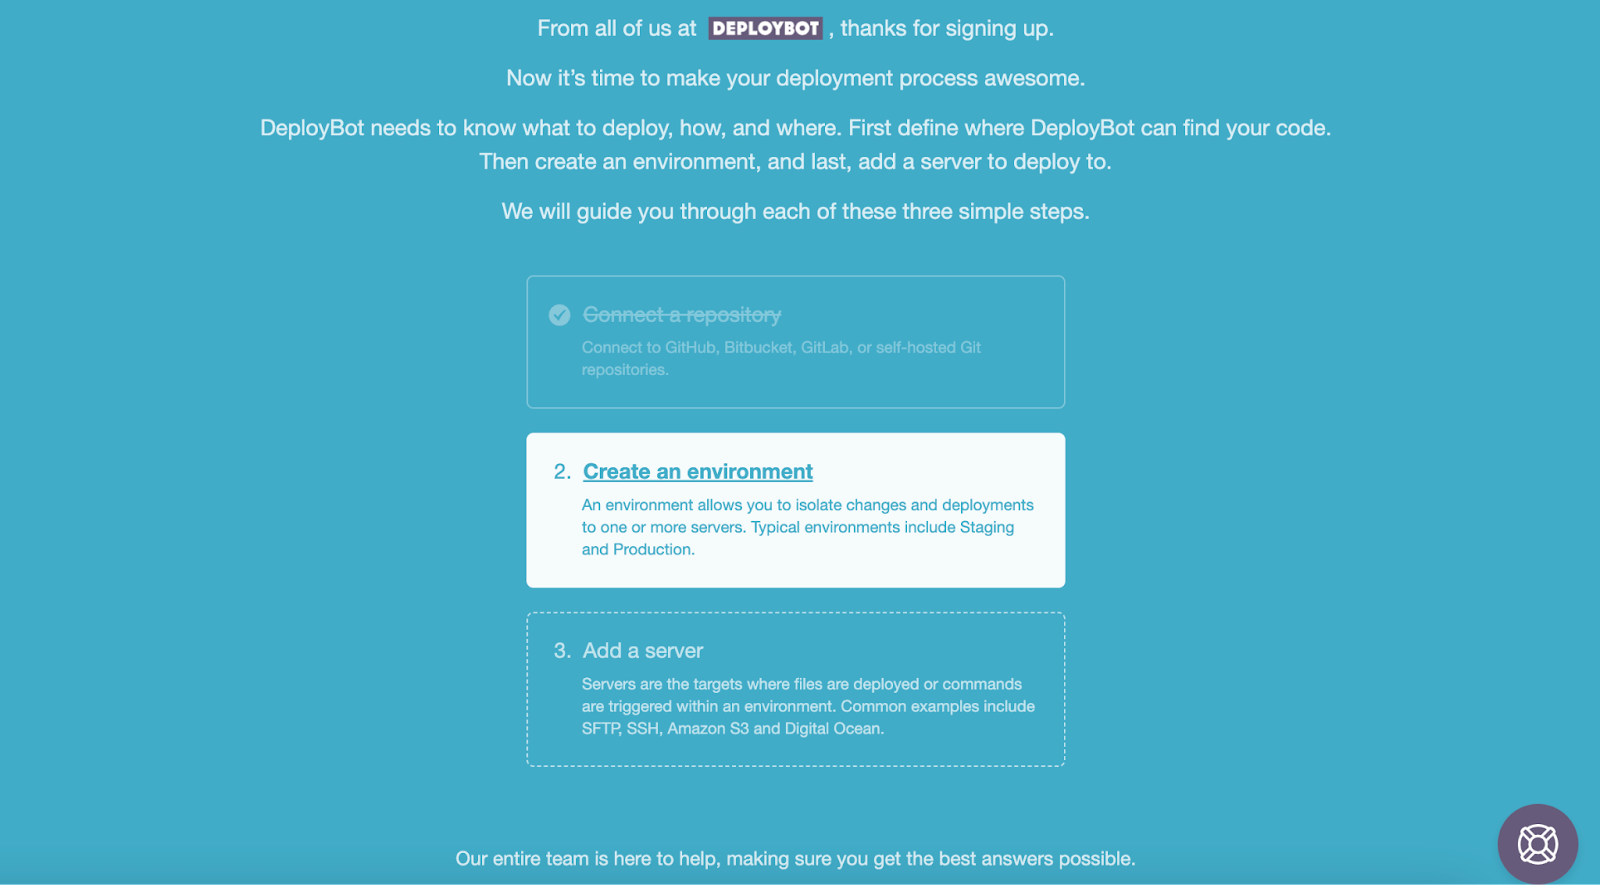
Step 3: Build an Environment.
After configuring a repository connection, you need to set up an environment. For that, press the “Create an environment” option.
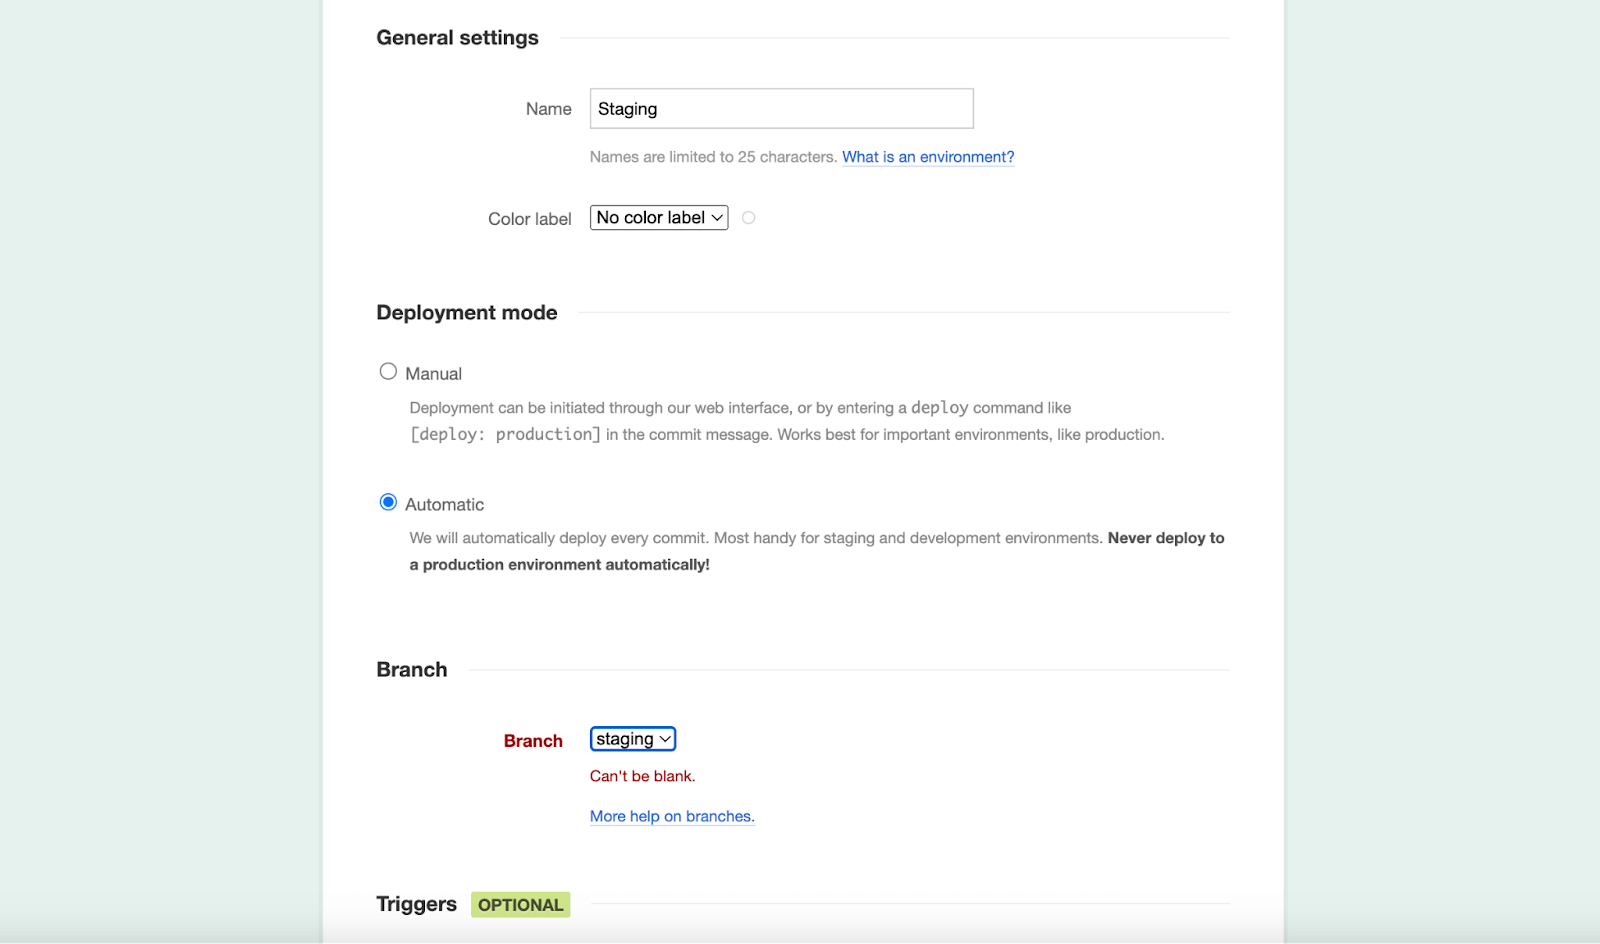
This will redirect you to all the settings that you need to configure for building an environment. Here you need to enter the environment name and color label for general settings.
After that, choose deployment mode from the following two options:
- Manual: This option will activate manual deployment which means you need to deploy each push by yourself. It significantly works great for the production environment.
- Automatic: It introduces automation in deployment. Select it for staging and development environments that automatically deploy every commit you make.
Now in the branch field, select the same branch you have created in the git repo. If you have created a staging branch then, choose staging from the drop-down menu. Thus, code deployment will occur whenever you push something in the staging repo.
After filling out all these fields, hit the “Save” button to connect an environment.
Step 4: Connect the Server via SFTP.
To connect a server, you need to visit the “Servers & Settings” option and press the “Add a server” button. This will take you to the control panel of the server connection. From here, select SFTP, which will further redirect you to the General Settings.
We’re assuming you have “Git” connected to SpinupWP. If you don’t, then follow this guide. After connecting Git, also connect DeployBot by generating an SSH key.

If you don’t know how to read the documentation for adding DeployBot via SSH key. You will find this SSH key in the DeployBot General Settings by right-clicking the “Show the Commands to add our public key to your server” option.
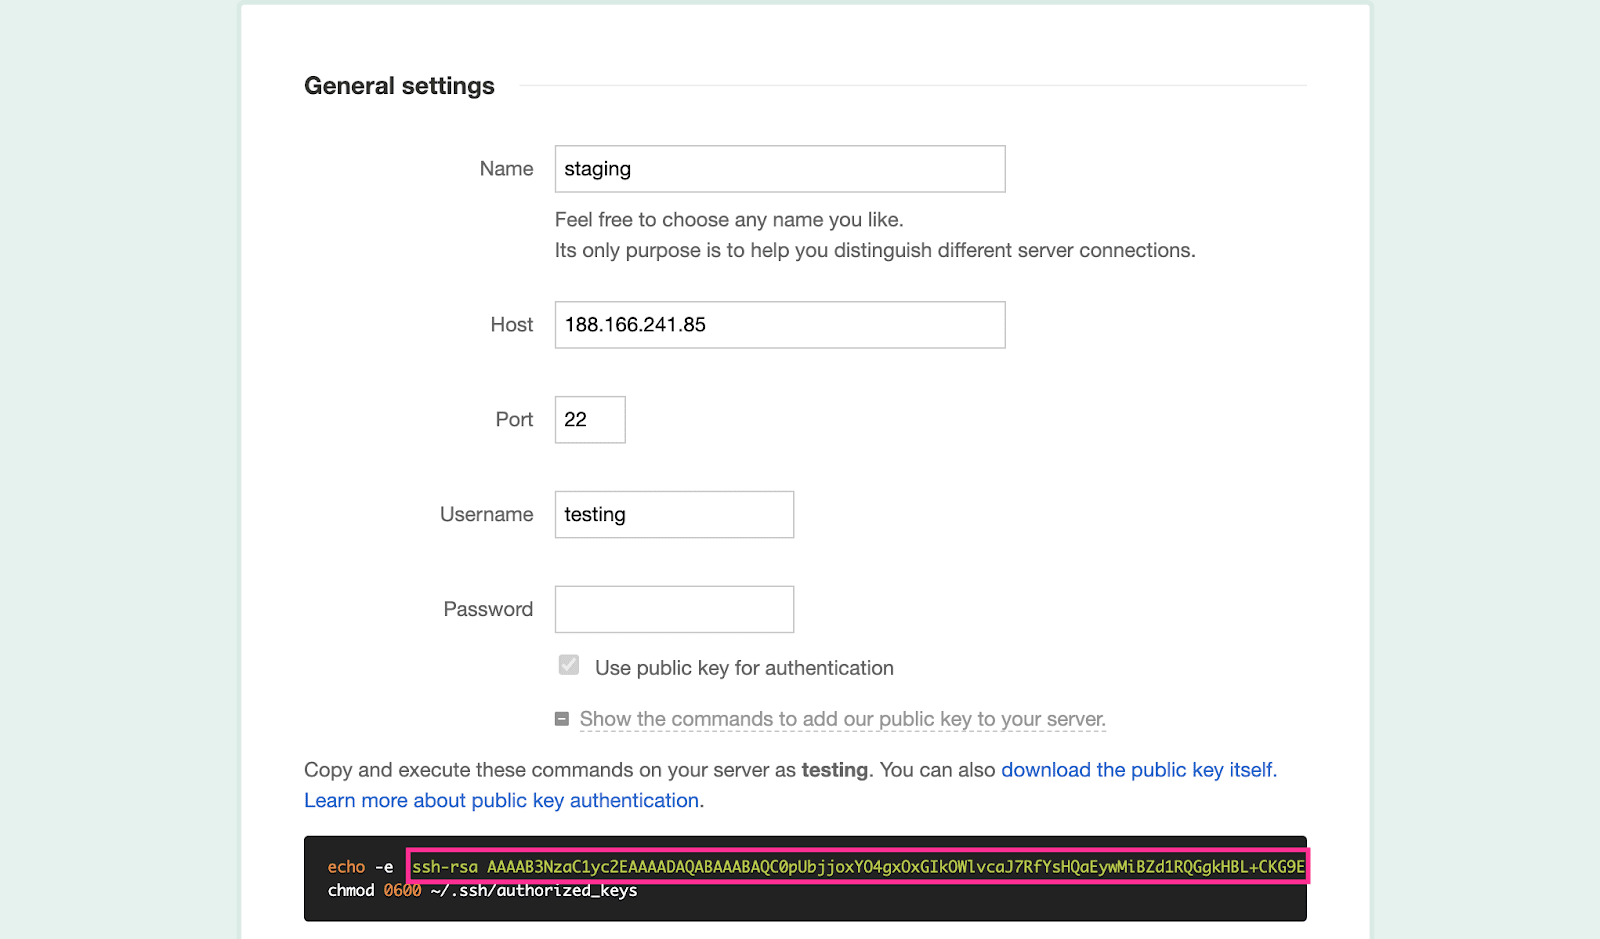
After configuring DeployBot and Git, you’ll find SFTP access, including Server, Port, and Username, from the “SFTP & SSH” tab of SpinupWP.

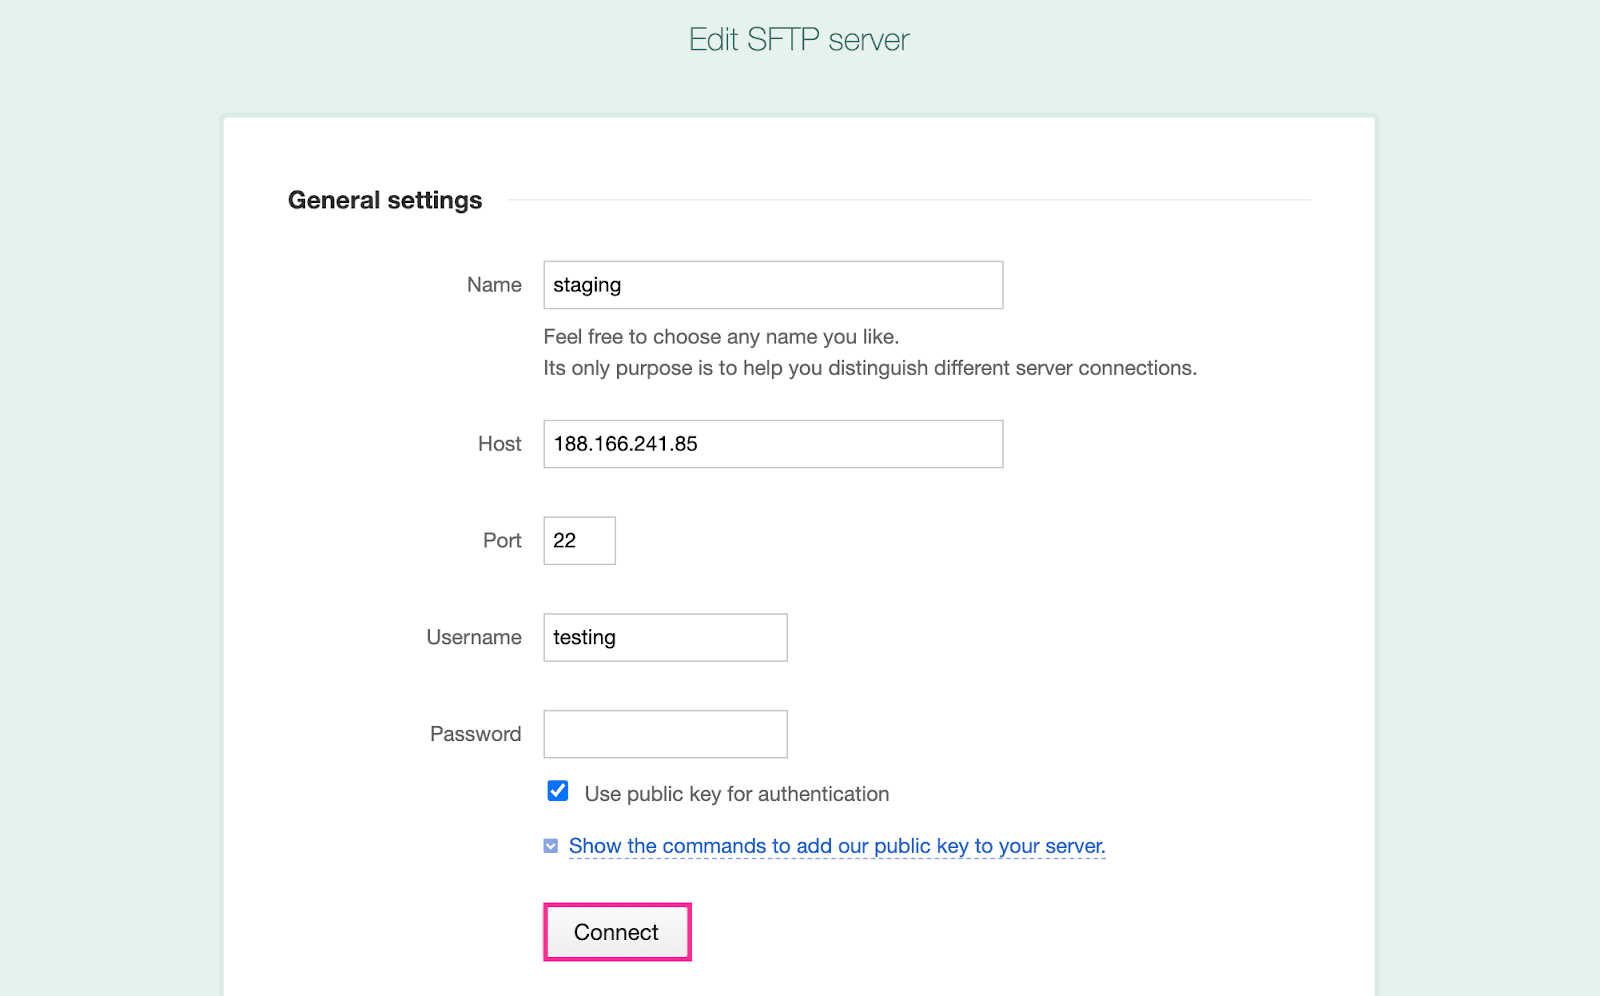
Now, copy-paste these credentials and fill out the Name, Host, Port, and Username fields. Keep the Password field blank for SSH key authentication. Also, right-click on “Use public key for authentication” and press the connect button.
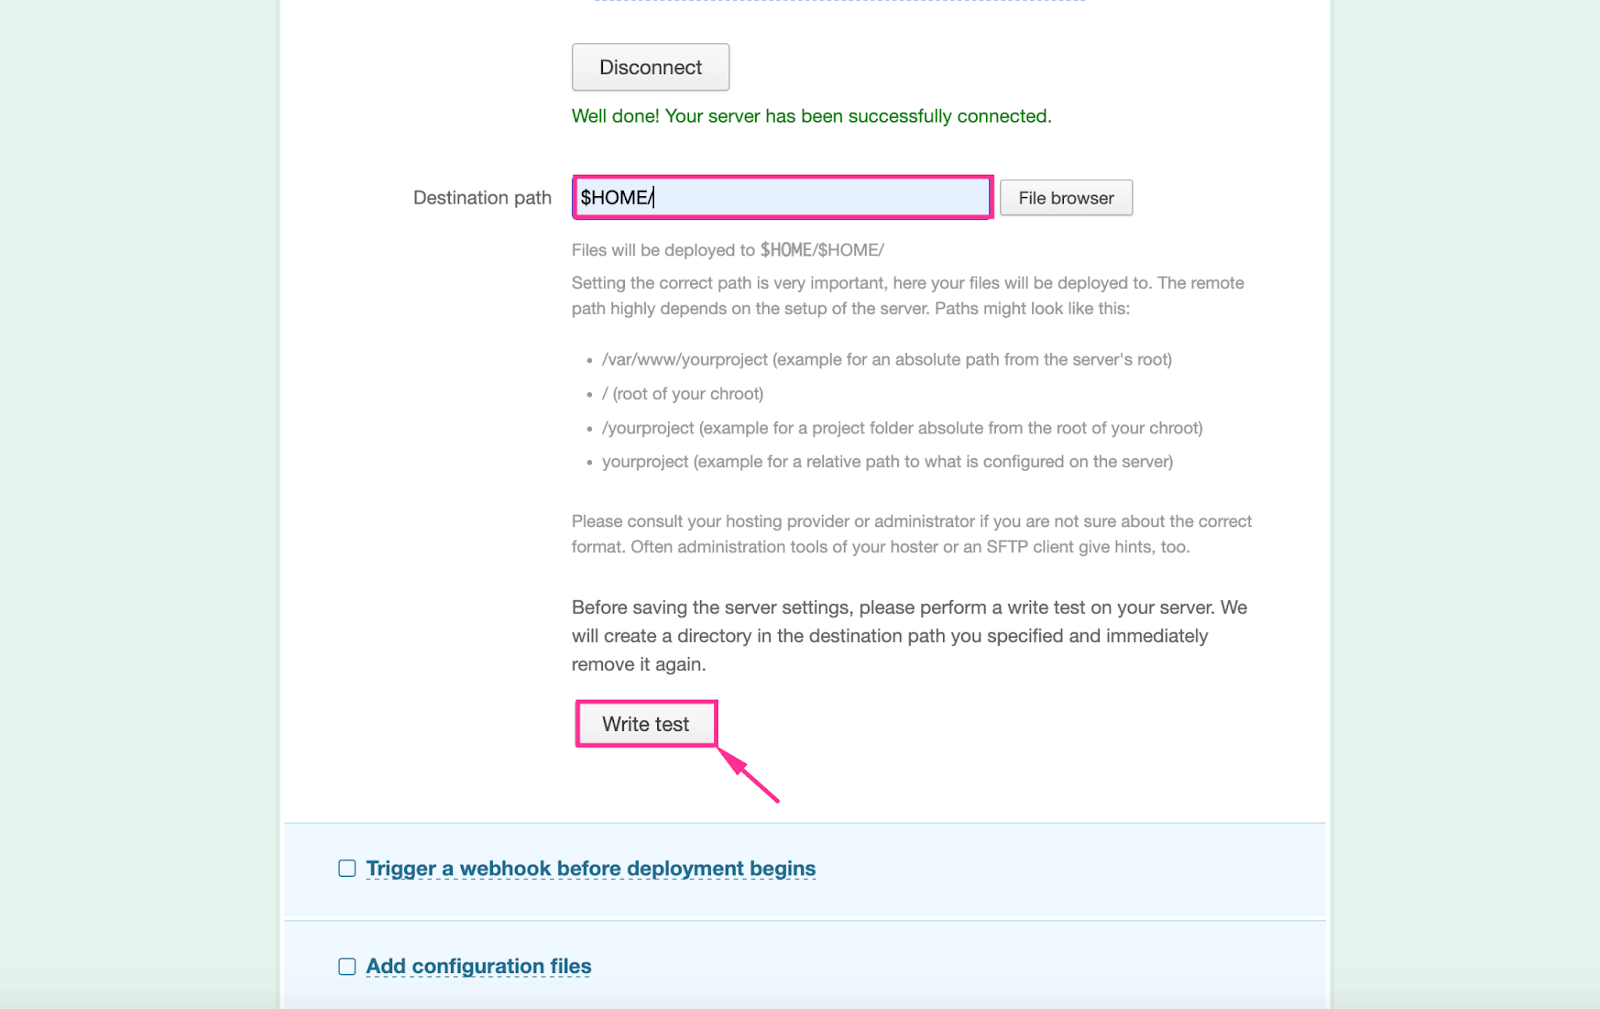
You will get to see a successful connection message after completing the integration. Then, enter the “Destination path” and press the “Write test” button.
After that, scroll down and hit the “Save” button.
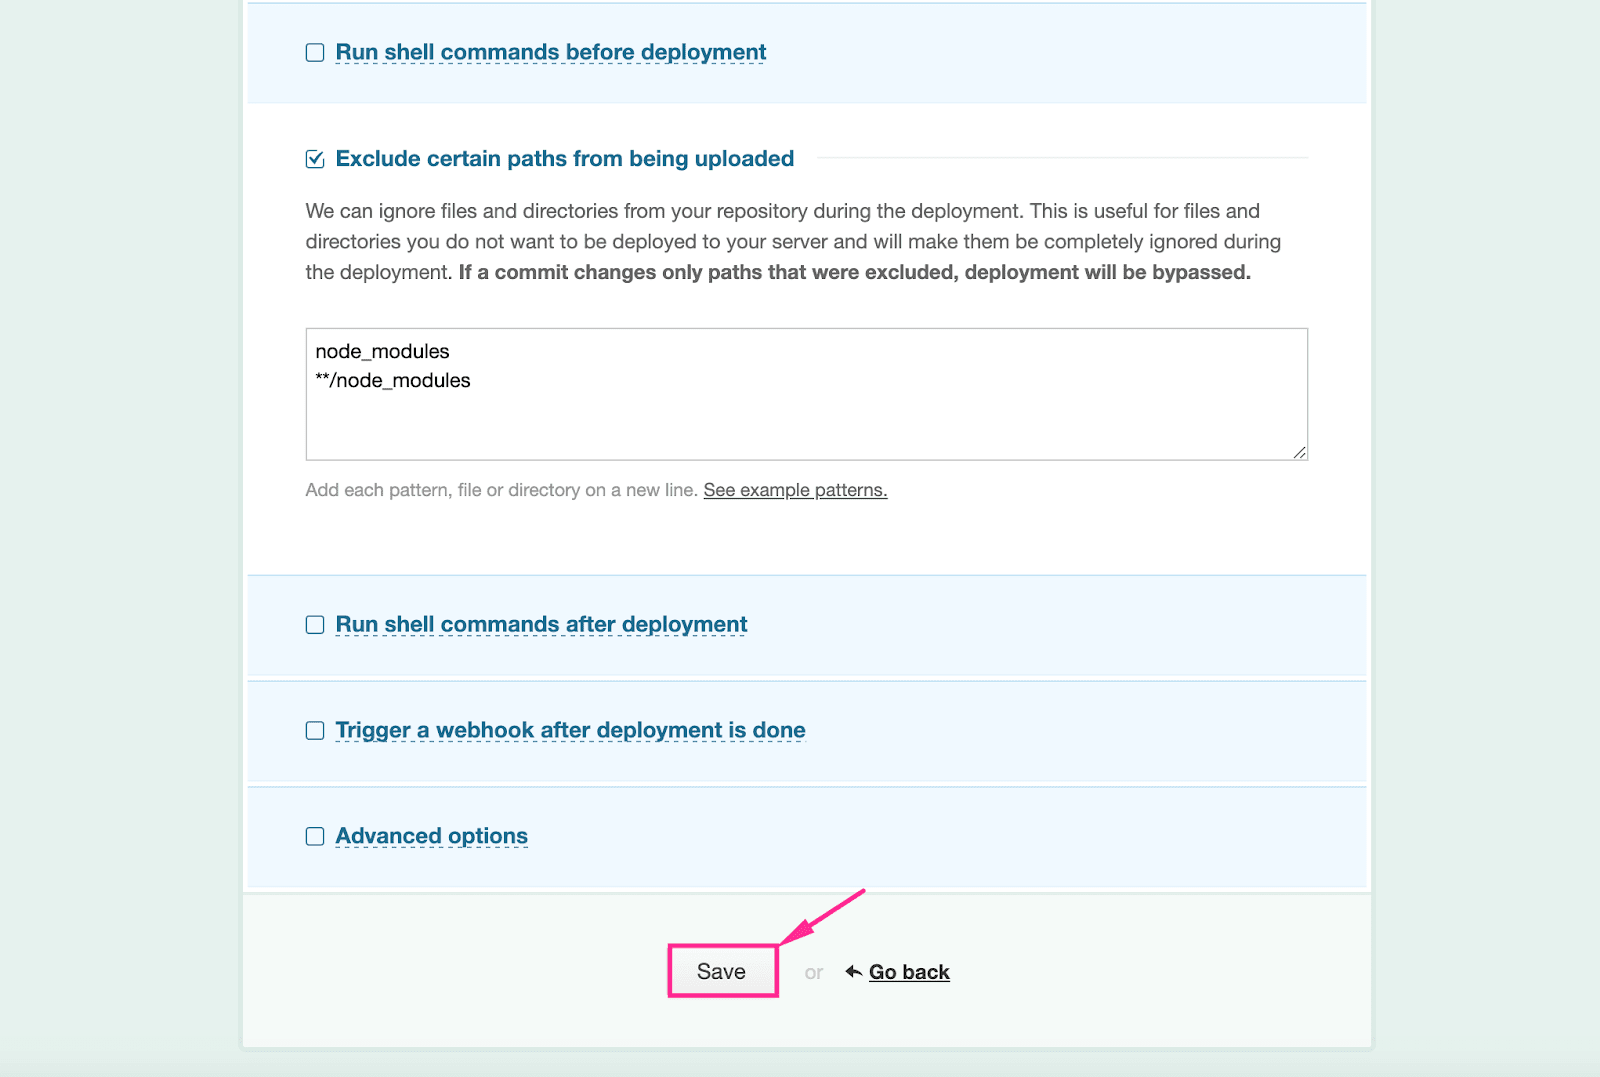
Thus, your server connection will be completed, which you will get to see in the “Servers & Settings” tab.

Simplify Your Code Deployment Process Integrating SpinupWP and DeployBot
You probably already know that deploying code to servers is a necessary evil for developers. It's often a manual, tedious process that eats up precious time you could spend writing new features or fixing bugs. With DeployBot's integration for SpinupWP, though, you can eliminate these deployment headaches.
Not just with SpinupWP, you can deploy into servers like Cloudways, EasyWP, and WP Engine seamlessly using Deploybot.
As we've covered, DeployBot can listen for changes in your repositories and then automatically pull down the latest code, run build and deployment scripts, and restart services in your SpinupWP environment. This takes the hassle out of shipping new features and fixes. No more SSHing into servers just to pull code or configure services.
Now, you can focus more on developing while DeployBot handles all the heavy lifting of actually getting that code where it needs to go. And with real-time notifications on the status of each deployment, you'll always know when new code hits your servers.
If you're a developer using SpinupWP, do yourself a favor and implement DeployBot today. It will save you time, reduce errors, and generally make your life easier. Plus, you've already learned the simplest way to deploy into SpinupWP, so why not give it a try and see just how painless shipping code can be?


