How to Run Ansible on DeployBot
What is Ansible?
Ansible is an open source automation tool that aims to ease the tasks involved in various IT operations such as configuration management, provisioning, application deployment and intra-service orchestration.
In application development, Ansible can be used to perform such tasks as downloading assets from servers and configuring the system, creating and/or moving files, compiling source code into binary code, packaging the compiled code for distribution, communicating with REST APIs, sending log messages to a team chat server with updates, sending emails to team members with a heads up, etc. As you can see, Ansible can drive all kinds of workflows.
Tasks that should be executed are defined in a Playbook using YAML and are run as shell commands on the machine over SSH. With Playbooks, your team can put in place a consistent, reliable and repeatable system for app development and deployment which will save them time and reduce errors that are likely to accrue from manually running the same tasks repeatedly.
Using Ansible on DeployBot
On DeployBot, you can use Ansible to process your code before it is deployed to your selected servers. DeployBot makes available Build Tools that can be used to execute commands that will prepare code for deployment. This is done inside a secure Docker container on the DeployBot servers. Inside the container, you have full root access so you are free to run commands that require this access.
Ansible offers a way to replace ad-hoc scripts with declarative configuration that describes how a server should be set up. For instance, a configuration change that triggers a server reboot or a database backup; or a configuration file containing placeholders that should be replaced by server-specific variables. The biggest advantage to this is that once you've written such configuration, it can be reused for more than one server.
To use Build Tools, you first specify a Docker image that will be used to create the container that your build script will be executed in. At the moment, DeployBot makes available two images that you can base your container off of - Ubuntu 16.04 and Ubuntu 14.04. These have been set up for general programming use and have the required compilers and development tools needed for basic programming needs. If the provided images don't cater to your needs (Check here for a list of what comes bundled with each image), you can use any other image on Docker Hub. At the moment, we only support the Docker Hub registry for hosted images.
Note that we will soon (April 2019) be retiring the Ubuntu 14.04 image, so we do not recommend using this. If you decide to use our predefined images, go with Ubuntu 16.04. We will make available a Ubuntu 18.04 image soon.
After setting up Build Tools, when you deploy your code, DeployBot will attach a version of the code to the selected container and execute the build script inside the container.
If the build script executes successfully, any files or directories that were added or modified as a result are then deployed to the server(s). If the build script fails (has a non-zero exit code), the deployment is stopped and marked as failed.
Configuring Build Tools
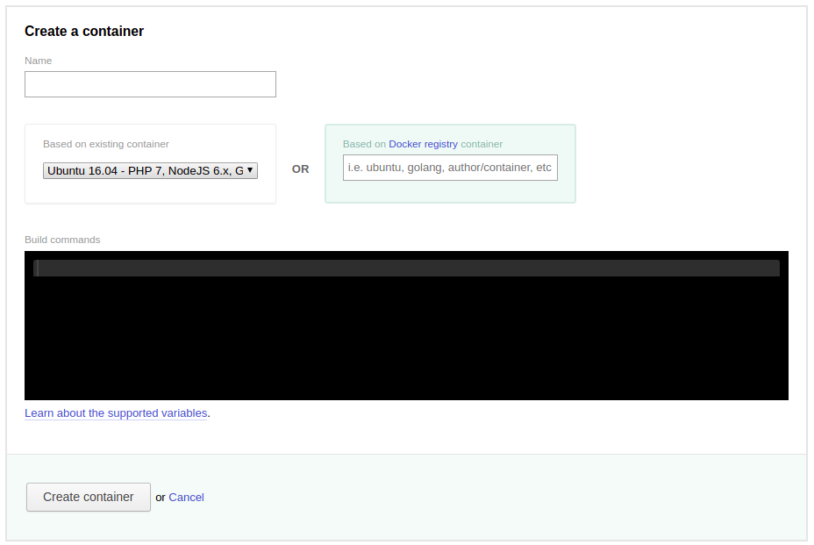
To configure Build Tools, you first need to specify the container that will be used to run your code and commands in. To do this, head over to Settings > Containers on your Dashboard.

On clicking the Create a Container button, you will be taken to a page where you can specify config settings for the container. If you have some commands that should be executed each time the container is run, you can specify them in the Build commands section.

While you can use one of our images and set commands that will download and install Ansible when the container is run, you might want to use your own pre-configured image that comes with the Ansible package.
After adding a container, you can then use it when setting up Build Tools in your server settings. On the Server Settings page, scroll down to the Compile, compress, or minimize your code section. Note that the Heroku server settings page doesn't have this section since Heroku has its own build tools that it uses to build your code before deployment.
Select the image from the dropdown menu and then specify commands that will be run when the container is built.

If you are using an image that doesn't have the Ansible package, you will need to first install it before running any Ansible commands.
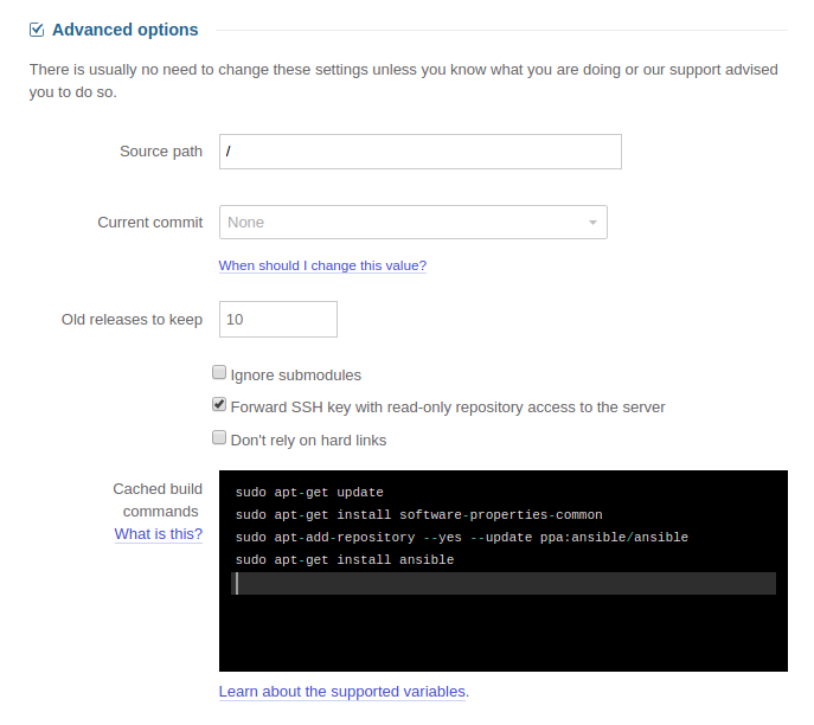
While you can include dependency/asset installation commands in the Compile, compress, or minimize your code section, we recommend including them as Cached Build Commands in the Advanced options section below the page.

Commands added to the Compile, compress, or minimize your code section are executed every time your code is deployed. For some commands, such as ones that set up the environment, e.g. commands that install dependencies, it is not necessary to re-run the command on every deployment. Thus, for better performance, you should include them as Cached Build Commands.
Cached build commands are executed once and then the results are cached for reuse until one of the following files in your repository changes: package.json, gulpfile.js, Gruntfile.js, composer.json, composer.lock, bower.json, Gemfile, Gemfile.lock, project.clj.
You can also specify your own list of files on which the cached build commands will be rerun on file-change. You set this by adding a comma-separated list of the file names as the first line of your script: # refresh: my-file.json, my-other-file.ini.
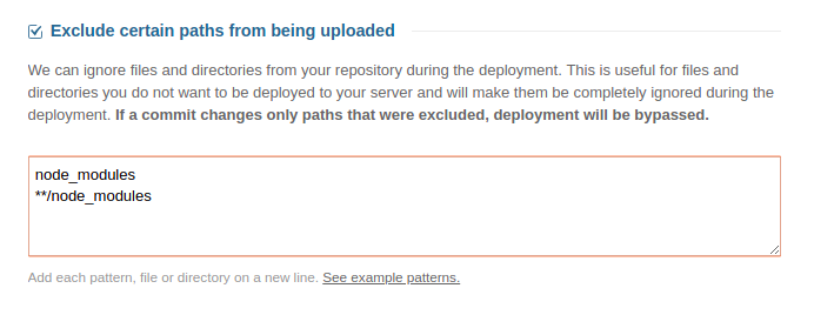
If there are some files that should not be included when deploying to the server, specify them in the Exclude certain paths from being uploaded section. For more on how to configure Docker and your server settings, check this guide.

After setting up your server, you are now ready to deploy your code. Each time a deployment is triggered, either manually or automatically, DeployBot will first process a copy of the files from your repository with the commands you provided. If the build is successful, the resulting files will be written to the /source directory. When everything goes well, the files in this directory will then be uploaded to your server(s). If an error occurs anytime during the procedure, the whole deployment process will be aborted and so your server(s) won't receive any files that might cause downtimes.
For a consistent and reliable build process, give DeployBot a try. If you have any questions or comments, drop them in the comments below, or send us a shout out via email.


