Deploy a Python Application to Heroku with DeployBot
Python is a widely used high-level programming language that has been said to be the fastest-growing major programming language. Its popularity can be attributed to a number of things. It is user-friendly and has a more intuitive coding style, compared to other languages, which makes it easier to learn. It also has a huge amount of libraries and an active community that contributes to building and maintaining the libraries and other resources. Because of this, not only is it effective in building web and desktop applications, it has also gained popularity in other fields such as Data Science and Artificial Intelligence.

In this guide, we'll go through the process of setting up an automated deployment process for a Python web application. We'll show you how to use DeployBot to configure zero-downtime deployments of a Python web app to Heroku. We'll use a Django project for the demonstration, but the same process can be used on any Python web application, whether you are using another framework or no framework.
Getting Started
Before you can set up DeployBot to work with Heroku, you first have to take care of two things: first, your code needs to be hosted in a git repository and second, you have to create an application on Heroku.
We'll assume that your code is already under version control. DeployBot supports any git repository with HTTPS or SSH URLs e.g. Github, Bitbucket, Beanstalk, GitLab and even self-hosted repositories.
For your application to work on Heroku, make sure you have the following files in its root directory:
- Either a Pipfile or a requirements.txt file. Heroku recognizes an app as a Python application by the existence of a Pipfile or a requirements.txt file in the root directory. These files are used to specify the dependencies needed by the application. Heroku automatically installs the listed dependencies when the application is deployed.
- A Procfile. This file specifies commands that are executed by the app's container (known as a dyno). In some languages/frameworks supported by Heroku (e.g. for Node.js applications), having a Procfile isn't a strict requirement (though it is recommended to have for greater control and flexibility over the app). In such cases, Heroku automatically detects the language and creates a default web process type to boot the application server. However, for Python applications, you do need to include a Procfile, otherwise the deployed application will give an error when you access it. The Procfile needs to declare the app's process types and entry point.
For the purpose of this tutorial, we'll use this sample Django application hosted on Heroku's Github account.
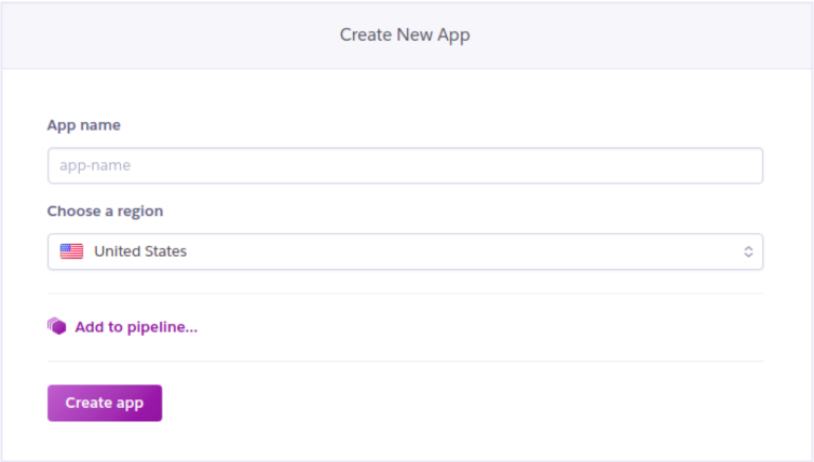
To create an application on Heroku, you can either use the Heroku Command Line Interface (CLI) installed on your computer or you can use the online Dashboard.
Configuring DeployBot
Before you can deploy your application with DeployBot, you first have to do the following:
- Connect to a repository
- Create an environment
- Add a server
Let's go through each of these.
Connecting to a Repository
From the Repositories page on your DeployBot Dashboard, you'll find a button labeled Connect a Repository which you can use to bring up a wizard dialog flow.

If you are connecting to either a Github or Bitbucket repository, you'll first be asked to authorize your account before you can select a particular repository to connect to. For other hosted git repositories, you'll provide the repository's HTTPS or SSH URL and use either an SSH key or login credentials for authentication.
When adding the repository, provide a name and apply a color label (optional), for easy identification on the DeployBot UI. After the repository has been created, you can then grant other users permission to view it and run deployments. You can do this from the repository's Settings page.
Creating an Environment
Once you've added your repository, you can then add an environment to it. This is where you'll add servers and manage your deployments.
We recommend that you add multiple environments to your repository. Maintaining more than one environment for testing and/or development makes for a more stable Production environment.

To add an environment, you need to specify a name (e.g. testing, staging, etc), set the deployment mode (manual or automatic) and select the branch that the environment will deploy commits from. If you set the deployment mode to Automatic, then DeployBot will deploy the code to the server(s), the moment a commit is made to the set branch.
For environments other than Production, we recommend Automatic deployments. For the Production environment, we recommend setting it to Manual so that a human is always involved when deploying to Production servers. When something goes wrong, they can quickly rollback changes and perform damage-control. It also prevents deployments from running at inappropriate times.
When adding the environment, you can also add an optional color label to it. This could help you group or easily identify the environments you've added to a repository.
You can also add an optional Trigger to the environment. This can be used to trigger certain actions upon each deployment to that particular environment, for example, you can set up a trigger that notifies an external application.
Adding a Server
After adding an environment, we can now add a server to it. You can have multiple servers in an environment. DeployBot supports deployments to DigitalOcean, Shopify, Heroku, AWS Elastic Beanstalk, AWS S3, Rackspace Cloud Files and all Linux based servers. It can also deploy anywhere else with SFTP, FTP, Shell, and Build servers. For each server that you set up, you can specify commands for it that can be executed either before or after deployment.

From the list of server options, select Heroku from the Web applications section. With this, deployments made to the server will be Atomic. Atomic deployments protect against faulty deploys. When something goes wrong in the deployment process, the whole transaction is discarded without affecting the running application. In this way, your application will never experience downtime due to unsuccessful deployments.
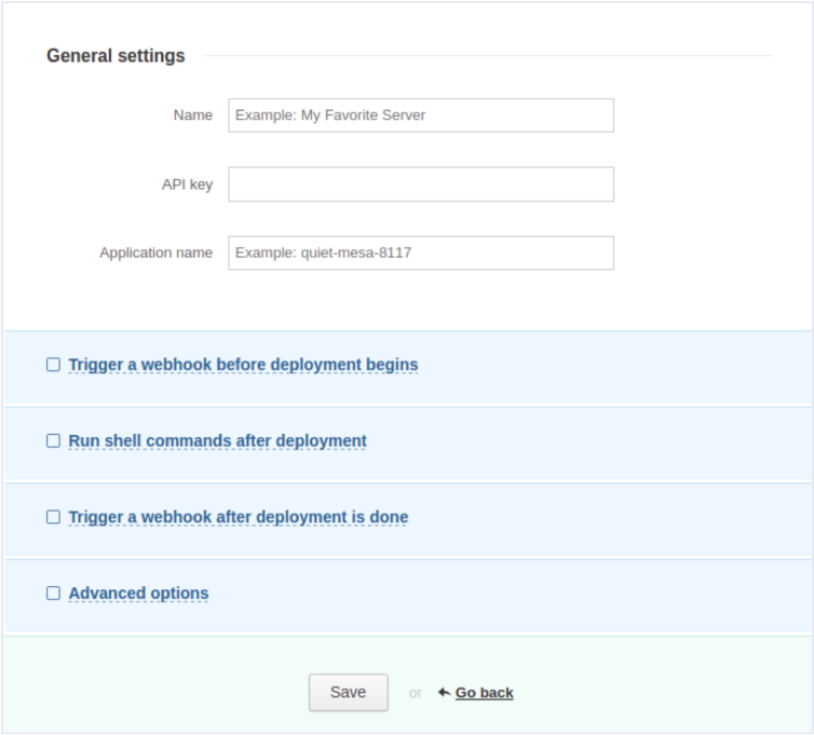
Next, give your server a name and add your Heroku API key and application name. You can find the API key on your account's Settings page. You can also add triggers and commands that you can ran at different points in the deployment process.
Once a server has been added to the environment, you are now ready for deployment.
Deploying
If you set the environment's deployment mode to Automatic, then code will be deployed to your server when a commit is made to the branch you specified.
To trigger a manual deployment, you can do either one of the following:
- On the Dashboard, there is a Ready to be deployed section that shows undeployed commits. You can select the environment to run deployment on from here.
- You can also navigate to a particular environment's page and use the Deploy button there to deploy.
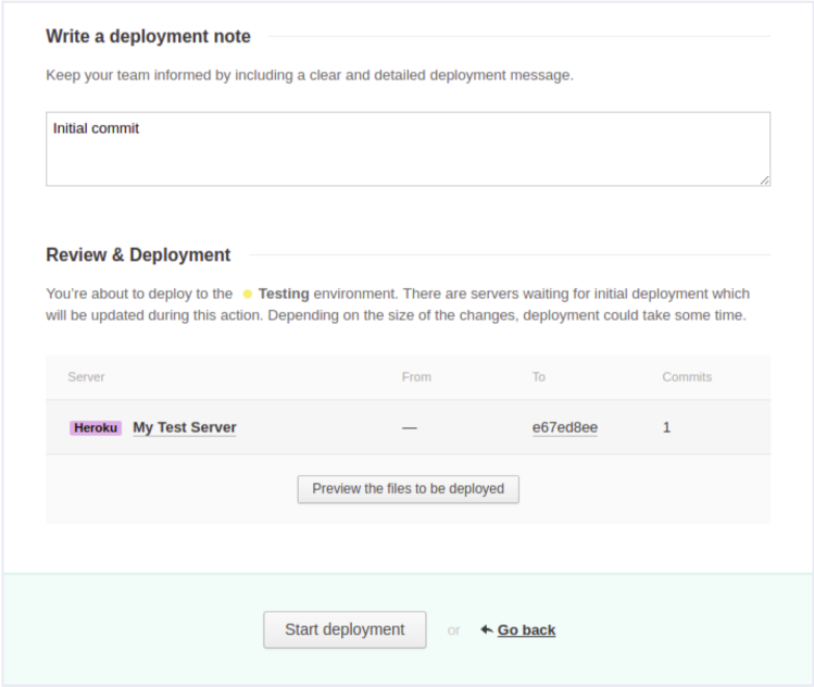
Before deployment starts, DeployBot gives you a chance to review your settings and attach a note to the deployment. After making sure everything is as it should be, you can confirm and start the deployment.
You can check the status of a deployment on the environment's page.
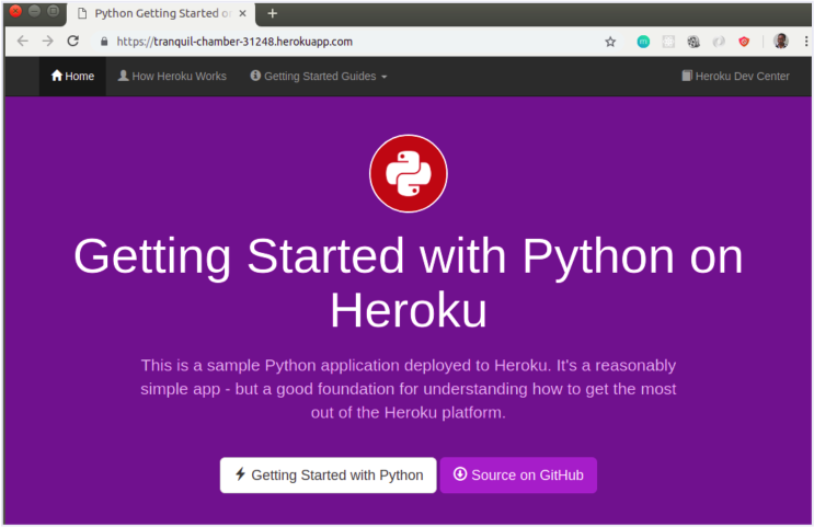
After deployment completes successfully, you can now navigate to your app's page to confirm that it was indeed deployed.
With the deployment process automated, you can now focus on developing your app and DeployBot will take care of deploying it.
We hope you found this article useful and that you were able to set up DeployBot to deploy your code to Heroku. If you have any questions or comments regarding DeployBot, please don't hesitate to leave a comment or get in touch with us.
Looking for a great deployment tool for your project? Try out DeployBot and you'll see just how seamless it makes your deployment workflow.


