DevOps meets Content Creators: CI/CD for a Headless CMS or how to connect DeployBot and ProcessWire
")
A lot of freelancers and small web agencies rely on a content management system to create and publish their digital content on the web. Without such a system their life would be so much more complicated – not many people are happy to code HTML, CSS, JavaScript, etc. in a text editor. Traditional CMS like WordPress, Joomla!, Drupal, Shopify, etc. work well as long as you're managing a single website. If you're a small web agency, though, you most likely have to handle multiple sites and generate output for different media – so, why not use a headless CMS instead?
CMS platforms like Magnolia, Directus, ButterCMS, Kentico Content, and ProcessWire, which are more flexible in making content available, are called “headless” or “API-first”, sometimes “Content Hubs” or “Content Management Frameworks”. Most of these systems use a database back-end and a web user interface, and the actual content is made accessible through an API (Application Programming Interface). Of course, this approach means that managing content works differently than in a monolithic CMS platform. A headless CMS usually requires some technical skill in web development.
This article describes the main differences between traditional (monolithic) and headless content management systems, followed by a brief introduction to ProcessWire. Next, we’re going to show how to connect ProcessWire and DeployBot – a deployment tool is the ideal addition to a headless CMS.
What is a headless CMS?
The main difference between a headless and a monolithic CMS is that a headless CMS is a back-end only system, built from scratch. It provides a way to author the content as data over an API instead of the content being connected to a particular output (like web page rendering). Traditional CMS platforms are often called monolithic because one single system provides all the functionality.
So, why is it called headless? Well, it refers to the head (the front-end where your content ends up, i.e. the website) being “cut off” from the body (the back-end, i.e. the repository for the actual content). All content is accessed via the API, and a headless CMS doesn’t care about where and how the content is displayed. Its main purpose is to store and deliver structured content. Basically, it all comes down to: you get to choose the heads your content is being sent to.
This doesn’t necessarily mean that editors and administrators have no user interface to work with – headless CMS systems can provide a UI which then uses the API in the background.
Differences between Monolithic and Headless CMS
A monolithic content management system consists of mainly four parts:
- A database (used to read and write content)
- The admin interface (where editors/authors manage the content)
- Integrations for writing and reading the content
- The front-end which combines data from the database with HTML/CSS
To change this setup into a headless CMS, all you have to do is remove the head, i.e. the actual website. The admin interface, integrations for reading and writing, and an API remain.
Since the headless CMS has separated the head from the rest of the stack, web developers create the websites with the help of the delivering API which loads the content. Sounds inconvenient? Well, not really – it’s just a different approach. By disconnecting the CMS from the front-end, developers can use their preferred programming language and don’t need to stick with what the CMS offers. Also, they can work without really having to care about the content.
What is ProcessWire?
ProcessWire is a free and Open Source content management system (CMS), content management framework (CMF), and web application framework (WAF). It is written in PHP and distributed under the Mozilla Public License 2.0. ProcessWire is built around an API (application programming interface) similar to the JavaScript framework jQuery. This API’s goal is to provide a well-defined interface (plus additional tools) for web developers to interact with the content managed by the CMS.
“Interaction” in this case simply means “producing output”, for example adding markup, creating new content, changing existing content, and so on. ProcessWire is entirely built around its API, and even the admin panel is really a website which was built using the API. The ProcessWire documentation says:
ProcessWire was a headless CMS before there was a term for it. ProcessWire's easy-to-use API can do everything that you can do interactively in the admin, and more.
Setting up ProcessWire
Installing this CMS isn’t too different from setting up a traditional CMS:
- You have a web server (for example Apache) with PHP, MySQL/MariaDB and some extra Apache modules and PHP libraries.
- You download the latest ProcessWire
.zipfile or clone their GitHub repository. - You open the ProcessWire installation file in your web browser and follow the instructions.
ProcessWire uses special terms to describe its internal structure. There are pages, templates, and fields. While almost everything in ProcessWire is represented by a page, and every page has a template which defines the page type and the fields presented on the page. Fields are where the actual content is stored. But let’s not get into too much detail here – for more information I recommend the well-written ProcessWire manual.
Let’s take a brief look at the directory structure. In your root directory you will find the files .htaccess and .gitignore as well as index.php and install.php. Apart from that, there are only two directories in the main folder:
wire: the ProcessWire installation and modulessite: everything unique to a site, for example templates, your configuration, stylesheets, scripts, cache files, etc.
Fore more information about the file structure, please read the respective chapter in the ProcessWire documentation.
Now, before you start making any changes to your new website, let's connect your new web project to a version control system. Start with creating a new blank repository on GitHub, GitLab, Bitbucket, or any other Git hosting service.
DeployBot is here to help you: it comes with a number of integrations for external tools and can quickly deploy your work to different environments. You can find an ever growing collection of beginners’ guides on our website:
Connecting ProcessWire to a VCS
We’ve decided to connect our new ProcessWire installation to a GitLab repository and we’ve included the entire directory, including all files and sub-directories:
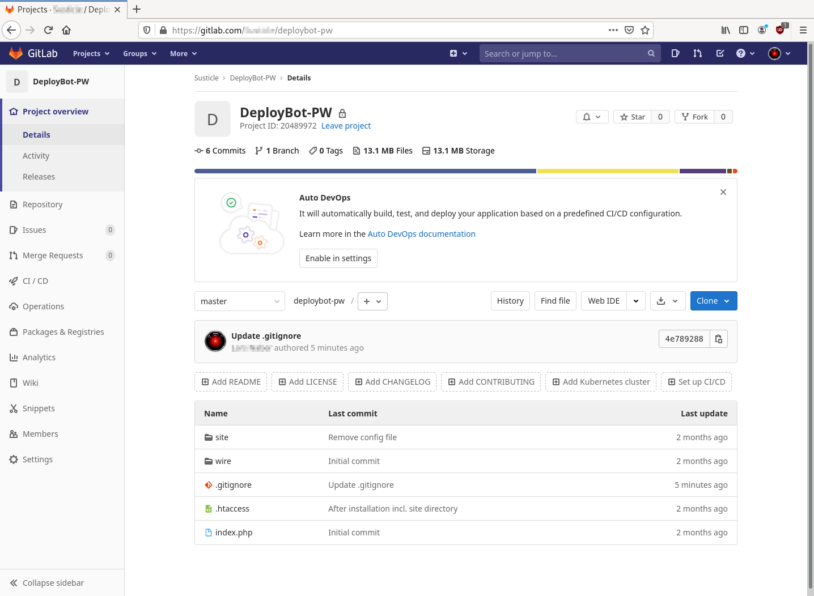
We’re using the .gitignore file to exclude certain files and folders from commits. Actually, the .gitignore file provided by ProcessWire itself is a good starting point, it looks like this:
*.sql*.zipsite/assets/cache/*site/assets/ProCache*site/assets/pwpc/site/assets/sessions/
You might want to consider adding the wire directory if you don’t want to deploy the entire CMS. For our installation, we’ve decided to add the file /site/config.php to the .gitignore file – read the next section to find out more about configuration files and how DeployBot can help you to deploy them.
Dealing with Configuration Files
ProcessWire stores every site-specific configuration in /site/config.php, other CMS installations use similar files – anyhow, putting such a configuration file in a repository is not the best idea, especially if it contains sensitive data like passwords or private keys. Since you do need the configuration on your server eventually, you need to upload it. There is no need to do this manually, though, let DeployBot handle it for you.
When configuring your environment in DeployBot, choose either Configuration files from the menu or click Settings in your server configuration and scroll down to tick the checkbox Add configuration files.
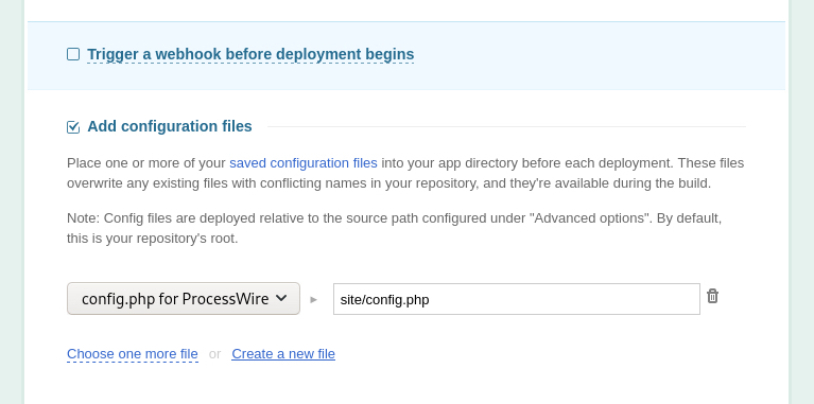
You can either upload an existing file from your computer or open a simple text editor by clicking Create a new file. Make sure to choose the correct location for the file: config files are deployed relative to the source path which you can set under Advanced options. By default, this is your repository’s root (/). For our ProcessWire installation we’ve therefore chosen site/config.php as the destination.
Note: It’s possible to store more than one configuration file for different servers. That way you can deploy one ProcessWire installation to more than one server and select the correct configuration accordingly.
The Rest of the Setup
Well, that’s it basically – the remaining steps are the same as for other projects. Make sure to create your environments, connect your servers, etc. as described in our various Getting Started Guides. As always, it’s best practise to include a staging environment, so you can test your code before it goes live on a production system.
Connecting a headless CMS to a CI/CD tool will not only improve your team work, it also allows you to migrate the CMS (or more precise: the file system) to another server if necessary.


