Using DeployBot with Docker: Getting Started Guide
This guide is a DeployBot x Docker tutorial for beginners. We'll discuss the following topics - what is Docker and how to use it, how to create a Docker container and how DeployBot and Docker work together for smooth, fast deployments. If you're using Docker, getting started with DeployBot is a snap. (As you'll see!)
What is Docker?
Docker is an open source project that allows you to package your application into a standardized unit for deployment to any server. It’s a platform that allows you to pack, distribute and manage Linux applications within Docker containers.
A Docker container consists of three components.
- A Docker image
- Execution environment
- A standard set of instructions
Docker containers are often compared to virtual machines, but they’re quite different and we’ll discuss more on that later. For now, just know that Docker gathers all the packages and applications it needs to run your application.
What is a Docker image?
A Docker image is a filesystem and parameters to use at runtime. It doesn’t have state and never changes. It is the main source code of a Docker container. The exact definition as stated from the folks at Docker is this:
“An Image is an ordered collection of root filesystem changes and the corresponding execution parameters for use within a container runtime. An image typically contains a union of layered filesystems stacked on top of each other. An image does not have state and it never changes.”
source: docs.docker.com
What is a Docker container?
A Docker container is a running instance of an image. The concept is borrowed from shipping containers, which define a standard to ship goods globally. Docker defines a standard to ship software.
It consists of an entire runtime environment: an application, plus all its dependencies, libraries and other binaries, and configuration files needed to run it, bundled into one package. This package is the Docker container.
Docker containers work similar to GIT repositories, allowing you to commit changes to your Docker images and version control them. For example, let’s say you perform a component upgrade that breaks your whole environment. It is very easy to rollback to a previous version of your Docker image.
Virtual machine or Docker — what’s the difference?
A virtual machine (VM) is a replica of a physical computing environment. While that all sounds good, there are some things you need to account for. A virtual machine requires a lot of overhead.
As stated, a VM is a program on your current operating system that acts as a virtual computer. And as with any computer — there are some basic requirements needed for it to function. Some of those things include a hard drive, memory, and an network interface. Because your machine is “virtual” and not a physical computer, the hardware devices in your VM are managed by a virtualization layer that pull from your physical computer. This means that the memory, and hard disk needed for your virtual machine is located on your local hard drive.
You can use virtual machines to test or experiment with new operating systems. And while there is no limit to the amount of virtual machines you can install on your system, it’s important to know that you will be limited to the amount of storage and physical resources you have available to them.
In stark contrast, Docker is lightweight and can be created quickly as you don’t have to boot an operating system kernel. Before you get started, it's a good idea to review some of the key benefits of Docker so you can make the best decision for your workflow and deployment needs.
Benefits of Docker Containers for Simplicity & Security
- It’s simple. Docker is portable and easy to use. And as long as it’s supported by the OS host, Docker containers can be run inside Amazon EC2 instances, Google Compute Engine instance, Rackspace servers or a VirtualBox. Because of this, the requirements of the infrastructure are no longer connected with the environment of the application itself.
- It’s faster. One advantage of using a virtual machine is that it allows you to have your own platform with it’s own custom configuration on top of your current infrastructure. With Docker, you can have a similar process without the hassle of using a virtual machine. What's more, unlike a VM, Docker does not need to reboot an operating system so you can deploy in a matter of seconds and reduce your overall deployment time. Easier process, faster results.
- Security. Docker uses host OS sensitive mount points (e.g., ‘/proc’ and ‘/sys’) as read-only mount points and uses a copy-on-write filesystem to make sure Docker containers can’t read each other’s data. To add, the images available on Docker Hub are digitally signed to ensure authenticity. And since containers are isolated, even if one of your applications is hacked, it won’t affect applications that are running on other Docker containers.
Installing Docker
Docker provides instructions on how to install Docker Engine on a variety of systems.
Docker for Linux distributions
- CentOS
- Debian
- Fedora
- Oracle Linux
- Red Hat Enterprise Linux
- openSUSE and SUSE Linux Enterprise
- Ubuntu
- Other Linux distributions
Docker for Mac and Windows
You can also install Docker Cloud for products like DigitalOcean, and AWS. There’s more details on that here.
How to Use Docker: Basic Commands
Now that you have Docker installed, you can start running commands.
Below are a few of the common Docker commands you’ll work with. To keep things simple, we’ve pull the exact definition directly from the documentation from Docker.
docker run my-imageThe Docker run command first creates a writeable container layer over the specified image, and then starts it using the specified command.
docker stop container-idThis commands allows you to stop one or more running containers.
docker psThis command only shows running containers by default. To see all containers, use the -a (or --all) flag:
docker rmThis command allows you to remove one or more Docker containers.
These are some of the common Docker commands, but there are others you may need for reference. You can find some of those here.
What is a Dockerfile?
Dockerfiles are the ingredients that make up the files, environment, and commands of an image. The Docker team has a helpful guide on how to create your own image by writing your own Dockerfile.
Using Docker with DeployBot
By default, DeployBot comes with its own Docker containers. But there may be situations where you need specific dependencies that we don’t include. For the sake of convenience, there are a few ways to create Docker containers with custom dependencies.
- Use our predefined container as a base and modify it to fit your needs.
- Can create your own containers, based from any public containers from Docker Hub.
How to create a Docker container with customization
You can create your custom container in DeployBot in the settings section of your account.

When you create a container with a base, DeployBot will add the build commands you specify on top of the base container you select. If your needs are more advanced, you can create your own custom container from scratch, deploy it to the Docker registry and then create your new container in DeployBot.
There is a fantastic Docker how to for creating a custom container from scratch here.
Uploading to the Docker Hub
Before you can upload images to the Docker Hub you’ll need two things.
- Docker Hub account. You can sign up for an account here: https://hub.docker.com/register/.
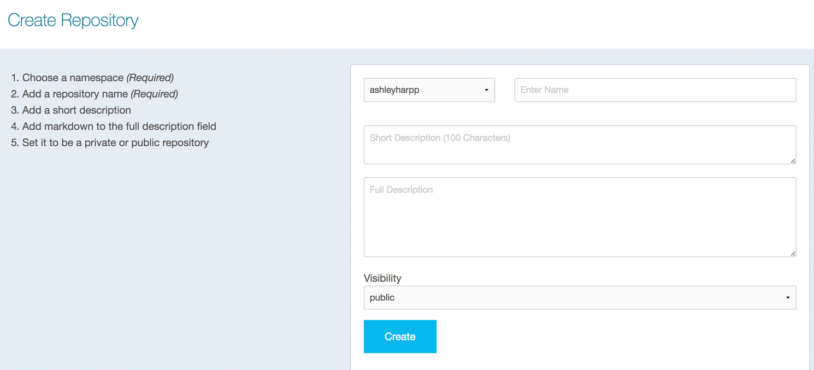
- A repository on Docker Hub. After you’ve signed up, you can create a repository through the Docker Hub website.

Once that’s done, use the terminal to tag, push, and pull your image. Docker has a detailed tutorial on how to do this. View tutorial.
Once your Docker container is ready, you can include the command to use it in DeployBot.
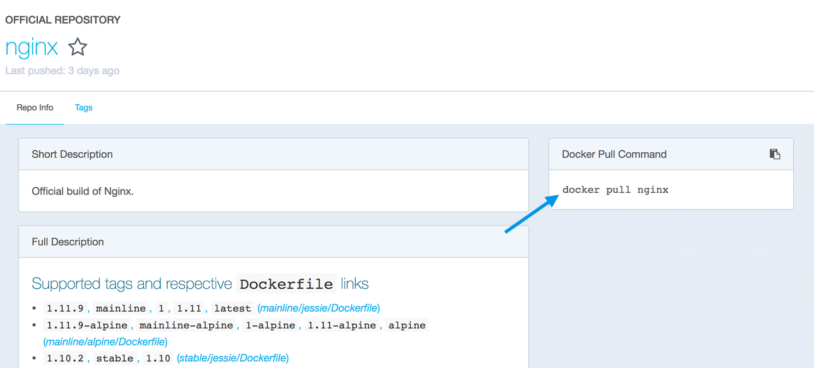
For example, if you wanted to pull this container into DeployBot you’ll need to copy the name of the build:

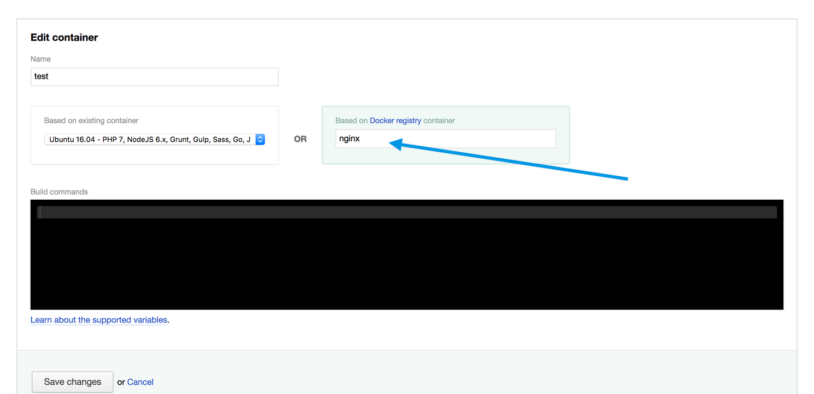
And include it in DeployBot here.

Now that you know more about how Docker works, and how to use Docker with DeployBot, why not go ahead and set up build tools on your account? And if you’re already using your own Docker container and this was a refresher for you — we’d love to hear how it’s going, and if you've got tips of your own that you'd like to share with other DeployBot users. Just email us or give us a shout on Twitter.


