Tell your Team: DeployBot’s Notifications Integrations

Notifications about deployments and releases help you and your team to stay in the loop on your projects’ activities. Instead of monitoring the actions yourself and reporting back to other team members, simply automate this process and let DeployBot take care of the announcements. This way you won’t forget to spread the news and everyone gets notified if something was deployed successfully or if a deployment has failed.
DeployBot offers integrations for Slack and can also inform you and your team by email. After you’ve set up the integration, you configure your environments to trigger one or more actions which happen after a deployment. Both notification methods, Slack and email, show when the deployment happened (date and time); they also reveal the commit number, the environment (i.e. production or staging), the server name, the commit message, the branch, the status (i.e. success, bypassed, failed, etc.), and the name of the team member who started the deployment.
In this article I’m going to show you how to set up integrations for email and Slack. I’ll also describe how to configure triggers for your environments and receive the notifications. Let’s look at the general settings first.
Setting up Integrations
After you’ve logged in to your DeployBot account, go to Settings. On top of the page, in the Notifications area, you can configure both, Slack and email notifications. The page also allows you to change or delete existing connections: simply click on the Delete or Edit icon.
Please note that the DeployBot dashboard still shows a button to configure Campfire integrations, although Campfire has been merged into Basecamp some time ago. The standalone version of Campfire is still around, though, and existing customers can connect it to DeployBot. However, the company no longer offers Campfire to new customers.
Email Notifications in DeployBot
Let’s start with setting up email notifications. In the dashboard, click Add next to the email icon. Enter your email address, and confirm with Add. DeployBot now sends out a confirmation email with a link. Open that URL in your web browser to complete the setup. If you ever want to change or delete an email address, you can always go back to the Settings page and click on the icons next to the address.
Next, go to one of your repositories and modify the settings for an environment. After you've clicked on an environment, change to Servers & Settings and scroll down to the Triggers section. Here you will see all notification methods you enabled earlier in the general settings. Activate Notify Email and choose an email address from the drop-down menu. Click on Save Changes, and repeat the steps for the other repositories/environments if you like.
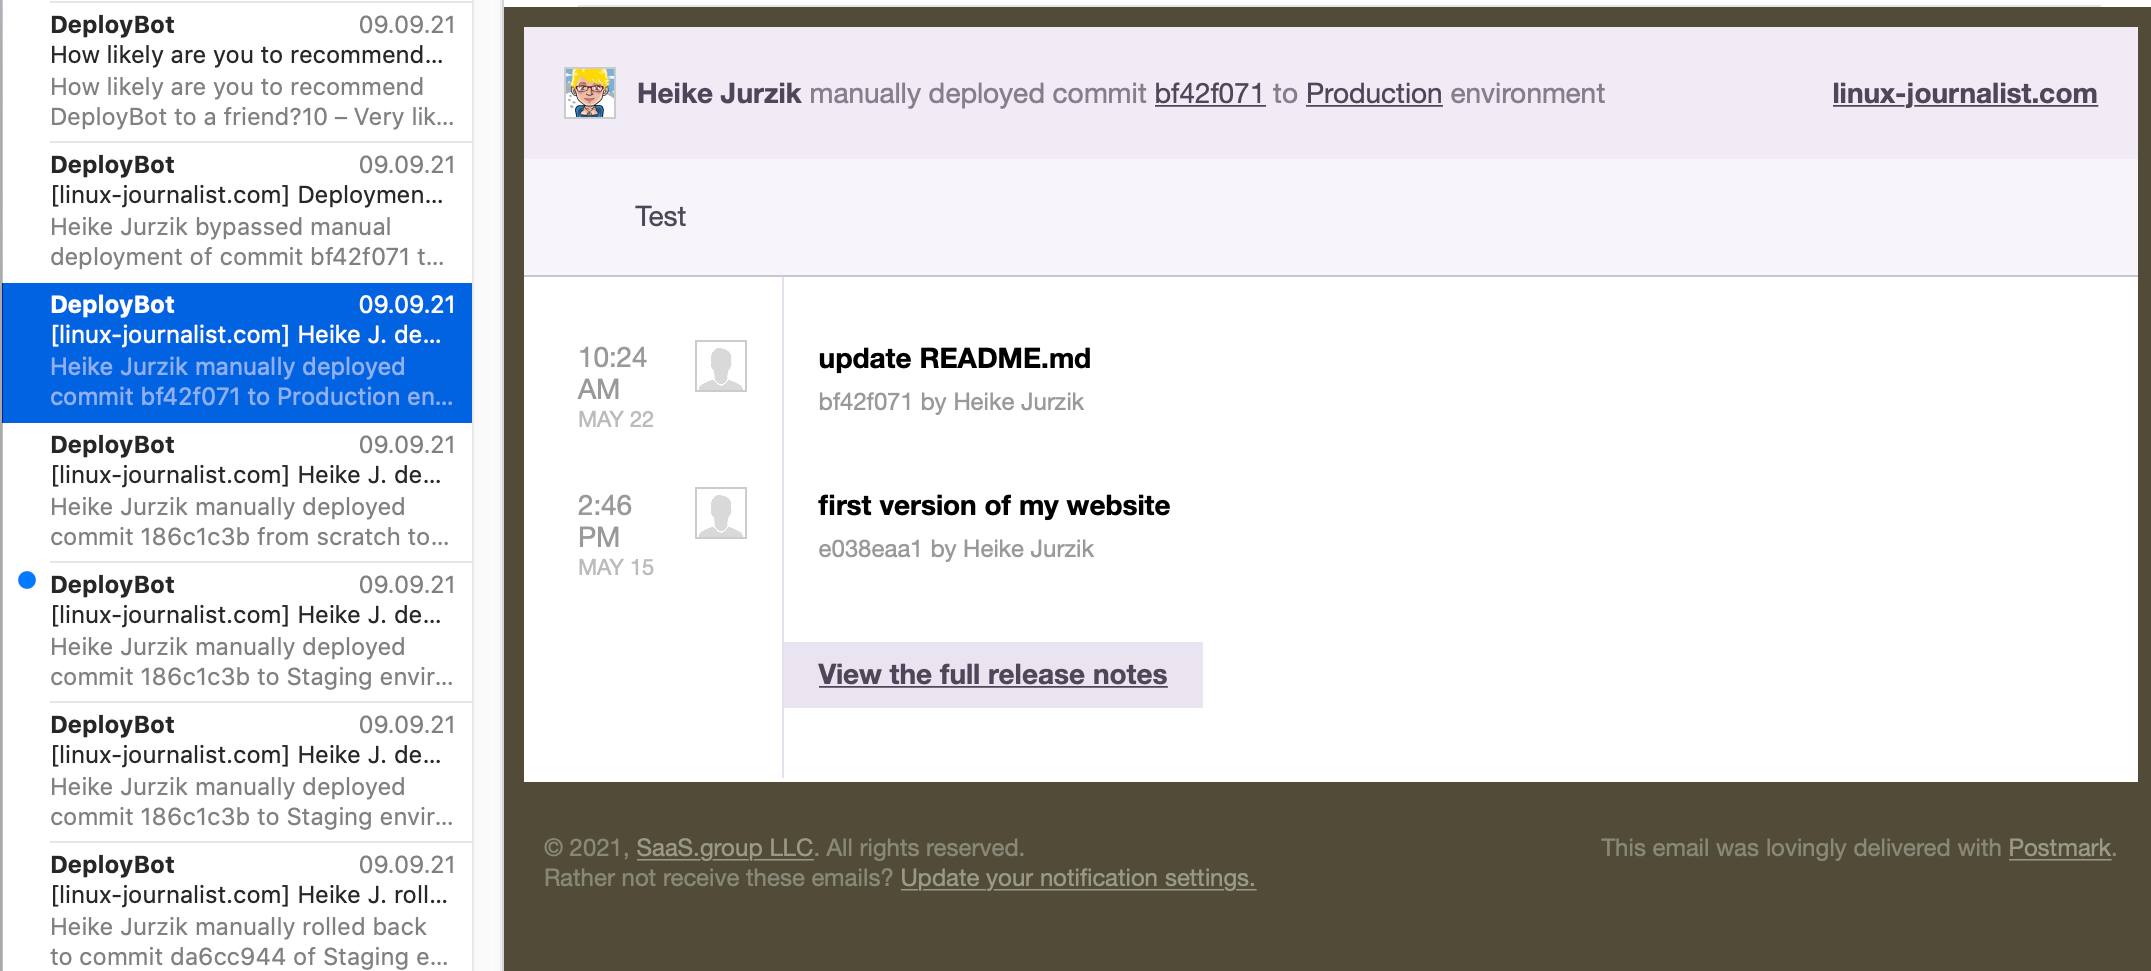
Next time something is deployed automatically or manually, you (or your team members) receive an email to the address you set up earlier. As you can see, the email contains lots of details and some links to your version control system and the DeployBot dashboard, so you can easily open the corresponding URL in your web browser.

If you’ve read this far, you’re probably a DeployBot user and familiar with version control systems, CI/CD, and other related topics. If not, we’ve compiled several beginner’s guides: Laravel, Digital Ocean, Ruby on Rails, Docker, Craft CMS, Ghost CMS, Google Web Starter Kit, Grunt or Gulp, Slack, Python, Heroku and many more.
Slack Notifications in DeployBot
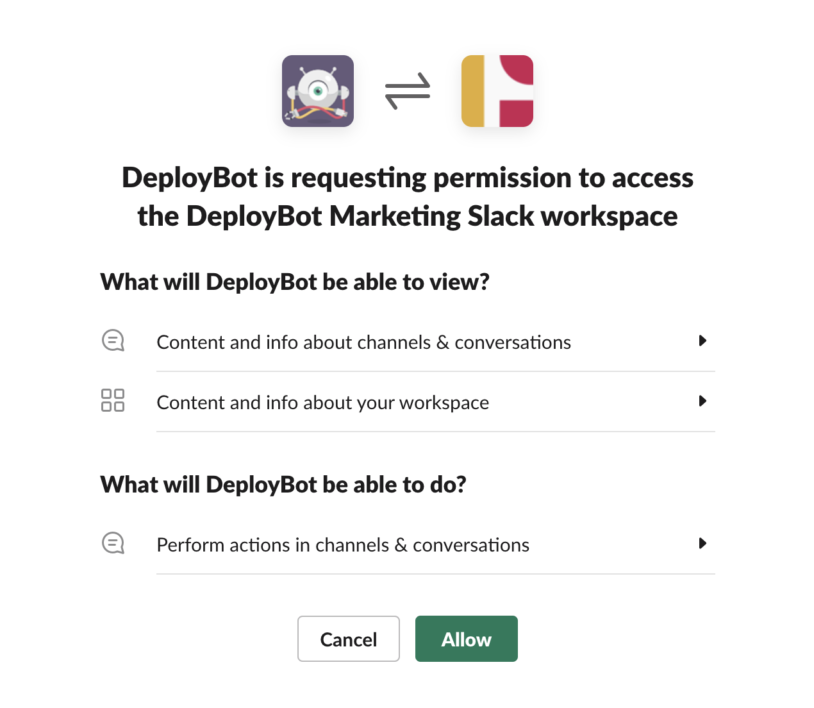
Setting up notifications for Slack is just as easy: open the general DeployBot settings and click Connect next to the Slack icon. DeployBot now reaches out to Slack and requests permission to access your Slack workspace.

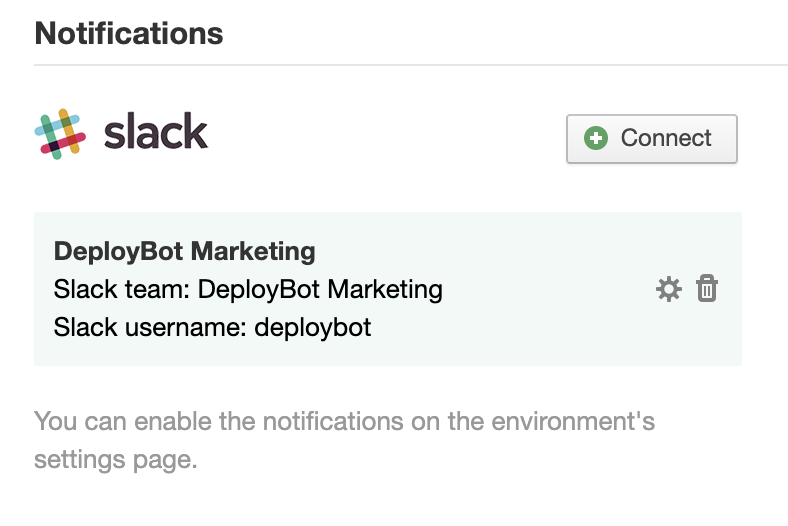
Just follow the instructions and click on Allow once you’ve configured the permissions. You’ll be directed back to the Integrations settings in DeployBot and you should see your newly connected Slack account.

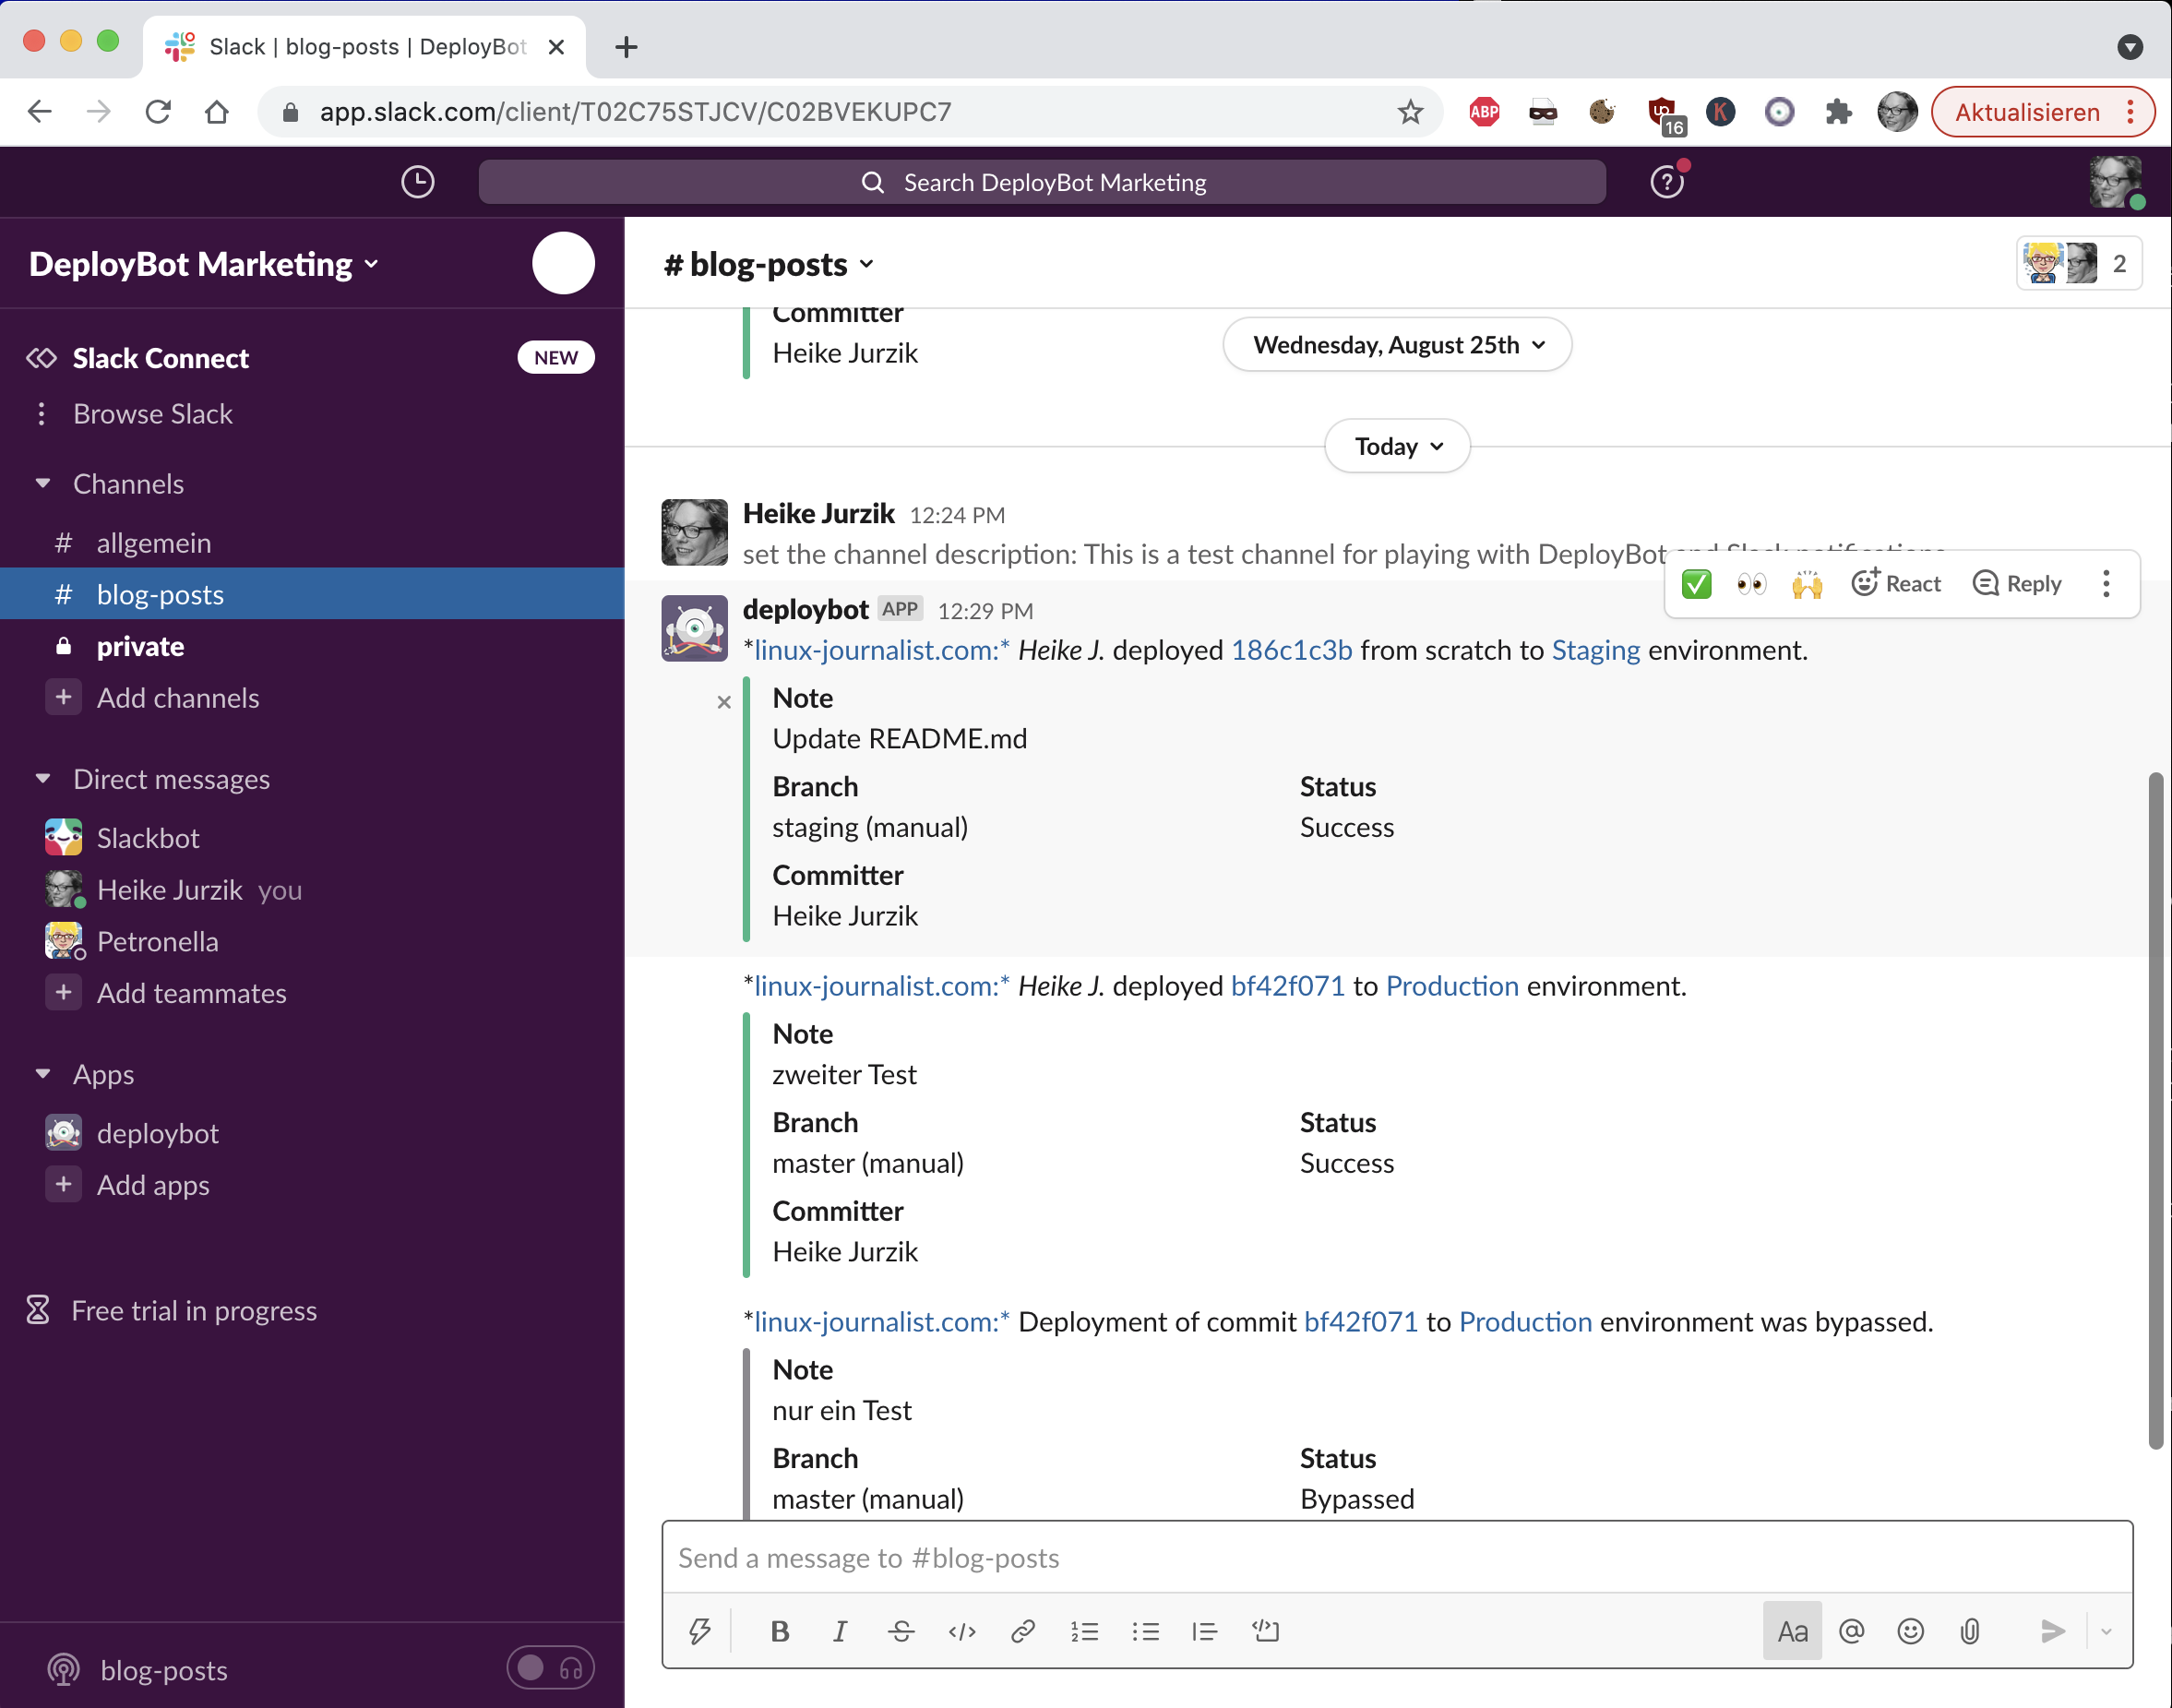
As a last step, configure the triggers for the environments. For each environment, go to the settings and scroll to the Triggers section. Tick the checkbox Notify Slack and choose a channel name from the drop-down menu. That’s it – DeployBot will now send notifications about deployments to the Slack channel. If you use different environments, make sure you add the Slack notification trigger for every environment to see notifications about deployments in your channels.
If you’re interested in triggering deployments from Slack, please read the older blogpost which describes how to set this up.
Tip: Sometimes there is an issue with fetching the list of Slack channels. I’ve spoken to our support team and they recommend renaming the Slack channel to trigger a refresh. Once that was successful, you can reappoint the channel’s original name.

Important Note: Slack has public and private channels. There is no support for private channels in DeployBot, and they don’t appear in the dashboard after connecting the Slack account.
Let others know
DeployBot is here to help you. When it comes to announcements about your deployments, our little bot is more than happy to assist with the communication. As you can see, it’s fast and easy to set up automatic notifications in DeployBot via email or Slack.
Now, customers sometimes ask if there is support for other messengers, like Telegram, for example. Although there is no Telegram integration for DeployBot itself, there are some Slack Apps available which connect Telegram and Slack and forward messages between the two services. Found a solution which works for you? Let us and other readers know in the comments.
Happy hacking!


