New DeployBot Extension for Google Chrome
Almost every developer I know is constantly looking for new tools to organize the daily work routine. There are plenty of programs and apps out there, like calendars, time tracking, communication, productivity, or deployment tools. If you're a DeployBot user, you already know how to organize your workflow. You've connected your Git repositories, you've set up one or more environments, maybe you've configured additional build or test routines – it's all right there.
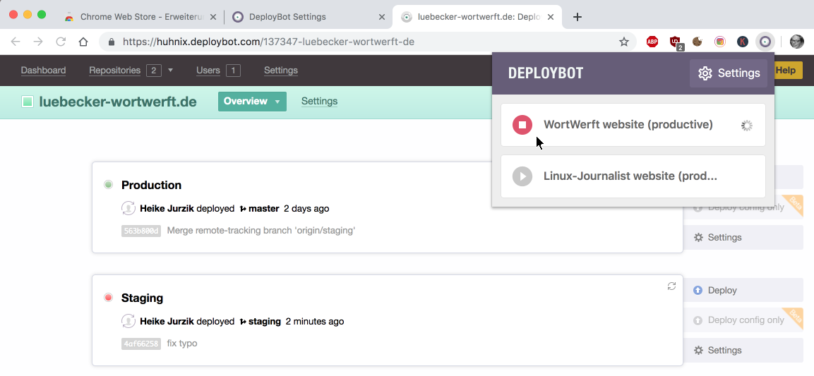
We've now released a new extension for Google Chrome that makes working with your favourite deployment tool even more efficient (when deploying manually, not automatically). Instead of visiting the dashboard, navigating to the right environment, and clicking the Deploy button, you can simply start the deployment from a little drop-down-menu that’s hiding behind the DeployBot icon next to the browser’s address bar.
Install the Extension
Now, if you haven't set up different environments already, you may want to read about the benefits of having testing/staging and production environments. If you're already familiar with this concept, then let's jump right in. Here is how to install and configure the browser extension:
- Open the Chrome Web Store.
- Use the search box to find our new DeployBot extension (or follow this direct link) and click Add.
- Click the new DeployBot icon next to the address bar and choose Settings.
- You can now enter up to 10 environments and set their title.
- Click Save to finish the configuration. You should then see the message Data saved successfully.
DeployBot is here to help you: it comes with a number of integrations for external tools and can quickly deploy your work to different environments. You can find an ever growing collection of beginners’ guides on our website:
Laravel, Digital Ocean, Ruby on Rails, Docker, Craft CMS, Ghost CMS, Google Web Starter Kit, Grunt or Gulp, Slack, Python, Heroku, and many more.
Tip: To find the correct webhooks, open your DeployBot dashboard, choose a repository and then Settings. Open the tab Webhooks & Badges and scroll down. Copy the webhook URL from one of the listed environments.

Ready, Click, Deploy
Since all my staging environments deploy automatically as soon as the connected GitHub repository sees a new commit, I've only added the production environments to the Chrome extension. When I need to (manually) deploy something, I can just click the little DeployBot icon in Chrome and choose the right environment – done. In case something goes wrong, the extension will let you know, so you can go back to the DeployBot dashboard and analyze the problem.

By the way, the new extension does not only work with Google Chrome, but also with the Open Source web browser Chromium. So, give it a try – deploying manually with your favourite deployment tool is now just as fast as the automated deployment.


