5 Git Best Practices for Developers
In the fast-paced world of web development, Git plays a significant role. It not only allows you to keep track of any changes made (making it easy to roll back any issues), but also facilitates collaboration and plays an important part in delivering reliable updates to websites following a CI/CD (Continuous Integration/Continuous Deployment) workCow.
Git is a wonderful tool that offers freedom in how it is used. While I believe this freedom is beneficial, it should be coupled with a set of best practices, particularly when working with a team.
Additionally, there are many features within Git that are not well-known; that’s understandable (mastering Git is rarely a priority for developers), but there is more to Git than just committing, pushing, and pulling.
That’s why, in this post, we’ll explore some of Git’s lesser-known features as we look into five best practices that all developers should follow
I will show you all the commands you can type in the command line, and I will also demonstrate how much simpler these actions can be when using Tower, a Git client available for Mac and Windows.
You can try Tower for free for 30 days (no registration is required). You can also use the code DEPLOYBOT2023 at checkout to receive a 50% discount on your first year.
Let’s dive in!
If you’ve read this far, you’re probably a DeployBot user and familiar with version control systems, CI/CD, and other related topics. If not, we’ve compiled several beginner’s guides: Laravel, Digital Ocean, Ruby on Rails, Docker, Craft CMS, Ghost CMS, Google Web Starter Kit, Grunt or Gulp, Slack, Python, Heroku and many more.
1. Craft Meaningful Commits
To ensure that your commits are easy to understand, it is important to address changes made from a single issue in each commit. If you try to include multiple topics in the same commit, you will make it dificult for your team (and yourself in the future) to figure out what changed.
You probably know that you can stage a single file by typing git add <file>, but did you know that you can select the chunks you would like to add to your next commit? All you have to do is add the -p Cag to the git add command:
$ git add -p <file>
Git will guide us through each and every chunk of changes in the file, and it will prompt us to decide whether to stage them. To stage a change, type “Y” for “Yes,” and to ignore a change, type “N” for “No”.
I find a Git GUI very useful in this process, as it will provide a lot of visual aid to make our life easier.
This is where Tower comes in handy. In the “Working Copy” view, you only need to click a few times to stage chunks or individual lines.
2. Write Descriptive Commit Messages
Writing a good commit message should not be dificult when your changes are related to a single topic. This is one of the advantages of following the recommended best practice above.
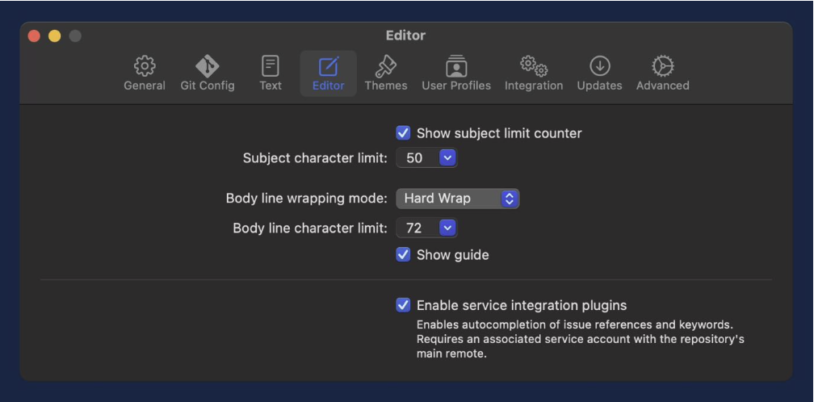
In a commit message, providing context is crucial for understanding the reasons behind each update to the project. Therefore, it is important to make an effort to include any valuable information that can shed more light on the situation, such as an issue number.
In Tower, you can simply type / in the subject or body fields to reference files, commits, and issues.
Many teams also follow a style guide, which can include instructions on character limits, capitalization, and even the inclusion of emojis.
In the body field, a wrapping style is commonly employed to enhance readability, particularly in open-source projects. Git does not automatically wrap text, so you’ll either need to do it manually or use a tool like Tower.

3. Clean Up Your Work With Interactive Rebase
Once you have finished working on a new feature, your commit history may look a bit messy. Before merging everything into the team branch, I suggest taking a moment to review all of your commits.
In this process, here are some questions you may ask yourself:
- Are these changes easily understandable?
- Should these two commits be combined into one?
- Are there any commits that should not be included?
- Should this commit be broken up into smaller, more readable commits?
This is the perfect time to talk about “Interactive Rebase”. This Git feature allows you to manage your commits more efficiently by deleting unwanted ones, reordering them, merging multiple commits into a single one, or dividing a large commit into smaller ones.
In short, Interactive Rebase is the answer for all the questions you may have asked yourself previously. Just make sure you perform these actions prior to pushing to the remote repository.
To open the Interactive Rebase editor in the command line, type git rebase -i HEAD~n (where “n” represents the number of commits you want to go back from the current HEAD). For instance, to modify the last 5 commits, you should use git rebase -i HEAD~5.
Once you execute the command, your default text editor will launch, displaying the list of selected commits. Each commit will have the “pick” keyword prefixed, indicating that the commit will be kept as it is. However, you can alter this keyword to “squash” or “fixup” in order to combine commits, “reword” to modify the commit message, or “edit” to split commits and make modifications.
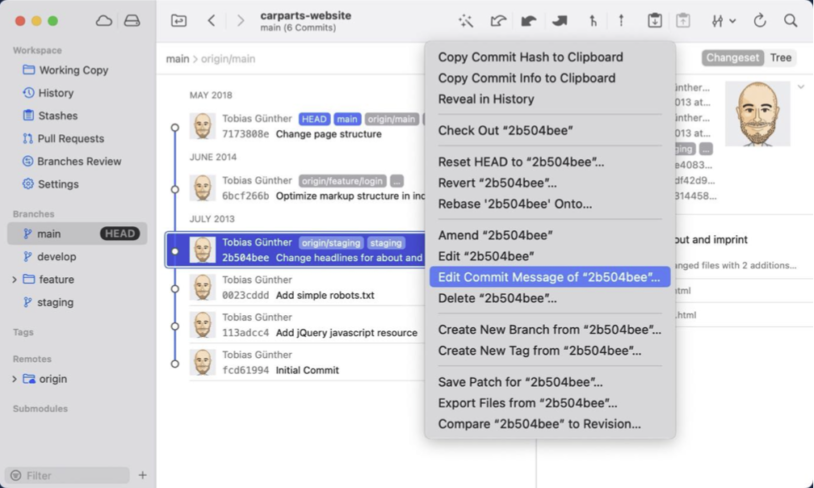
For this task, Tower can be a valuable companion. You can utilize Tower’s drag and drop functionality to rearrange commits or squash them. For editing a commit, you can simply right-click on the commit and select “Edit”.

4. Take Advantage of .gitignore to Exclude Unnecessary Files
The .gitignore file is used to prevent certain files from being tracked by Git. It is named as such because it “ignores” these files.
What should be excluded? As a general rule, it is advisable to exclude most automatically generated files from Git. Build artifacts, log files, temporary files, IDE or platform-specific files, and dependencies are all good candidates. Including these files in your repository can make it cluttered and slow down its performance.
Although it is highly recommended to define the list of ignored files and folders at the start of your project (even before making your first commit), it is important to regularly review and update this file to accommodate any new situations that may arise.
This is something that many teams underestimate — regularly updating the .gitignore file can provide notable long-term advantages, as it promotes consistency among team members and prevents individual developers from having to configure their own local ignore rules.
If needed, Github provides a collection of useful .gitignore templates here.
5. Use LFS to Manage Large Files
Some people use Git as a backup tool, where they store every file associated with their project, including large binary files like videos or audio tracks.
As a result, your repository becomes bloated and cloning takes an excessive amount of time. However, the good news is that there is a solution to this problem: Git LFS.
Git LFS manages large files by creating reference pointers in the repository that link to the actual files stored externally. This approach helps Git handle large files more effectively without directly storing them in the repository.
To utilize this feature, you must download and install the CLI extension on your computer (unless you’re using Tower, which has full LFS support out of the box).
After installation, you need to add it to your repository by entering the command git lfs install. Then, all you have to do is enumerate the files or extensions that LFS should monitor and include the .gitattributes file in Git. This file, created by LFS, is used to track the names and patterns of the designated files.
Here is an example:
$ git lfs install
$ git lfs track "*.mp3"
$ git lfs track "video/*.mov"
$ git lfs track "presentations"
$ git add .gitattributes
Final Words
As developers rely more and more on CI/CD to drive their projects forward, it becomes evident that becoming proficient in Git is increasingly important.
I hope this article has shown you some of the powerful features that Git offers and emphasized the importance of following best practices for fostering a productive (and happy!) collaboration environment.
I would also like to highlight the importance of having a dedicated Git client when working with Git. While all mentioned tasks can be accomplished through the command line, using a dedicated Git client can boost our productivity as developers and offer better visibility during Git operations.


